- Home
- Crochet Stitches
- Jacob's Ladder Crochet Stitch
Jacob's Ladder Stitch: Guide for Beginners
The Jacob's Ladder stitch, aptly named for its resemblance to the biblical ladder ascending to heaven, is a captivating crochet technique that produces a richly textured fabric with an intriguing woven look.
Don't let the intricate appearance fool you, though. While visually impressive, this stitch is surprisingly approachable for crocheters of all skill levels, even adventurous beginners.
What Makes the Jacob's Ladder Crochet Stitch Special
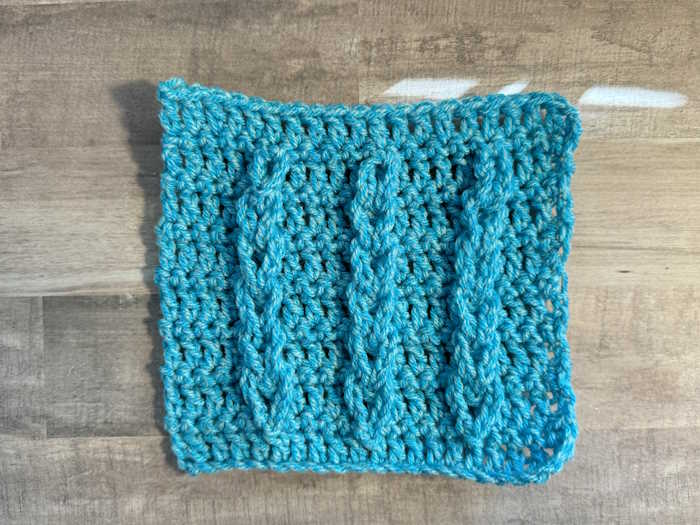
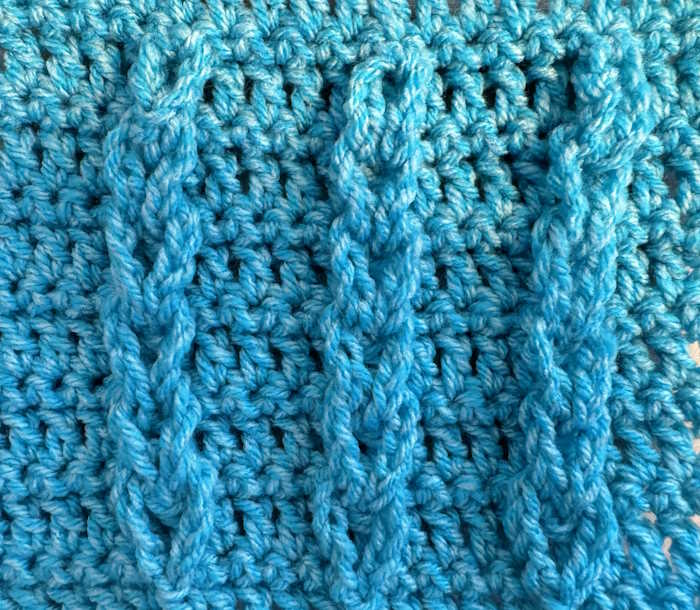
If you look at the completed fabric, you might think the ladder rungs are chains of stitches worked on top of a fabric of double crochet stitches.
This is not what happens.
Instead, the rungs of the ladder are created with chain stitches as part of the base fabric of single and double crochet stitches. This results in a series of loops that can be linked together and secured in the last row of stitches once your fabric piece is complete.
It can work as one color, as my sample shows, or using rows of different colors.
Supplies
- Yarn: Any yarn is fine. You may choose a solid color, several colors or a varigated yarn. For the swatch shown on this page, I used Hobby Lobby’s I Love this Yarn in colorways, “spunky.”
- Crochet Hook: Select a hook size recommended for your chosen yarn. Adjust the hook size to achieve a tighter or looser fabric as desired. (For this tutorial, I used an H/5.0 mm hook)
- Scissors
- Yarn needle for weaving in ends.
- Stitch Markers (optional)
- Patience: Like any new stitch, the Jacob's Ladder stitch requires a bit of practice to master. Don't be discouraged if it takes a few tries to get the hang of it. Once you get it, you’ll wonder why you ever thought it might be difficult.
Abbreviations
Sc – single crochet
Dc – double croche
Ch – chain
St/sts. Stitch/stitches
* * Repeat the instructions between the two asterisks the number of times indicated by the instructions.
Sl st – slip stitch
Skills Needed
Notes
- These instructions are written in US terms.
- The ch-3 at the beginning of the row counts as one double crochet.
- This pattern is worked on a multiple of five plus two.
- Jacob’s Ladder stitch is a two-row repeat.
- It is not reversible (the right side shows the ladders, and the wrong side appears as double and single crochet stitches.
Step-by-Step Tutorial
Foundation Chain (Multiple of 5 + 2)
Make a slip knot and chain a multiple of 5 + 2. My swatch is worked on 22 chain stitches.
Row 1: (RS) Dc in 4th ch from hook and next 4 chs. *Ch 10, sl st into top of last dc made. Dc in next 5 chs. Repeat from * across. Turn.
Row 2: (WS) Ch 1, sc in the same stitch as ch 1 and each stitch across, pushing the ch-10 loops to the other side of the fabric. Turn. (You should have five sc sts between each ch-10 loop)
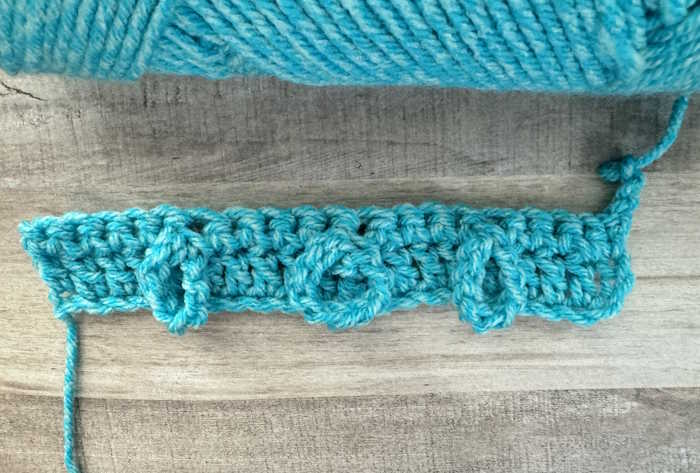
Row 3: Ch 3. Dc in same st as ch 2 and next 4 chs. *Ch 10, sl st into top of last dc made. Dc in next 5. Repeat from * across. Turn.
Repeat rows 2 & 3 ending on a row 2.
Making the Slip Stitches after each chain 10
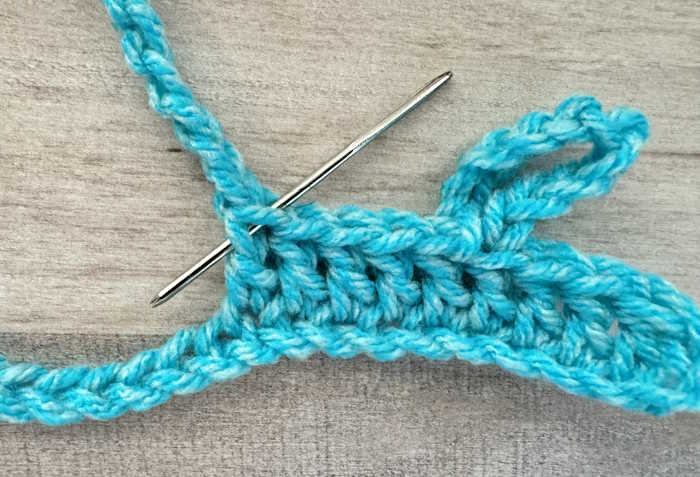
This part was a bit confusing for me at first. This is how I do it.
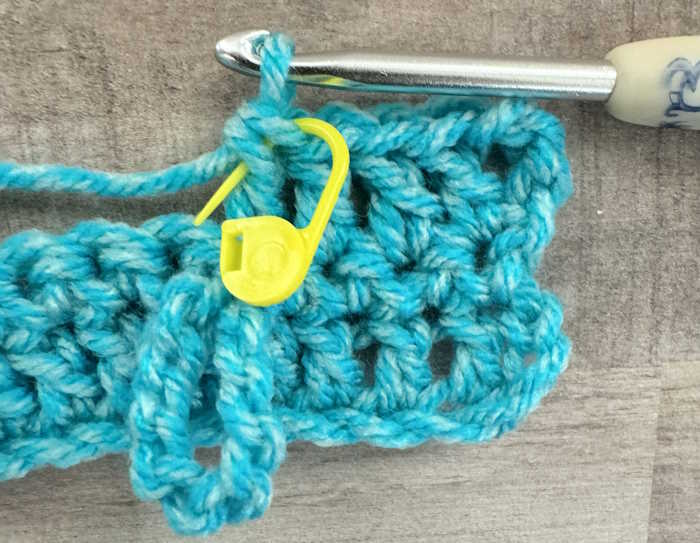
After making the ch-10 loop, with one loop on the hook, insert the front loop of the last double crochet stitch just created, then through the top vertical loop of that same stitch.
Yarn over and pull through all three loops. I’ve inserted a stitch marker through the two loops you will go under when making that slip stitch.
Finishing
After reaching your desired length, work one last row of double crochet stitches without chaining the loops.
It’s time to connect the ladder's rungs.
The final row will be a single crochet stitch used to anchor the loops. To do this, first connect the loops:
Using your fingers or hook, begin at the base of the fabric and connect loops as if you were making a chain stitch. Do this for each row of loops you have. Leave the loops at the top of the fabric.
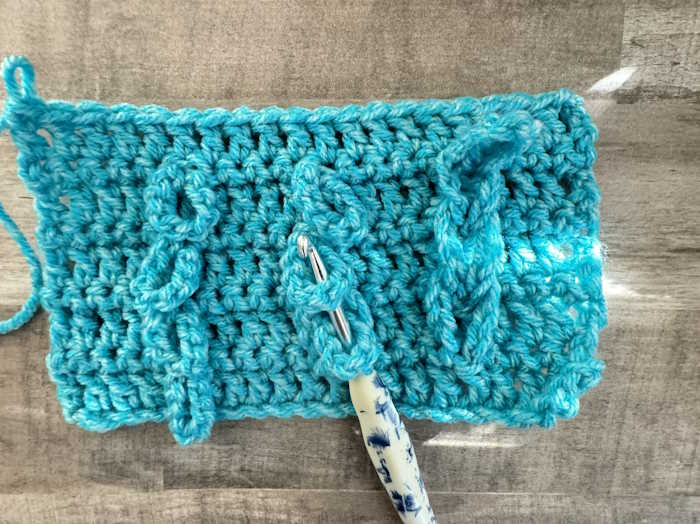
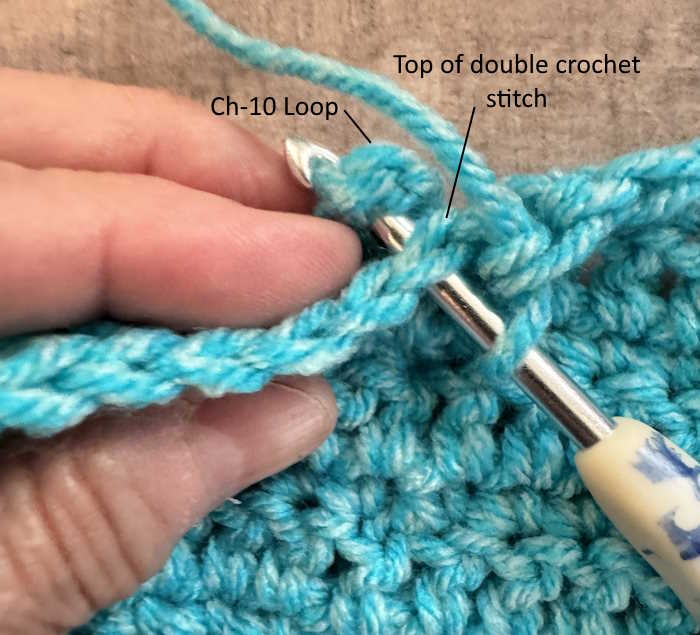
Last row: Ch 1. Work single crochet stitches across the row, picking up the top loop as you reach it, working inside the loop. This will lock the ladder in place.
Fasten off and weave in any loose ends.
Tips
Tension: Maintaining consistent tension throughout the pattern is crucial for achieving the desired ladder effect.
Counting: Count your stitches after each row to ensure that there are five double crochet stitches between loops and an equal number of single crochet stitches.
Last Words
With its captivating texture and straightforward technique, the Jacob's Ladder stitch is rewarding to master. Even though it looks very complicated, it is achieved with single and double crochet stitches, chains, and slip stitches. If you can work these stitches, you can make the Jacob’s Ladder Crochet Stitch Pattern.
Happy Crocheting,
Janice
