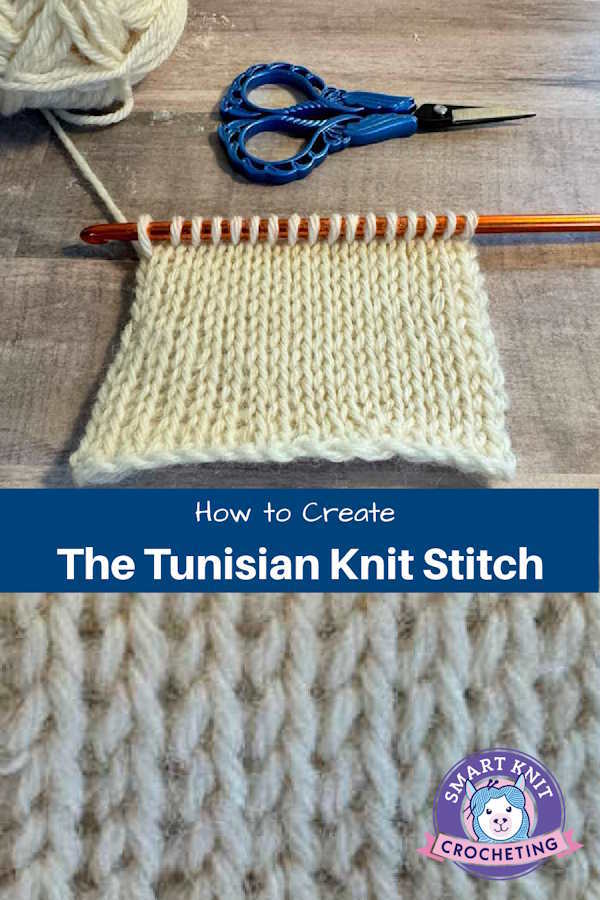
Tunisian Crochet Knit Stitch: A Step-by-Step Guide for Beginners
Tunisian Crochet Knit Stitch: By Janice Jones
The Tunisian knit stitch (abbreviated Tks) is a wonderfully versatile stitch that creates a fabric that mimics the look of a knitted stockinette stitch. This comprehensive guide will equip you with everything you need to know to crochet the Tunisian knit stitch confidently, even as a beginner.
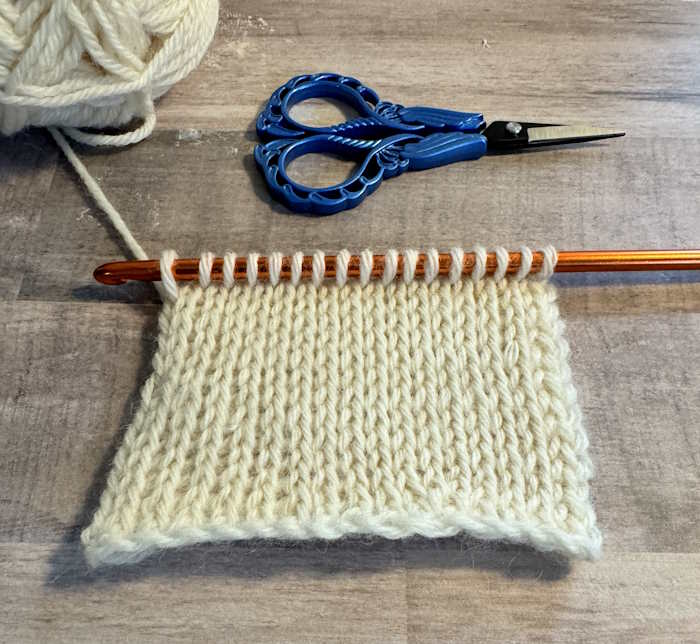
When I first started crocheting, Tunisian Crochet seemed extremely foreign and challenging.
Was I ever wrong?
Tunisian crochet may be a little easier for knitters because they are accustomed to having many stitches on their needles. It is, however, clearly crocheted because it works with a crochet hook.
History of Tunisian Crochet
Please skip over this part and go directly to the instructions if history is not your thing. For those interested in history, Tunisian crochet does not seem to have a clear history. The exact origins of Tunisian crochet, also known as Afghan crochet, are a bit murky and debated. There's no definitive historical record pinpointing the inventor or the period in which it emerged. However, here's what we can piece together:
Early 1800s
1800s: Some historians believe Tunisian crochet might have roots in ancient Andean cultures or even Coptic knitting from Egypt. However, concrete evidence is lacking.
Early 19th Century (Europe): The earliest documented mentions of a similar technique appear in Europe during this time. It was called "tricot crochet," meaning "knitted crochet" in French.
In the mid-1800s (England), a stitch called "Shepherd's Knitting" emerged. It resembled Tunisian crochet and further solidified its potential European development.
Late 1800s—Early 1900s
:The craft grew popular in the Western world, particularly in the United States. This period is often linked to the misnomer "Afghan stitch." Shawls and blankets resembling those from Afghanistan were believed to have been made using this technique, leading to the name.
World Wars
Tunisian crochet experienced a decline in popularity between the World Wars, possibly due to yarn shortages and a focus on more practical crafts.
Modern Day
Mid-20th Century Onward: Tunisian crochet saw a resurgence, reclaiming its original name and garnering renewed interest.
Present Day: It continues to be a beloved craft, appreciated for its unique look, versatility, and ability to create traditional and modern designs.
Creating the Tunisian Crochet Knit Stitch
What You'll Need:
Yarn:
You can use any weight yarn for this stitch, but beginners may find the worsted weight (#4) easiest to work with. I don’t have a preference for the type of fiber, but the swatch I worked on for this tutorial was made with 100% acrylic yarn, which made it very thick and not quite as easy to block. If you have 100% wool in your stash, I recommend using it for this practice.
Tunisian crochet hook:
Choose a hook size appropriate for your yarn. Tunisian crochet hooks are longer than regular ones and often have a cap on the end to prevent stitches from slipping off. They also come with cables for use in larger projects. I am using a 5.5 mm Tunisian Hook with my CYC #4 Worsted Weight Yarn for this tutorial
Scissors: These are used to cut yarn at the end of your project.
Tapestry Hook for weaving in ends.
Understanding the Tunisian Knit Stitch
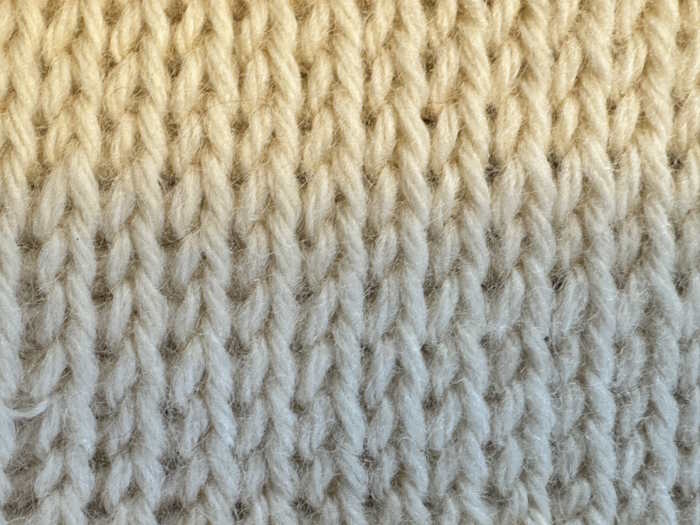
Unlike traditional crochet, which works in rows, Tunisian crochet is worked in a forward (picking up loops onto the hook) and return pass (working off loops so that you end up with one loop left on the hook).
The Tunisian knit stitch looks very similar to the traditional stockinette stitch. Here are two swatches, one knit with the stockinette stitch and one crocheted with the Tunisian Knit Stitch. You can see the similarity.
Is the Tunisian Knit Stitch Reversible?
No. Similar to the traditional knit stockinette stitch, the reverse side of the Tunisian knit stitch looks like the reverse stockinette stitch.
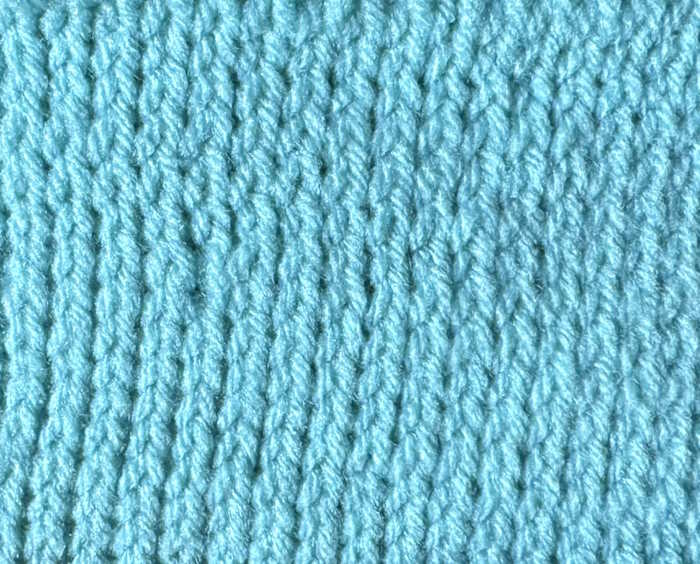 The Tunisian Crochet Knit Stitch: Right Side
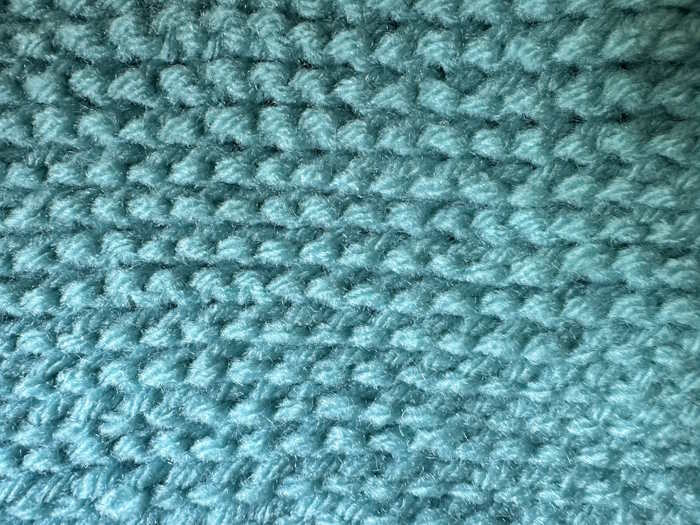 The Tunisian Crochet Knit Stitch: Wrong Side
Basic Crochet Terms to Know
Yarn over (YO): Bring the yarn from the right side of the hook up and over the hook.
Pull Through: With the loop on your hook, pull it through the stitch you are working on.
Step-by-Step Instructions for Making the Tunisian Crochet Knit Stitch
Foundation and Set-up Rows
1. Foundation Row:
Make a slip knot and chain your project's desired number of chains. This will determine the width of your work. For this swatch, I created 20 chains.
2. Forward Pass Set up Row:
You may work into the back bump of the chain or the top loop. It is up to you.
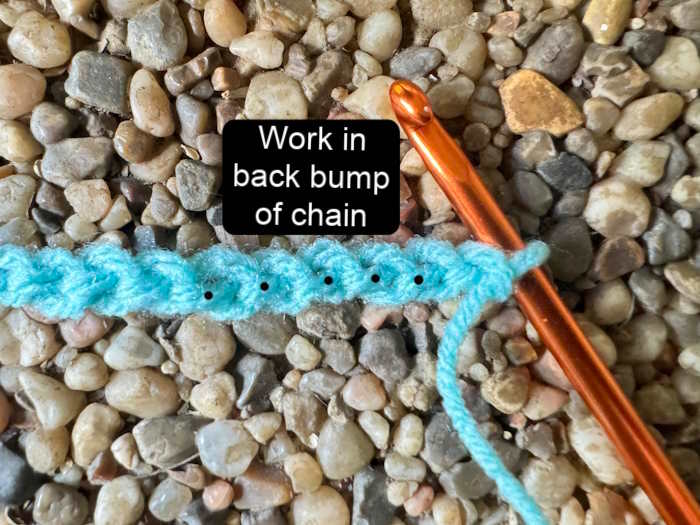
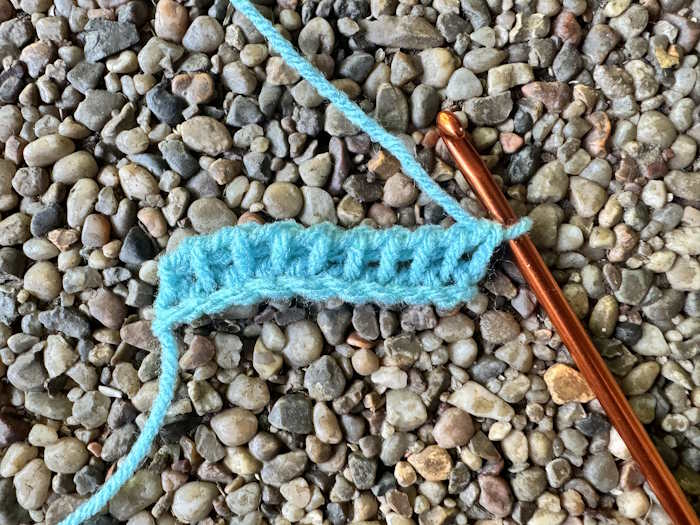
Insert your hook into the second chain from the hook, yarn over, and pull up a loop. (Do not work into the first chain.) You will now have two loops on your hook. *Repeat this step across the entire chain.* You will have the same loops on your hook as chains in your foundation row.
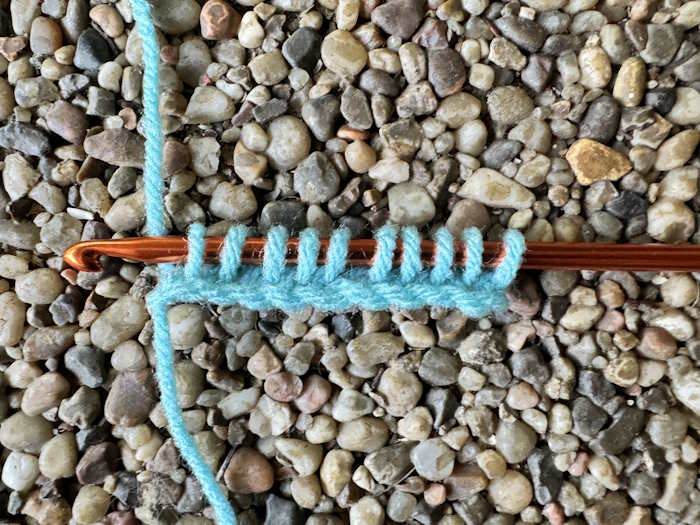
3. Return Pass of the Set-Up Row:
Yarn over and pull through one loop on your hook. *Yarn over and pull through two loops*. Repeat this step across the entire row until only one loop remains on your hook. This single loop is your turning chain.
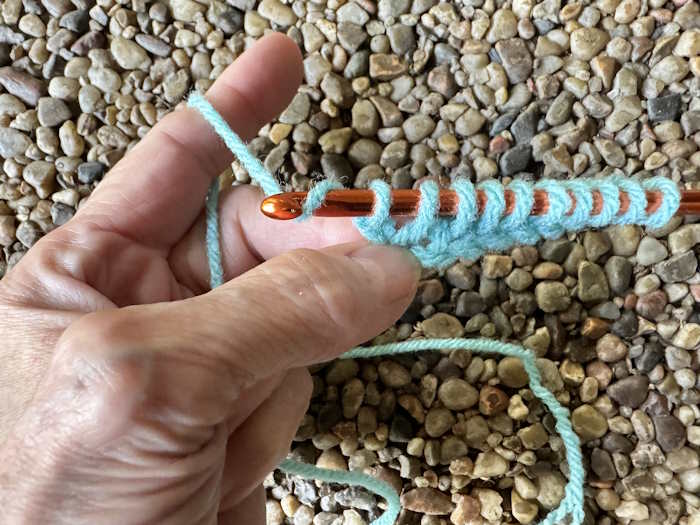
Subsequent Rows
Forward Pass:
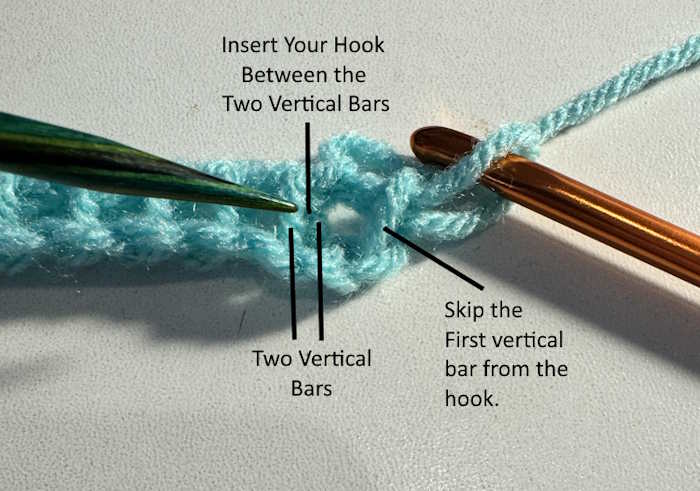
Skip the first vertical bar closest to the hook (created by the return pass of the previous row).
Identify the two vertical bars of the next stitch.
Insert your hook between these two bars from front to back and pull up a loop. Leave the loop on the hook.
Repeat across the row to the last stitch.
For the last stitch of every forward pass, insert your hook under the two loops that form the edge stitch, yarn over, and pull up a loop.
Return Pass
Yarn over and pull through one loop on the hook.
Yarn over and pull through the next two loops on the hook.
Repeat this step until one loop remains on your hook.
Continue repeating the forward and return pass until you reach your desired length.
Binding Off:
Work the forward pass as you usually would.
On the final return pass, work two loops together as usual. Then, yarn over and pull through both loops on the hook, creating a neat and sturdy edge.
Here are some tips for success
- Curling: All Tunisian crochet stitches curl but there are a couple of things you can do. Choose a hook one or more sizes larger than you would for your yarn. Work the forward pass loser than normal, and block your swatch afterwards.
- Counting Stitches: Pay close attention to your stitch count, especially at the beginning and end of rows.
- Practice: Mastering the Tunisian knit stitch takes practice, like any new skill. Don't be discouraged if your first attempts aren't perfect.
- Experiment: Once you feel comfortable with the basic stitch, experiment with different yarn weights and colors to create unique projects.
- Finding the Right Hook: Consider going up one size hook if the fabric gets too thick and tight for your project.
Projects for Beginners
Scarves and Cowls: The Tunisian knit stitch creates warm, cozy scarves and cowls.
Dishcloths and Washcloths: The dense fabric of the Tunisian knit stitch
is perfect for practical projects.
Blankets and Afghans: With patience and persistence, the Tunisian knit stitch can be used to create beautiful and intricate blankets.
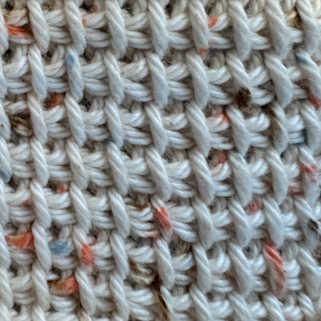
Learn How to Make the Tunisian Simple Stitch
Last Words about the Tunisian Crochet Knit Stitch
Despite our understanding of its historical trajectory, many questions about Tunisian crochet's origins remain unanswered. Was it genuinely invented in Europe, or did similar techniques exist elsewhere first? Further research and archaeological discoveries might shed more light on this intriguing craft's past.
Learning the Tunisian knit stitch is rewarding and opens up creative possibilities. With this step-by-step guide and a little practice, you'll create stunning Tunisian crochet projects in no time!
Tunisian Crochet Knit Stitch: Pin Now, Crochet Later
About Janice
Hi, I’m Janice, the voice behind Smart-Knit-Crocheting. I love to knit and crochet and even more, I love teaching others what I know.
Though I learned to knit and crochet as a child, I didn’t get serious about these amazing hobbies until I retired. I’m a certified knit and crochet instructor through the Craft Yarn Council and am working on becoming a Master Hand Knitter through The Knitting Guild Association.
I’m currently living with my husband of over 50 years and our 6 Shih Tzu dogs.
I love hearing from you, so please drop me a line and let me know what you’re working on, whether you love knitting or crocheting more, and if you have any questions. Please visit my about me page for more information.
Happy Crocheting
