- Home
- Reversible Knit Stitch Patterns
- Twisted Moss Knit Stitch
Twisted Moss Knit Stitch Tutorial for Beginners
If you love the Moss or Double Moss stitches, you will love the Twisted Moss knit stitch. It’s not only lovely, but it creates a highly textured fabric that is thick and squishy.
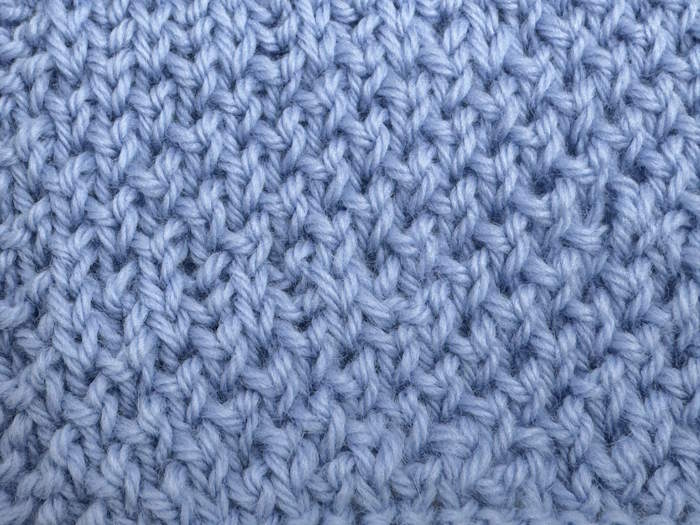
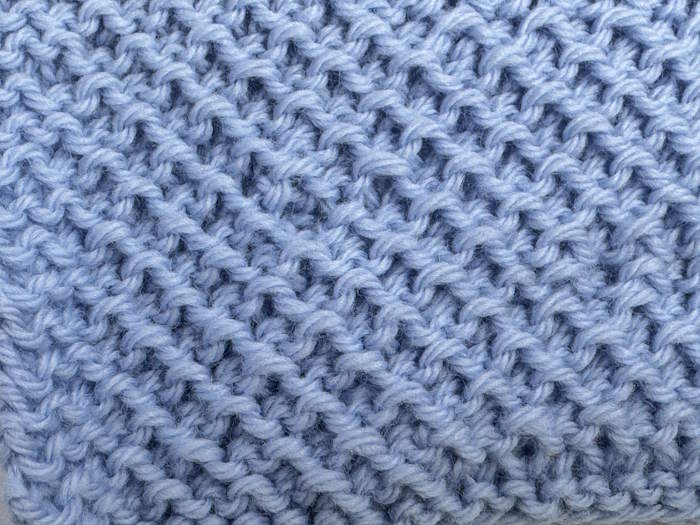
This stitch is reversible, though the "front" and "back" have slightly different appearances. I’ve included photos of each below so you can see the difference.
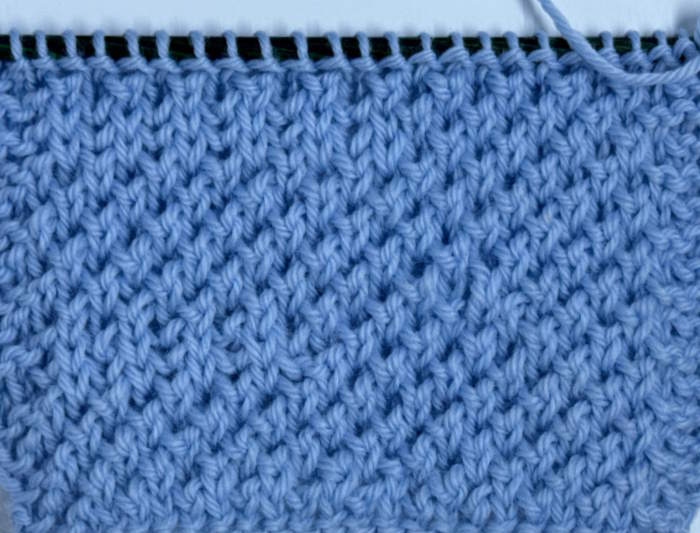 Twisted Moss Knit Stitch
Because it is beautiful on both sides, it makes an excellent choice for scarves, blankets, hats, and other projects where a textured, visually interesting fabric is desired.
It's also a great stitch for beginners wanting to move beyond basic knit and purl. There is a subtle difference between the standard and the twisted moss stitch. I will explain in just a moment.
Difference between the Moss, Double Moss, and Twisted Moss Stitches
Standard Moss Stitch
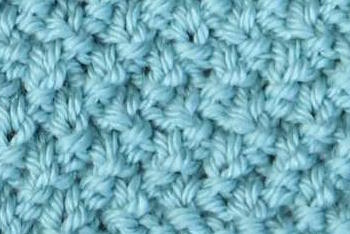 Moss Stitch
The Moss Stitch relies on simple Knit and Purl stitches.
The Moss Stitch is worked on a multiple of 2 + 1 stitches and is a 4-row repeat.
Row 1: *K1, P1, repeat from * across the row.
Row 2: *P1, K1, repeat from * across the row.
Row 3: Repeat row 2.
Row 4: Repeat row 1.
Discover how to make the Moss Stitch.
The double moss stitch is slightly different.
Double Moss Stitch
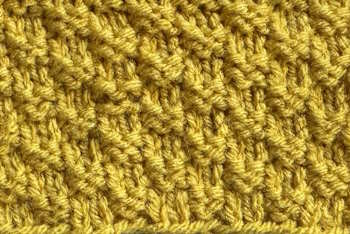 Double Moss Stitch
This pattern is worked on a stitch pattern of Multiples of 4, + 2
Row 1 (Right Side): * K2, P2 *, K2
Row 2 (Wrong Side): P2, * K2, P2 *
Row 3: * P2, K2 *, P2
Row 4: K2, * P2, K2 *
Here is the double moss stitch tutorial.
Here is how the Twisted Moss Knit Stitch works:
Twisted Moss Knit Stitch
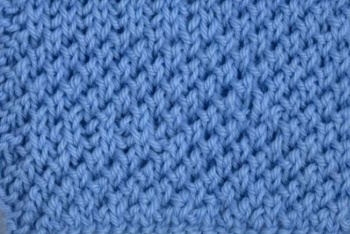 Twisted Moss Knit Tutorial
The Twisted Moss Stitch replaces the purl stitches with K1B stitches. That’s It.
Row 1 (RS): K1, *K1B, K1; repeat from * across.
Row 2 (WS): K
Row 3: K1B, *K1, K1B, repeat from *
Row 4: K
Skill Level
Skill Level: Easy
Notes
- I am using U.S. terms for this tutorial.
- The combination of knits and purls creates a tight fabric.
- The twisted stitches add a subtle but noticeable texture.
- Both sides offer an interesting but different appearance.
- The dense nature of the stitch makes it less drapey.
- It is worked on a multiple of 2 + 1 stitch and a four-row repeat.
Materials
- Yarn: Any yarn weight will work, but medium weight (worsted) is recommended for beginners. For the swatch, I used acrylic, worsted-weight yarn, and a US number 8 (5.0 mm)
- Needles: Choose a size appropriate for your yarn (check the yarn label for recommendations).
- Scissors
- Yarn needle (for weaving in ends)
Skills Needed
Cast on stitches (Long-tail Cast On)
How to block knitting projects
Abbreviations
K: Knit
P: Purl
K1B: Knit one below
* * Repeat the instructions between the two asterisks the number of times indicated by the pattern
Is This Stitch Pattern Reversible
I think you could call this reversible, even though the front and back of the fabric looks different. Both sides are attractive.
 Right Side
 Wrong Side
Step-by-Step Instructions
Multiple of 2 + 1 stitches
Cast on an odd number of stitches. This is important for the Moss stitch pattern to work correctly. I cast-on 21 stitches.
Row 1 (RS): K1, *K1B, K1; repeat from * across row.
Row 2 (WS): K
Row 3: K1B, *K1, K1B, repeat from * across the row.
Row 4: K
Repeat rows one to four until you reach your preferred length. Bind off after the fourth row. Weave in ends and block.
What is K1B and How It's Made
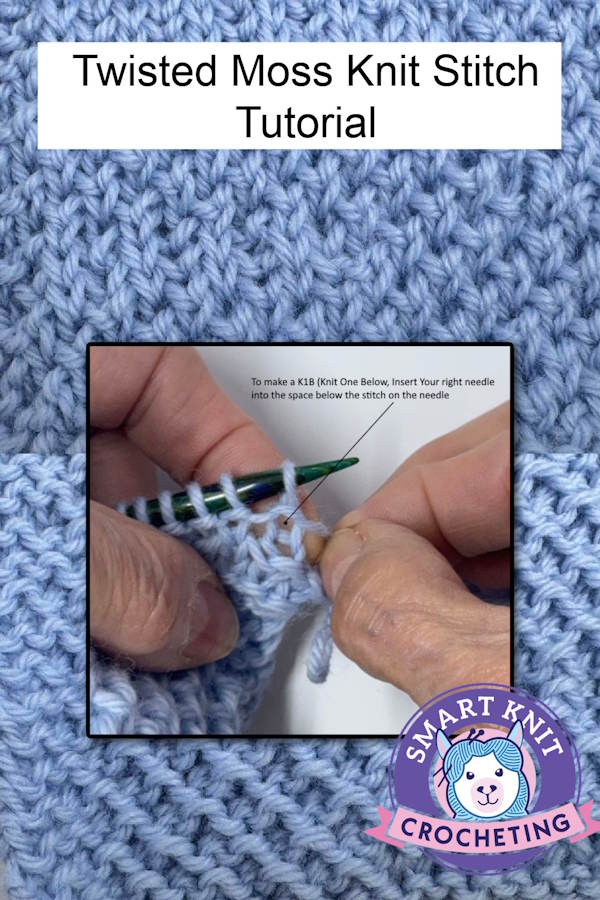
K1B stands for Knit one stitch into the stitch below the stitches on the needle.
To make the K1B, knit to the stitch where you want to make the K1B.
Rather than work into the stitch on the needle, go down one row and locate the stitch below the one on the needle.
Insert the right needle into the little hole created in the stitch below the one on the needle and knit it as if you were knitting a stitch on the needle.
1. Knit One Below: Locate Where You Will Place the K1B
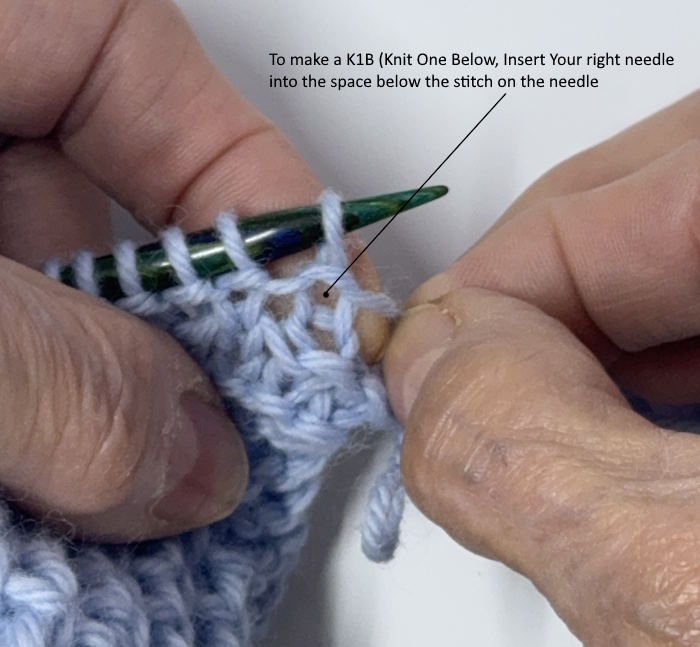
Rather than work into the stitch on the needle, go down one row and locate the stitch below the one on the needle.
2. Insert Right Needle into the Space Below the Stitch on the Needle
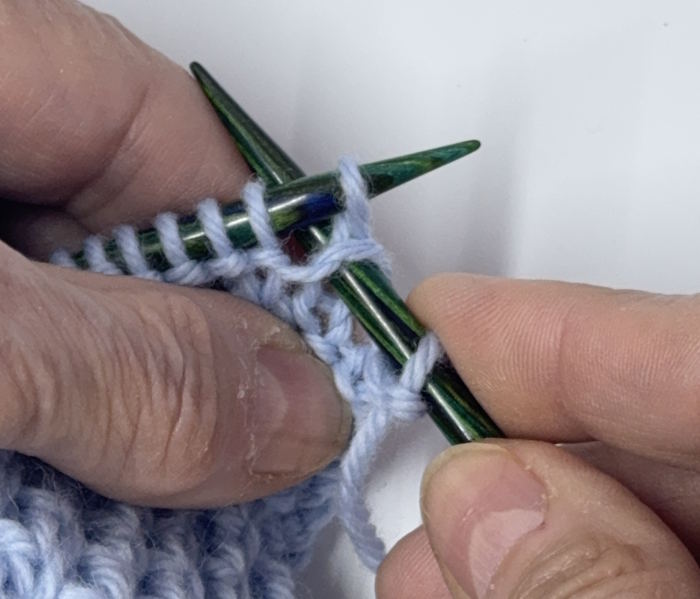
Insert the right needle into the little hole created in the stitch below the one on the needle and knit it as if you were knitting a stitch on the needle.
3. Wrap Yarn around the needle just like you would normally do.
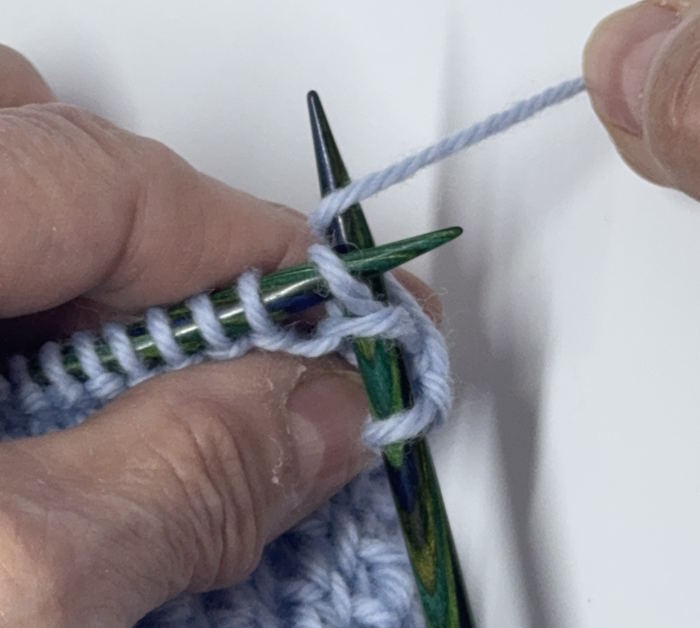
Wrap the yarn around the needle in the normal way.
4. Pull Through. The Stitch is now on the right needle.
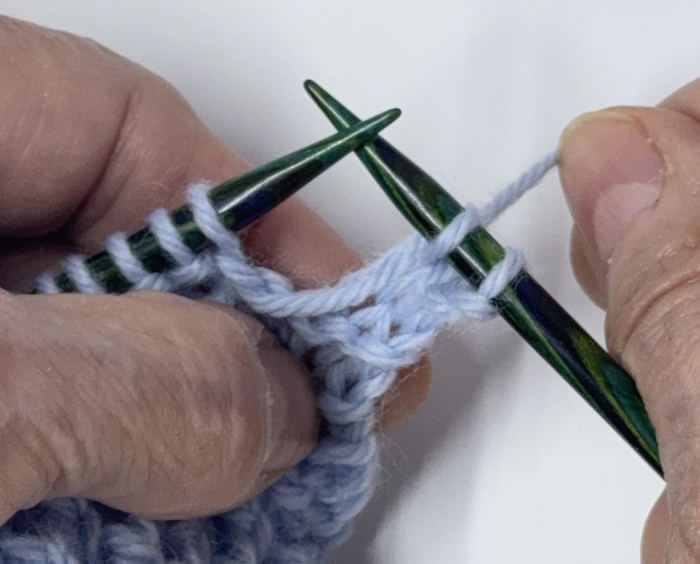
Now, pull through as if you were making a normal knit stitch. That's it! You just made a K1B!
Projects That Work Well With This Stitch
This stitch is great for a wide variety of projects, especially those where the right and wrong side of the fabric will show.
- Blankets
- Scarves
- Shawls and Wraps
- Cowls
- Hats
- Pillow covers
- Washcloths
- Wearables
Tips for Success
- Maintain an even tension throughout your work to ensure a consistent fabric. Don't pull the yarn too tight. If you want a more open fabric, consider going up one or more knitting needle sizes.
- Pay attention to your stitch count, especially at the end of each row. This stitch pattern is straightforward, but adding or deleting a stitch is always possible if you aren’t concentrating. Keeping the pattern consistent with an odd number of stitches is crucial.
- Knitting a small swatch like the one provided in this tutorial is always a good idea. This allows you to practice the stitch, get a feel for the fabric, and check your gauge before starting your project.
- Once your project is finished, blocking can help even out the stitches and enhance the overall appearance of the fabric. It does tend to curl somewhat.
Conclusion
The Twisted Moss stitch is rewarding and versatile, offering a beautiful textured fabric. It is similar to the standard moss stitch but with a small change, an entirely different textured pattern.
It requires an understanding of knitting into the stitches below the ones on the needle. This may seem intimidating, but it really isn’t. With a bit of practice, you can master this technique and then go on to make an interesting project.
