The Purl Stitch: Beginner Tutorial
How to Purl Stitch (Step-by-Step for Beginners)
by Janice Jones, Last updated December 2025
The purl stitch is one of the two foundational stitches in knitting, along with the knit stitch. Once you learn how to purl, you unlock the ability to create textures like stockinette, ribbing, seed stitch, and hundreds of beginner-friendly patterns.
I’m a certified knitting instructor, and this is the same method I teach absolute beginners. If purling feels awkward at first, you are not alone — that’s completely normal. With a little practice, the motion becomes natural.
How to Purl Stitch (Quick Steps)
If you want the short answer, here it is:
- Hold the working yarn in front of your needles
- Insert the right needle from back to front into the next stitch
- Wrap the yarn counterclockwise around the right needle
- Pull the new loop through and slip the old stitch off
That’s one completed purl stitch. Below, I’ll walk you through this step-by-step with photos for both English and Continental knitting styles.
What Does the Purl Stitch Look Like?
The purl stitch creates a bumpy texture on the front of the fabric. When worked across every row, it forms what is commonly called reverse stockinette stitch.
If this texture looks familiar, it’s because the purl stitch is the reverse side of the knit stitch. In fact, every knit stitch has a purl stitch hiding on the back — they are mirror images of each other.
Tip for beginners: If purling feels harder than knitting, try the English method first. Many beginners find it easier to control tension when the yarn is held in the right hand, myself included.
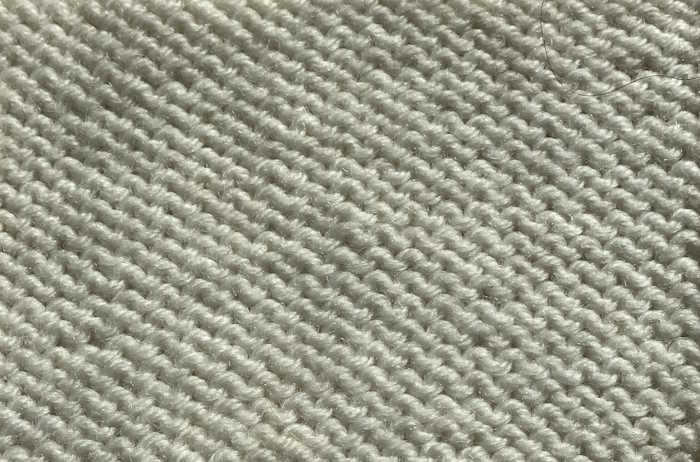 Purl Stitch (aka Reverse Stockinette Stitch)
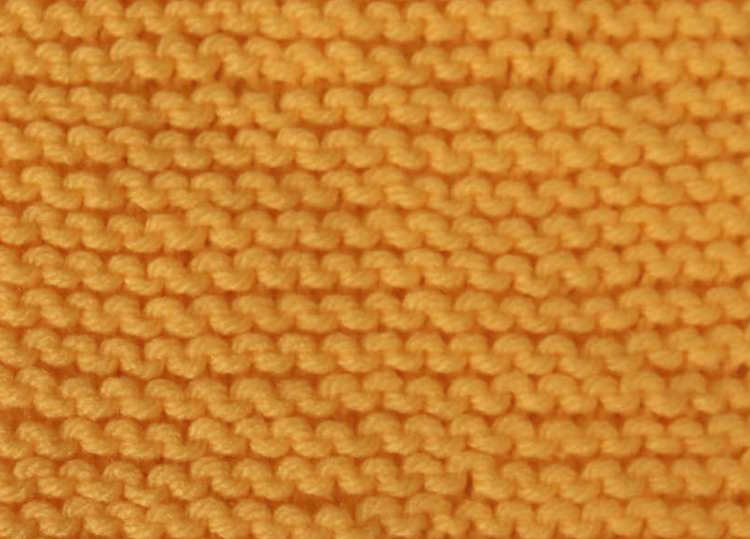 Garter Stitch
The first thing you will notice in the photo above is that the purl stitch looks very similar to the knit stitch or garter stitch (created with only knit stitches). But it is different. Often you will see the term, reverse stockinette to describe what the purl stitch looks like.
Purl stitches are generally used with knit stitches to create interesting textures such as stockinette stitch, seed stitch, and rib stitches.
Knitting the Purl Stitch English Vs. Continental Methods
Learning to knit requires practice and time. It takes time to develop that muscle memory to knit without thinking about every step. Think about a skill that you do today without even thinking about it - typing on a keyboard or riding a bike. Both skills were probably hard when you first tried them, but now, you can accomplish them without even thinking. Knitting is no different. It is called muscle memory.
Most western knitters hold their yarn in either their right or left hands. Either way is perfectly fine, but when you are just beginning, you will need to try both methods to see which one feels more comfortable to you.
How to Purl if You are a Continental Knitter
If you like to hold your yarn in the left hand, you are a continental knitter. Many crocheters trying knitting for the first time will use this method because they hold the yarn in their left hand when crocheting.
Many people believe that this method allows you to knit faster. Many people also think that purling or making purl stitches is more difficult with this method. You be the judge for yourself.
- May be more comfortable for crocheters
- May be faster
- Easier on the wrists
- Purling may be more difficult for continental knitters
- Some knitters find this style to be more relaxing, but the same can also be said for English Knitters.
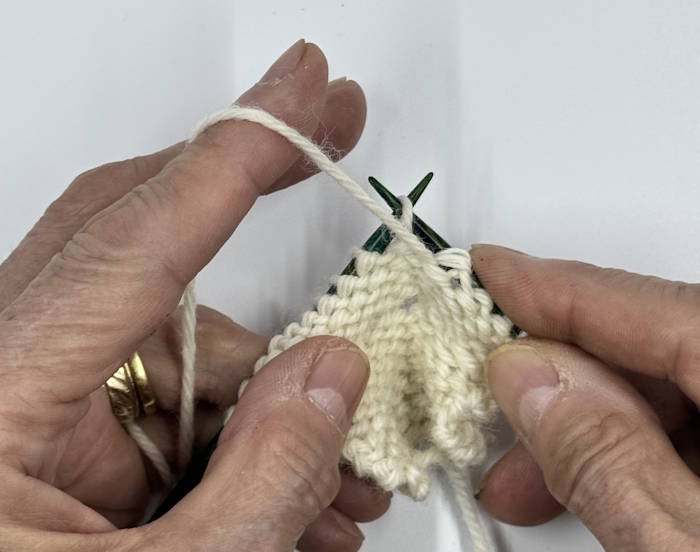 Continental Knitters hold the yarn in the left needle.
Purling Techniques for English Knitters
Knitters that hold the working yarn in their right hand are known as English knitters. Some knitters will learn to knit using the English method and then switch to the continental.
There is a benefit for being able to do both, especially as you progress through your knitting adventure. Some colorwork knit techniques such as stranded knitting can be done proficiently using both methods, by holding one color of yarn in each hand.
- May be more comfortable for beginners
- Some say that tension can be controled better using this method
- Experienced English knitters may advance to a method called flicking which can be very fast.
- May cause wrist pain for some
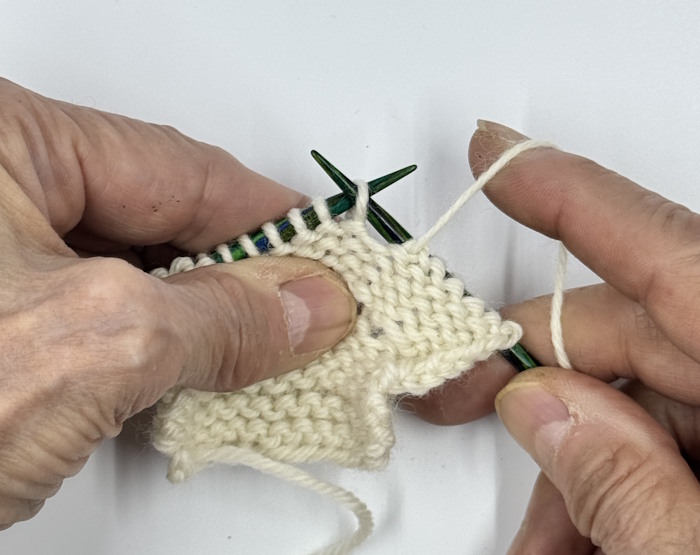
How to Make the Purl Stitch: English Style
The following photos show how to make the purl stitch using the English method (also known as throwing or holding the yarn in your right hand.
1. Hold Your Working Yarn in Front of the Work
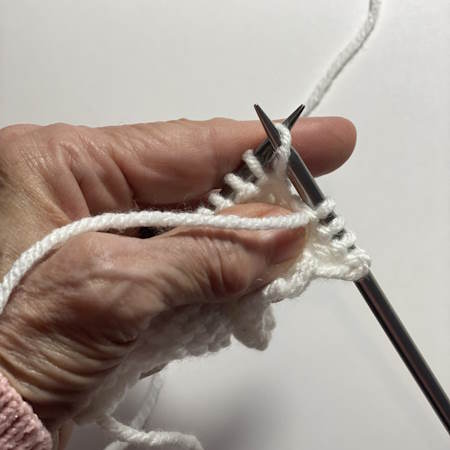 With your working yarn held in front of the needle, insert the tip of the right needle into the next stitch from back to front and right to left. It will look like the two needles have formed an x or a T.
2. Wrap the Yarn Around the Right Needle
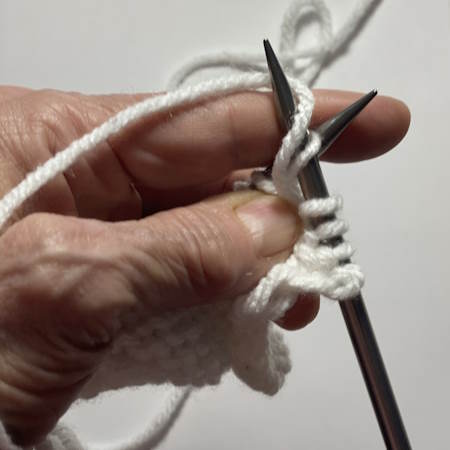 Wrap the working yarn from behind and around the right needle in a counterclockwise motion as shown in the photo. Keep some tension on the yarn.
3. Tug the Yarn Downward
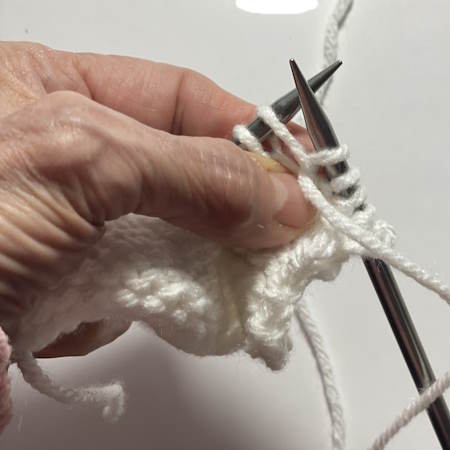 With a little tension on the wrap of yarn, bring the tip of the right needle with the wrap of yarn down and through the loop on the left needle to the back side of the left needle.
4. Push the old Stitch Off the Left Needle
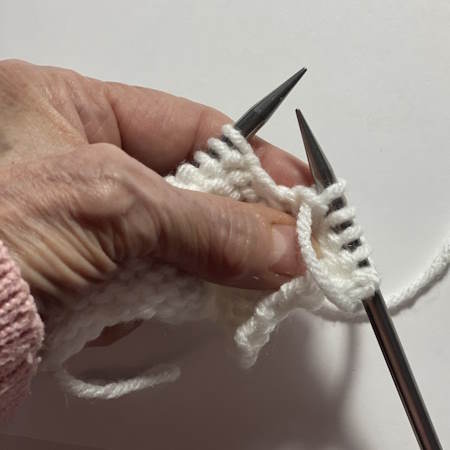 Slip the old stitch off the needle. One purl stitch is completed. Repeat this procedure across the row or for the number of purl stitches required on your pattern.
The Purl Stitch Using the Continental Style
Step One: Inserting the Needle into the Stitch
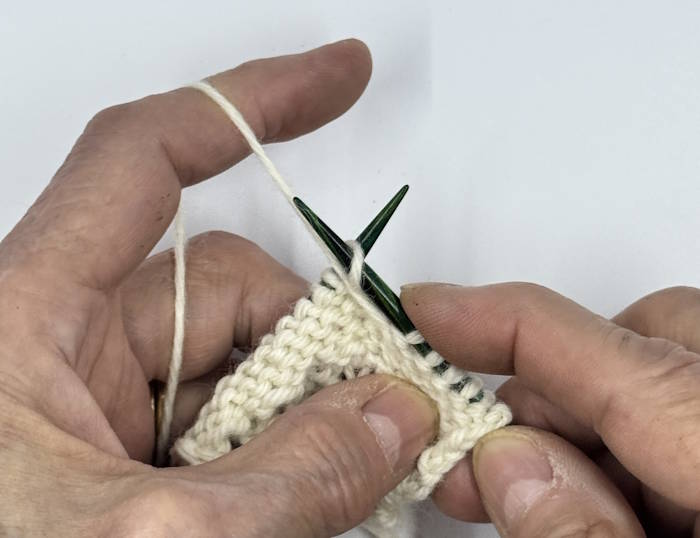 Insert the right needle through the stitch on the left needle from left to right and front to back.
Step Two: Wrap the Yarn
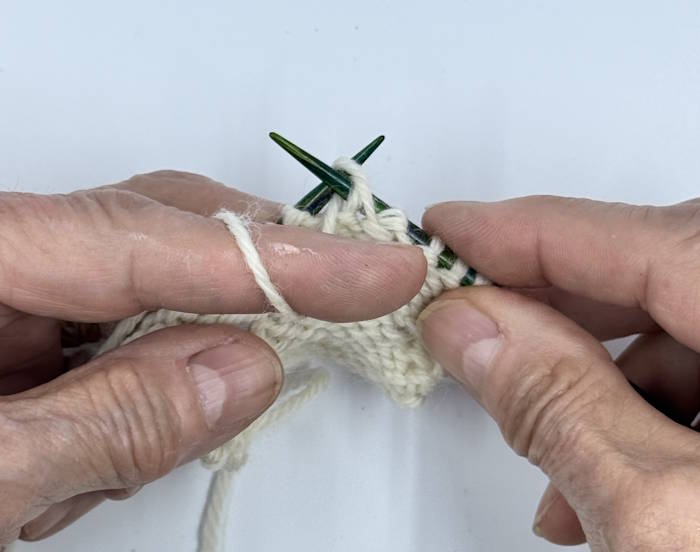 Slightly rotate the right needle tip to the right while the pad of your left forefinger brings the yarn between the needles from right to left and down between the needles. Please note, that this step is different for continental knitters. Some use their forefinger as described before, but many also use the middle finger or thumb to accomplish this step.
Step Three: Pull Through
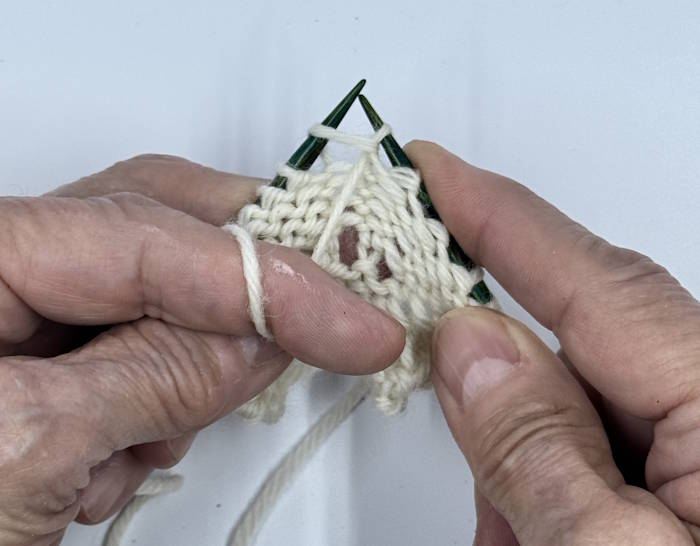 Bring the tip of the right needle with its wrap of yarn through the stitch on the left needle to the back and away from you.
Step Four: Finish the Purl Stitch
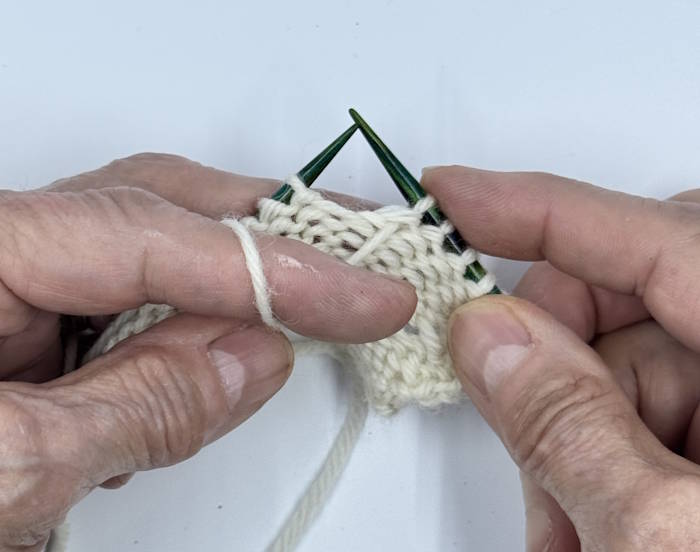 Slip the old stitch off the left needle, tighten it on the right needle.
Stockinette Stitch
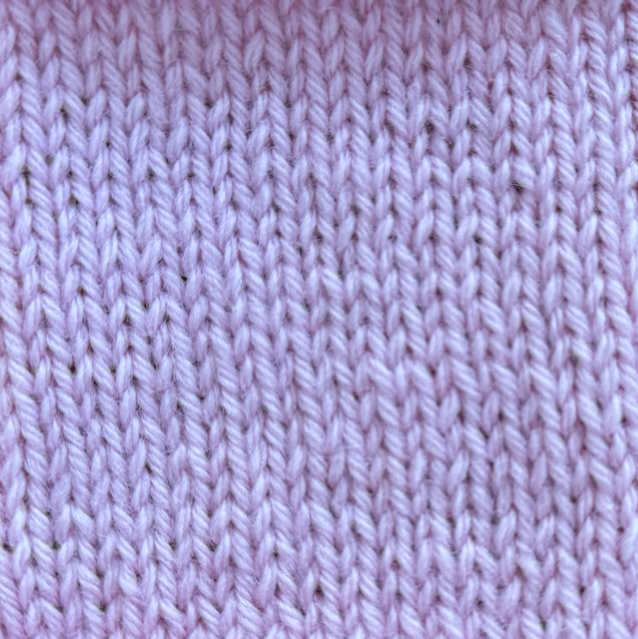 Stockinette Stitch: One row knit stitches, one row purl stitches
The most common way that the purl stitch is combined with the knit stitch is to create the stockinette stitch. This stitch pattern is created by working one row of knit stitches and then working one row of purl stitches. These two rows are then worked alternately creating a solid soft textured fabric that is good for a wide variety of projects.
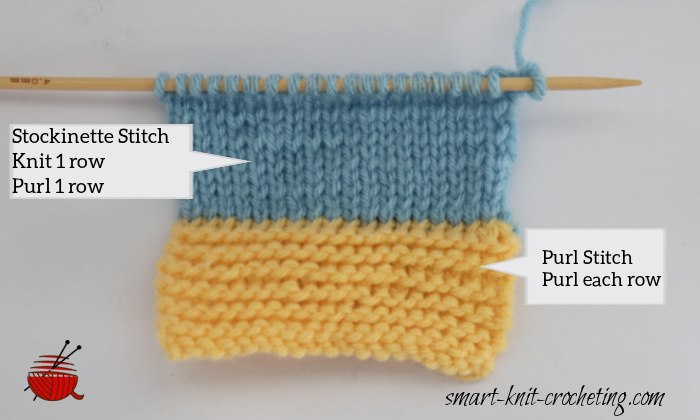
Take a look at the photo below.
The yellow stitches are the rows of purl stitches. You will also see the term, reverse stockinette. This just refers to the technique of knitting purl stitches only. The blue portion is both knit and purl. (One row knit, one row purl and then repeated.)
Learn more about the stockinette stitch.
Knit vs. Purl Stitch: Side-by-Side Comparison
| Feature | Knit Stitch | Purl Stitch |
|---|---|---|
| Yarn Position | Held behind the needles | Held in front of the needles |
| Needle Insertion | Insert from front to back | Insert from back to front |
| Fabric Texture | Creates a smooth “V” shape on the front | Creates a bumpy “ridge” on the front |
| Appearance on Opposite Side | Looks like a purl stitch on the back | Looks like a knit stitch on the back |
| Use in Patterns | Used in stockinette, garter, ribbing, etc. | Used in stockinette, reverse stockinette, ribbing, etc. |
| Common Challenges | Can be hard to keep tension even for beginners | Can feel awkward or reversed at first |
| Goal of Movement | Pull working yarn through to the back | Pull working yarn through to the front |
| Learning Tip | Often taught first | Usually learned right after knit stitch |
Tip: The knit and purl stitches are like mirror images. Mastering both gives you the foundation to create nearly every knitting pattern!
Common Purl Stitch Problems (and How to Fix Them)
If your purl stitches don’t look right yet, you’re not doing anything wrong. Almost every beginner struggles with purling at first. Most problems come down to yarn tension, yarn direction, or hand position, all things that improve quickly with practice.
Why does my purl stitch look looser than my knit stitch?
This is very common. Purl stitches often look looser because the yarn travels a longer path around the needle.
What helps:
- After making a purl stitch, give the yarn a slight, gentle tug before starting the next stitch
- Focus on even tension, not pulling tight
- Make sure your needle size matches your yarn
Why do my purl rows look taller or more stretched?
Purl rows can look taller because the yarn is wrapped differently than in knit stitches.
What helps:
- Keep your needle tips close together
- Avoid lifting the yarn too high when wrapping it
- Try to keep the same hand position for both knit and purl stitches
Why does purling feel harder than knitting?
Many knitters find purling awkward because the yarn is held in front of the work, and the motion feels backwards. Some knitters even go so far as to tell others that they refuse to purl at all. (Naturally, this limits the type of knitting they can do.)
What helps:
- Slow down and focus on each stitch
- If you knit continental, try guiding the yarn with your middle finger or thumb
- If purling still feels difficult, try the English method; many beginners find it easier
Why do my purl stitches look twisted?
Twisted purl stitches usually happen when the yarn is wrapped the wrong way or the stitch is sitting incorrectly on the needle.
What helps:
- Always wrap the yarn counterclockwise
- Make sure the front leg of the stitch is facing you on the needle
- Insert the needle from back to front when purling
Why do my knit rows look neater than my purl rows?
This happens to almost everyone. Knit stitches are easier to control, and purl stitches show tension differences more clearly.
What helps:
- Practice on small swatches and focus on even tension
- Block your finished project — many tension issues improve after blocking
- Be patient with yourself; consistency comes with time
If you’re still struggling, the questions below address the most common beginner concerns about purling.
Frequently Asked Questions about the Purl Stitch
Why is purl stitch hard?
Why is purl stitch hard?
Many beginners find the purl stitch slightly more awkward at first because of the yarn placement and motion, especially if you are learning to knit continental style where you hold the yarn in the left hand. However, with practice, it becomes just as natural as the knit stitch.
Some knitters even find it easier! The key is repetition and building that muscle memory. You may want to try both English and Continental methods to see what feels most comfortable for you. In my opinion, purling is easier if you are an English knitter, but there are ways to make the purl stitch, the continental way just as easy.
What is the difference between the knit and purl stitches?
What is the difference between the knit and purl stitches?
The knit stitch and the purl stitch are the two basic stitches of knitting, but they are made using opposite motions and create different textures:
Knit Stitch: The working yarn is held behind your needles, and the needle is inserted from front to back. The yarn is wrapped around the needle clockwise and the new stitch is pulled through.
Purl Stitch: The working yarn is held in front of your needles, and the needle is inserted from back to front. The yarn is wrapped counterclockwise around the needle, pulled through and slid off the left needle.
What is the purpose of the purl stitch in knitting?
What is the purpose of the purl stitch in knitting?
The purl stitch is one of the two foundational stitches in knitting, along with the knit stitch. Without the purl stitch, you are limited to creating projects solely with the knit stitch or garter stitch pattern. There's nothing wrong with that and I've created an entire page of free patterns using only the knit stitch. Garter Stitch Patterns.
When you incorporate the purl stitch into your knitting repretoire, there's no turning back. It's used to create texture and contrast in your fabric. When combined with knit stitches, it forms patterns like stockinette, ribbing, and seed stitch. The sky's the limit.
Why does my purl stitch look uneven and not like the photos I've seen online?
Why does my purl stitch look uneven and not like the photos I've seen online?
A twisted or uneven purl stitch usually happens when:
- You may be wrapping the yarn in the wrong direction. Be sure you are wrapping the yarn in a counterclockwise way.
- You may not have achieved an even tension. This is common and just requires more practice.
-
The stitch may be mounted incorrectly on the needle.
Stitches should sit on the left needle with the leg of the stitch facing you
More Ideas
There are more variations for the purl stitch than I have room to show on this page. Please check on my knit and purl stitches for more ideas.
