- Home
- Types of Knit Stitches
- Knit and Purl Stitches
- Double Woven Knit Stitch
Double Woven Knit Stitch
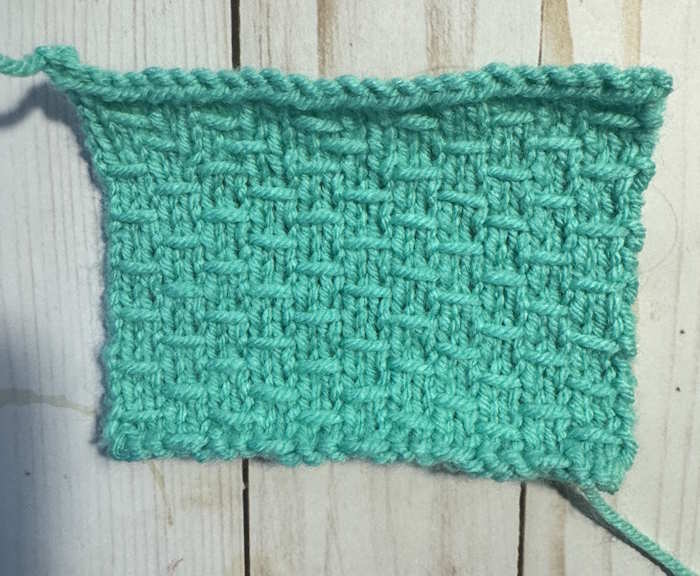
This lovely knit stitch pattern is an easy example of slip stitch knitting. Slip stitches are made by slipping stitches from the left needle to the right needle without knitting or purling the stitch.
This results in a fabric where the slipped stitch looks like a bar that floats on the side of the fabric where the slipped stitches were made.
Slipped stitch knitting can be relatively easy like this double woven knit stitch, or quite complex that are made with multiple colors.
Skill Level
Easy

Abbreviations Used
K / k = knit
P / p = purl
Wyif = yarn front
Wyib = yarn back
Sl = slip stitch
St / sts = stitch, stitches
CO = cast on
BO = Bind off
* * = Repeat the instructions between the two asterisks for the number of times indicated in the pattern.
Skills Needed
Supplies
- Yarn (I used a CYC #4 worsted weight yarn, 100% acrylic), but feel free to use whatever yarn you have on hand for this practice swatch. This stitch pattern can be worked on any type of yarn, but to see the stitches and texture created with the slip stitches. I recommend that you use a solid, smooth yarn.
- Needles: I used a number U.S. 7 (4.5 mm needles). Remember to use a needle size appropriate for the yarn you have chosen. Here is an article with more information on needle sizes.
- Scissors
- Yarn needle for weaving in ends.
Notes about the Double Woven Knit Stitch
- The instructions are written in U.S. terms.
- The pattern is worked over a multiple of four stitches
- This is a 4-row repeat
- It lays flat but does tend to curl at the cast on and bind off edges.
- This pattern is not reversible.
Is this Knit Pattern Reversible?
No, both sides look different. The front side resembles slip stitches, and the reverse side looks like a reverse stockinette stitch pattern.
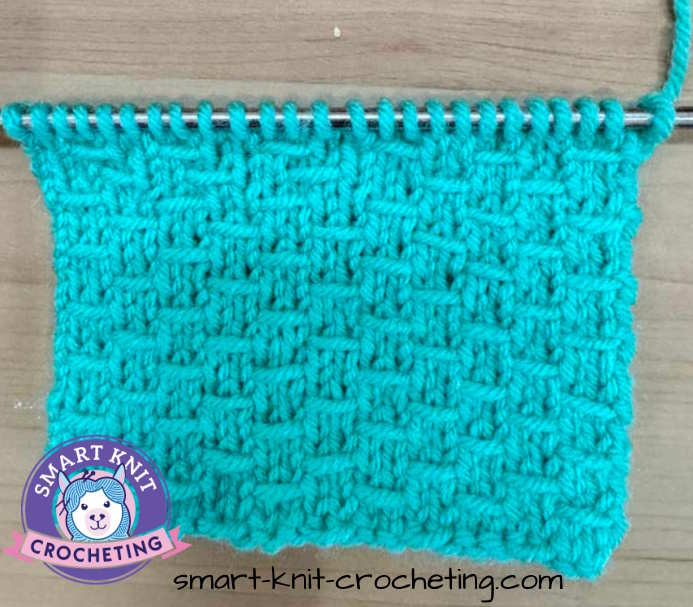 Double Woven Knit Stitch Right Side Showing
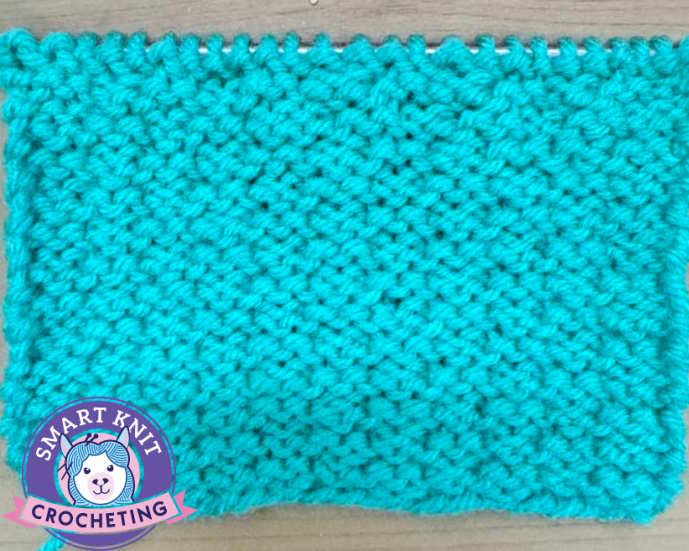 Double Woven Knit Stitch: Wrong side Showing
How to Slip a Stitch
Slipping a stitch means moving the stitch from the left needle to the right needle without working it. To avoid creating twisting the stitches, all stitches are slipped purlwise. You may also see it written “as if to purl.” Both statements mean the same thing.
Either way it is written, it means that you would insert the right needle into the next stitch on the left needle as if you were going to make a purl stitch. Do not make that purl stitch, but rather just slip it.
My instructions will always tell you whether to slip the stitch purlwise, with the yarn in front or back, but is not the case elsewhere. If you see the instructions, slip the stitch, assume you should slip it purlwise.
Why not slip a stitch as if to knit (knitwise). You can slip stitches knitwise, but this technique is reserved for decreasing stitches.
Written Instructions
Cast On: Multiples of 4
Row 1: (Right side) K3, *wyif, sl 2, wyib, k2; rep from *to last st, k1
Row 2: Purl
Row 3: K1, *wyif, sl 2, wyib, k2; rep from * to last 3 sts, wyif, sl 2, wyib, k1.
Row 4: Purl
Repeat these 4 rows until you have reached your desired length. Bind off in pattern. Weave in Ends. Block if desired.
Instructions Written Out in Plain English
Cast on a multiple of 4 stitches. For this practice, I cast on 24 stitches (6 x 4)
Row 1: (Right Side) Knit 3 stitches. Next begin the stitch repeat: *With yarn in front, slip two stitches, with yarn in back, knit 2. * Repeat the instructions between the two asterisks until there is only one stitch left on the left needle. Knit that stitch.
Row 2: Purl all stitches across the row.
Row 3: Knit one. Begin the stitch repeat: *With yarn in front, slip two stitches, with yarn in back, knit two. * Repeat the instructions between the two asterisks until there are three stitches remaining. Then, with yarn in front, slip two stitches, with yarn in back, knit one.
Row 4: Purl all stitches across the row.
Learn How to Read Knitting Charts
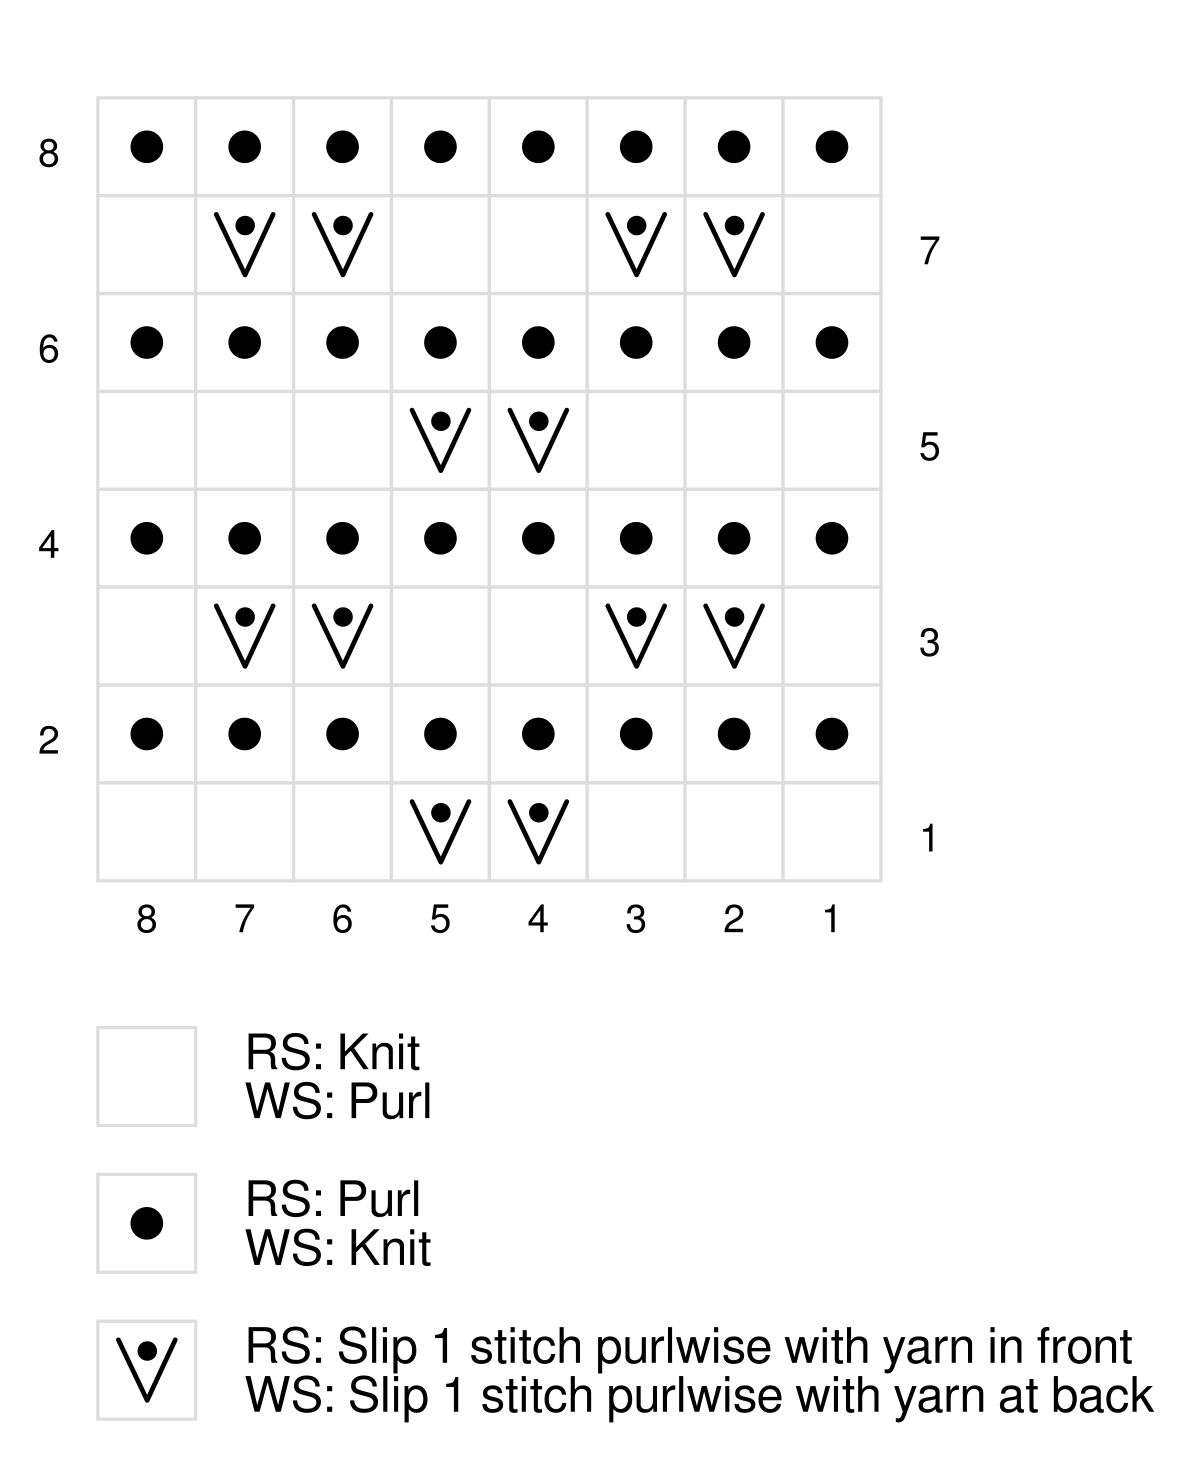
This relatively easy stitch does not require a knitting chart, but it is always a good idea to learn how to read and use knitting charts.
The chart represents how your fabric should appear. Begin knitting at the lower right corner and work from right to left across the first row.
On the second row, marked with a two, work from left to right across. Continue like this, working each row and then moving up one row. Work until you have reached your desired length.
Projects That Can Be Made With This Stitch
- Hats and headbands
- Washcloths and Dishcloths
- Scarves and Shawls
- Bags and purses
- Blankets
- Household items such as baskets, pillows, placemats
Problems That You May Encounter
Twisted Stitches
Twisted stitches can occur if stitches are slipped knitwise instead of purlwise. Twisted stitches also occur when you work into the back leg instead of the front leg of the stitches on the left needle. This latter reason for twisted stitches is common no matter which techniques you are using.
Tension
This is a problem when making slipped stitches, because these stitches create floats on the right side of the fabric. If you pull on these too tightly, the fabric will pucker and it won't be easy to fix with blocking.
If you don't pull tight enough, the floats will be loose. With this stitch pattern, you are only slipping two stitches so the floats are not too long. But with some slip stitch patterns, the floats can get very long and they can get sloppy.
Pin for Future Reference
Conclusion
The Double Woven Knit Stitch is a lovely slip stitch pattern that creates the look of a woven fabric. It is surprisingly easy to make, even though it looks complicated.
With just a four-row repeat, even beginners can master this stitch easily. The pattern calls for knits and purls along with slip stitches that are made with yarn in the front. Grab your needles, some yarn and let’s knit.
