- Home
- Crochet Stitches
- Crochet Alpine Stitch
Crochet Alpine Stitch: A Complete Beginner's Guide
The crochet alpine stitch creates a beautifully textured, dense fabric with a unique ridged appearance It's not reversible but has a slightly different texture on each side.
This stitch is perfect for projects requiring warmth and structure, such as blankets, scarves, hats, sweaters, and even home décor items like placemats and coasters.
While the exact origins of the alpine stitch are challenging it has gained popularity in recent years due to its visual appeal and practicality.
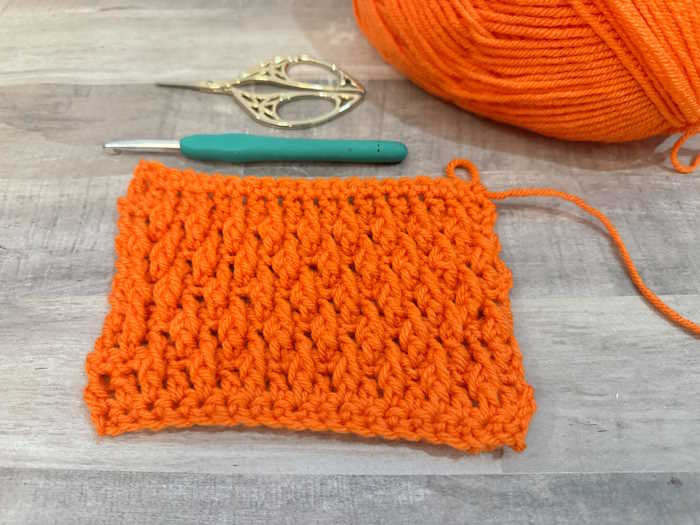
I was searching for an easy crochet stitch to make a pair of fingerless gloves for a friend, and I chose this stitch pattern. Why?
Because,
- It’s easy and quick
- Its texture makes me think that it is warm and cozy (which it is)
- It is a two-row repeat, which is doable for any adventurous beginner
In This Article
Instructions for a Practice Swatch
Materials Needed
- Yarn: Any weight yarn can be used; however, worsted weight is recommended for beginners. I used an acrylic yarn to try out this stitch. For this tutorial, I am using Knit Picks’ Brava Worsted Weight Yarn in colorway orange.
- Crochet Hook: Choose a size appropriate for your chosen yarn (check yarn label). I’m using a US I (5.5 mm) hook.
- Scissors
- Tapestry Needle (for weaving in the ends)
Abbreviations (US Terms)
ch: chain
st: stitch
sc: single crochet
sk st: skip stitch
dc: double crochet stitch
rem: Remaining
fsc: foundation single crochet (optional)
Fpdc: Front Post Double Crochet
How to Make the Front Post Double Crochet Stitch (Fpdc)
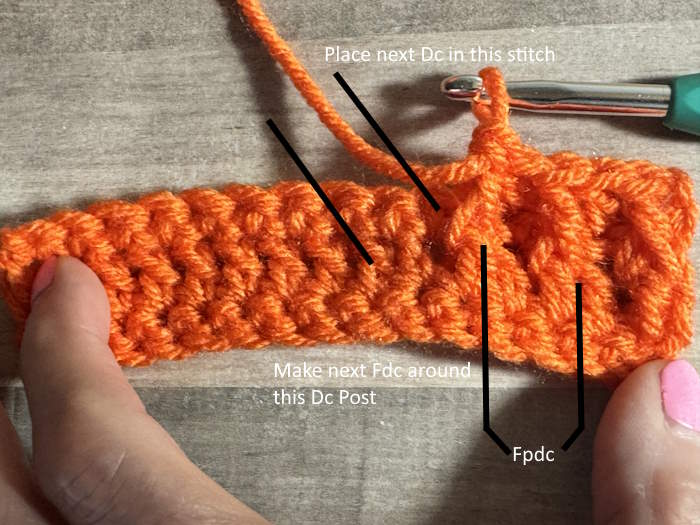
Yarn over and insert your hook around the double crochet stitch post from right to left behind the post so the post is in front of the yarn. Yarn over and pull up a loop. Finish the stitch the same way as you would a normal double-crochet stitch.
More about crochet post stitches
Notes
- These instructions use US terms.
- Begin with an even number of chains.
- Chain 1 at the beginning of rows does not count as a double crochet.
- You might consider going up one or more hook sizes if you are a tight crocheter.
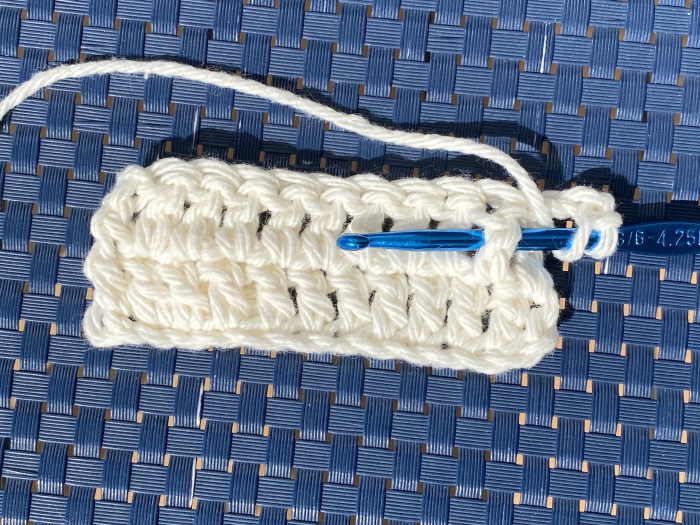
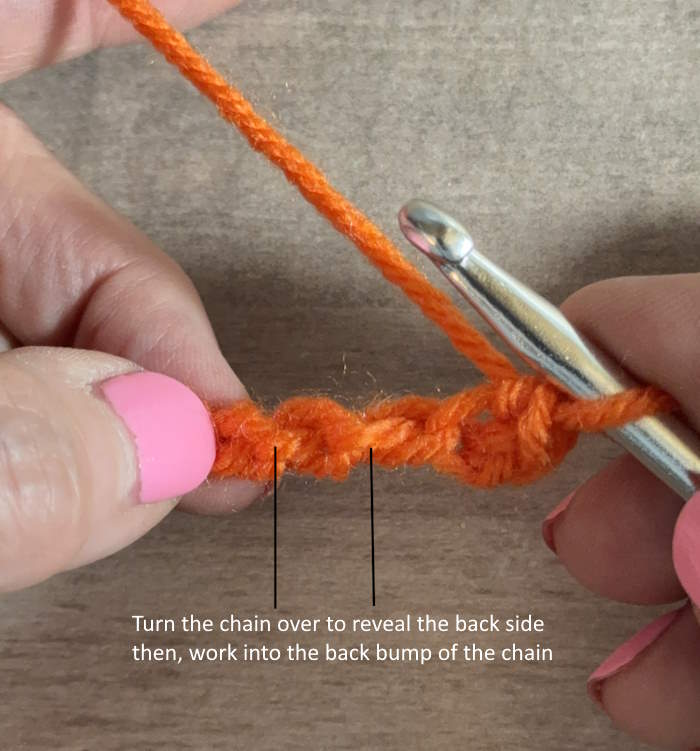
- I recommend working your first row of single crochet stitches through the back bump. It looks much nicer.
Crochet Alpine Stitch Instructions
Foundation Chain: Create a foundation chain with an even number of stitches. The chain length will determine the width of your project.
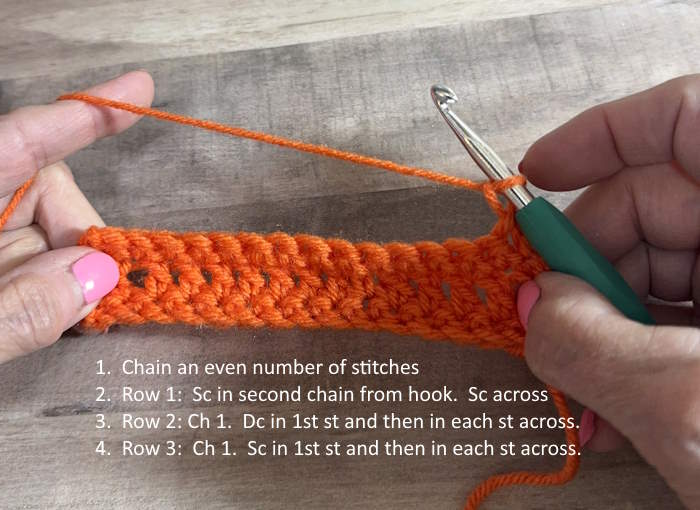
Row 1: Sc in the 2nd ch from the hook and in each ch across. Turn.
Row 2: Ch 1. Dc in the first stitch from hook across the row: Ch 1 and turn.
Row 3: 1 sc in the first st. 1 Sc in each stitch across. Work the last sc in the top of the turning ch: Ch 1 and turn.
Row 4: *FPdc into the second dc from two rows below. (sk sc from last row). 1 dc in next sc. Sk next dc, Rep from * to end of row. Work one last dc in last sc st. Ch 1 and turn.
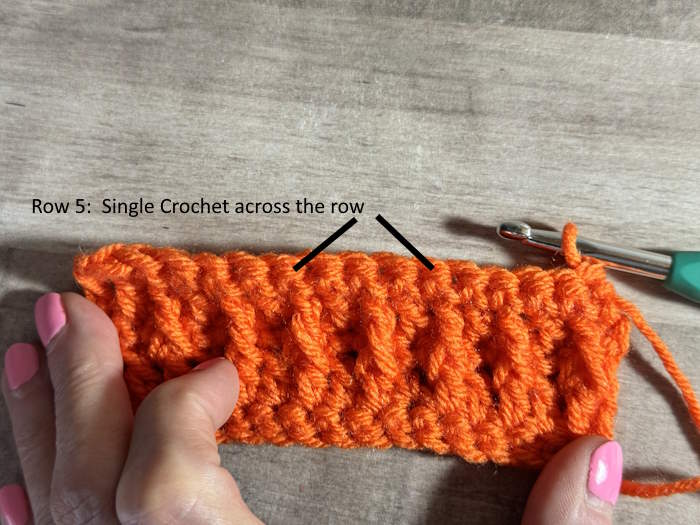
Row 5: Make 1 sc in the first st and then sc in each rem st, ending with 1 sc in the top of the turning chain. Ch 1 and turn.
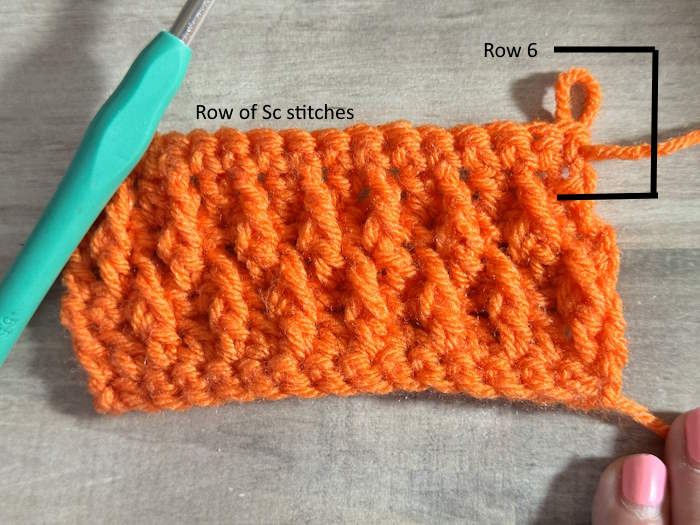
Row 6: 1 dc in second st from hook. *FPdc in the next (normal) dc from two rows below. Dc in next st. Rep from * to last st. Work dc in the top of the turning ch. Turn
Repeat: Rep rows 3-6 until you reach your desired length.
Finishing Row:
Ch 1 and turn. 1 sc in same st as ch 1. 1 sc in each rem st. Fasten off.
 Crochet Alpine Stitch Right Side
 Crochet Alpine Stitch Wrong Side
Troubleshooting
- Possible tension problems when making the front post double crochet stitch. To avoid pulling this stitch too tighly, when making the stitch, pull up a loop that is larger than you normally would.
- Keeping track of your work:
- Once you've worked rows 3 to 6, read your work to help you know where you are at.
- On rows 4 and 6, the normal double crochet stitches are worked about and just to the right of the previous row of front post double crochet stitches.
Frequently Asked Questions
Can I use any yarn for the alpine stitch?
Can I use any yarn for the alpine stitch?
Yes, you can use any weight yarn. However, worsted weight is recommended for beginners as it's easier to see the stitches.
What if my edges are curling?
What if my edges are curling?
Curling edges can indicate tight tension. Try using a larger hook or consciously loosening your tension. Adding a border can also help.
Is the alpine stitch suitable for beginners?
Is the alpine stitch suitable for beginners?
The Alpine stitch is not hard but may be best suited for the advanced beginner because of the post-stitches involved. Once one learns how to make front and back post stitches, it will not seem difficult at all.
What are the most common projects to make with the alpine stitch?
What are the most common projects to make with the alpine stitch?
The alpine stitch is perfect for projects needing a little texture, such as blankets, hats, and bags. Household items like dishcloths also work well with this stitch pattern.
Is the alpine stitch reversible?
Is the alpine stitch reversible?
No, both the right and wrong sides will look different.
What types of yarn are best for achieving different textures with this stitch?
What types of yarn are best for achieving different textures with this stitch?
A solid-colored worsted-weight yarn works best to highlight the texture of this stitch. Consider alternating rows of colors or using a self-striping yarn for added color.
Can the alpine stitch be used in circular projects?
Can the alpine stitch be used in circular projects?
Yes, it is appropriate for making cowls, beanies, and other projects. In the round, it’s worked on a cast on an even number of stitches.
Conclusion
The crochet alpine stitch is versatile and visually appealing, perfect for various projects.
While it may seem a bit challenging initially, with practice and patience, you'll master this beautiful stitch and create stunning handmade items.
Don't be afraid to experiment with different yarn weights and colors to discover the full potential of the alpine stitch!
Crochet Alpine Stitch: Pin for Later
About Janice
Hi, I’m Janice, the voice behind Smart-Knit-Crocheting. I love to knit and crochet and even more, I love teaching others what I know.
Though I learned to knit and crochet as a child, I didn’t get serious about these amazing hobbies until I retired. I’m a certified knit and crochet instructor through the Craft Yarn Council and am working on becoming a Master Hand Knitter through The Knitting Guild Association.
I’m currently living with my husband of over 50 years and our 6 Shih Tzu dogs.
I love hearing from you, so please drop me a line and let me know what you’re working on, whether you love knitting or crocheting more, and if you have any questions. Please visit my about me page for more information.
Happy Crocheting


