- Home
- Crochet Stitches
- Cluster Stitch
Crochet Cluster Stitch
The Cluster Stitch Crochet by Janice Jones
The cluster stitch family is a crochet classic. This name is given to the whole group of stitches with the different names but similar technique to crochet. Each of them is formed as a group of stitches gathered at the top, or the bottom, or both.
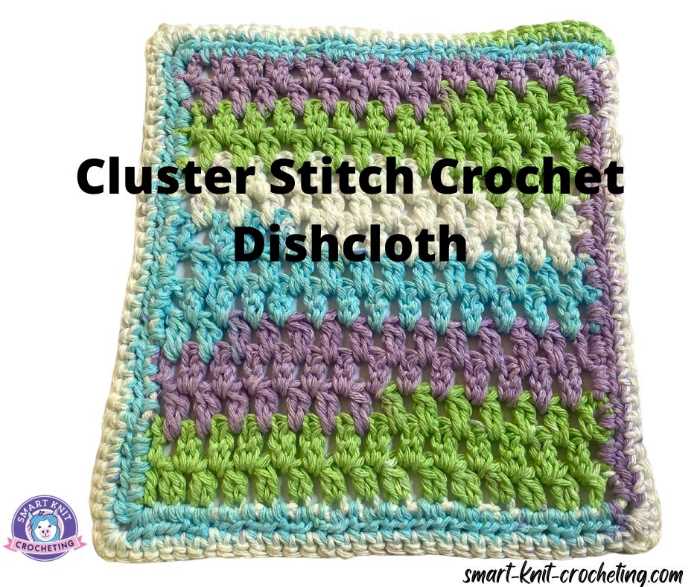
It creates a decorative stitch that is very beginner-friendly and can be used to make a wide variety of different items such as pillow covers, blankets, or dishcloths which we will be making at the end of this tutorial. It creates a thick textured fabric that looks good on both the front and the back.
If you want the free pattern for a cotton dishcloth, and do not need the tutorial, feel free to jump directly to the pattern.

Cluster Stitches are easy to crochet and have endless possibilities to be combined with the other stitches and make new patterns. Being joined in a group, clusters look much more volumetric, hence much more decorative, than, for instance, any single stitch.
There are a lot of variations to crochet the stitch.
You can crochet these stitches by using single crochets, double crochets, or treble crochets. The number of stitches in a cluster can be different. The more stitches included in a group, the more decorative stitch you will get.
Cluster can
serve both as a decorative element and the way to decrease number of stitches in a
row.
What to Call a Cluster Stitch
A crochet cluster stitch is a group of stitches that are positioned adjacent to each other and joined at the top. Clusters can consist of any number of stitches.
Cluster stitches are named based on the height of the stitch (double or treble crochet) and the number of stitches in the cluster.
- If 2 double crochet stitches are used, it would be called a two dc cluster
- If 3 double crochet stitches are used, it would be a three dc cluster
- If 5 double crochet stitches are used, then it would be a five dc cluster
- If 4 treble crochet stitches are used, it's called a four tr cluster
The process is similar no matter how many stitches are used or whether it is made up of double or treble crochet stitches.
Step-by-Step 5 Double Crochet Cluster Stitch
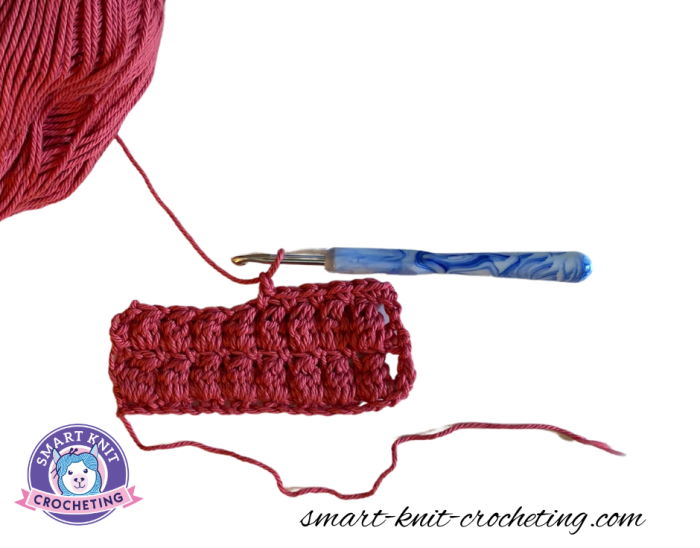
To practice you will need some yarn and the appropriate size hook for the yarn you have chosen. Before you can make clusters, you will need to create a slip knot and make a chain with an even number of chain stitches.
For this tutorial I will be making a chain of 20 stitches. This is just a sample swatch for demonstration purposes. If you were making a scarf, you would want to create a chain that is the width of the scarf you are making.
All Instructions are in US Terms. The cluster stitch I am demonstrating uses a two row repeat. I've seen these done differently, but this is my method for doing them.
Abbreviations Used in this Tutorial
These are the abbreviations I will be using in this tutorial:
ch st = chain stitch
ch sp = chain space
yo= yarn over
dc = double crochet
sc = single crochet
Step One: Slip Knot and Chain
Make a slip knot and make 20 chains.
Step Two: Row One
The first row is a little different than subsequent rows.
- Work into the second chain from the hook. Make one sc in the second chain from the hook.
- Make a sc in the next chain. Chain one.
- Skip the next chain and then make a sc into the next chain. Chain one.
- Skip the next chain and make a sc into the next chain. Chain one. Repeat across the row until you get to the last two chain stitches. Chain one.
- Make one sc in each of the last chains. Turn.

Step Three: Row Two
- Chain 4. (This brings the height of the row up to the size of the double crochet. You will be working the cluster stitches into the chain one space.
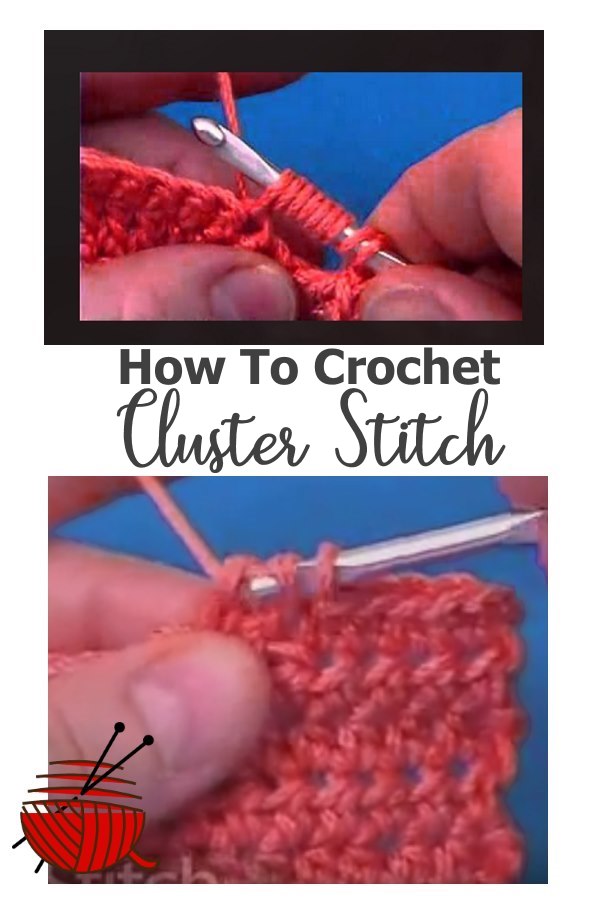
- Insert hook into the first chain one space. Yarn over and pull through two loops as if to make a double crochet stitch but don't finish off the dc. Yarn over and insert hook into the same space. Yarn over and pull through the first two loops. You should have 3 loops on the hook.
- YO, insert hook into same ch sp. YO and pull through 2 loops. You have 4 loops on the hook.
- YO, insert hook into same ch sp. YO and pull through 2 loops. You have 5 loops on the hook.
- YO and pull through all five loops. Ch. 1 This is your first cluster stitch.
- Continue making clusters in each of the ch sp across the row until the last two stitches.
Row Three (Similar to Row 1)
Row three is similar to row one, but you will be working in stitches and not chains.
- Ch 1 and turn. SC in first chain from hook. Next, sc in first ch sp. Ch 1
- 1 sc in space between the cluster stitch. Ch. 1. Sc in next space between cluster stitches. Ch. 1. Repeat across the row until you've made the last sc between the cluster stitches.
- 1 sc in chain space. 1 sc in 3rd chain from the bottom. Turn. Chain 4
Row Four: Repeat Row 2
Row four is a repeat of row 2 (cluster stitches). After this, you just continue repeating row 3 and 4 until you have reached the length of fabric you desire.
Tips for Making the Crochet Cluster Stitch
- Keep your tension loose especially on those rows where you are making single crochet stitches.
- If you have difficulty pulling through all five loops on the hook, turn your hook so it is pointing to the side. It should slide through easily.
Summertime Cluster Dishcloth

Skill Level: Easy
MEASUREMENTS/FINISHED SIZE: 8.5 x 9 inches
MATERIALS
• Lily Sugar’n Cream Stripes Violet Stripes 100% Cotton, CYC #4 worsted weight. 2 oz/56.7 g, 95 yds/86 m
• Hook: Size US H/8 (5.0 mm)
• Tapestry Needle
• Scissors
STITCH GUIDE/ABBREVIATIONS
• ch(s) = chain(s)
• ch sp = chain space
• dc = double crochet
• 2 dc cluster: 2 Double Crochet Cluster
• Sc = single crochet
• st/sts = stitch/stitches
• RS = right side
PATTERN NOTES
• This pattern uses American crochet terms.
• The pattern is worked through two loops.
• The Chain-2 at the beginning of the row counts as part of the cluster stitch.
SPECIAL STITCH: CLUSTER
Yarn over, insert hook into the stitch, pull up a loop. Pull through the first two loops. Yarn over, insert hook into the same stitch and pull up a loop. Pull through the first two loops. Pull through the remaining 3 loops.
INSTRUCTIONS
Chain 31. Work in the back loop of the chain.
Row 1: dc in the third chain from the hook. *ch1, skip the next chain, cluster stitch in the next chain* across. Ch 3, turn.
Row 2: Dc in the first st (the ch-3 and your first dc are worked in the same stitch and count as the first cluster stitch). *ch 1, skip the ch 1 space, cluster stitch in the next ch sp* across. Dc in top of ch-3 from the previous row. Chain 3, turn.
Repeat row 2 for a total of 14 rows.
Border Pattern
Hdc around the edges of the dishcloth. Along the beginning and ending rows, work 1 hdc into each stitch. Along the sides, you will work approximately 2 hdc in each chain space.
Corners: Work 2 hdc, 1 ch, 2 hdc. Sl st to the top of the first sc to join.
Optional: You may want to make one more row of sc for a more finished appearance.
FINISHING
Block. Weave in ends.
About Janice
Hi, I’m Janice, the voice behind Smart-Knit-Crocheting. I love to knit and crochet and even more, I love teaching others what I know.
Though I learned to knit and crochet as a child, I didn’t get serious about these amazing hobbies until I retired. I’m a certified knit and crochet instructor through the Craft Yarn Council and am working on becoming a Master Hand Knitter through The Knitting Guild Association.
I’m currently living with my husband of over 50 years and our 6 Shih Tzu dogs.
I love hearing from you, so please drop me a line and let me know what you’re working on, whether you love knitting or crocheting more, and if you have any questions. Please visit my about me page for more information.
Happy Crocheting


