- Home
- Types of Knit Stitches
- Knitting Rib Stitches
- Slip Stitch Rib
- 2 x 2 Rib Stitch
How to Knit 2 x 2 Ribbing: Complete Tutorial for Beginners
2 x 2 Ribbing by Janice Jones
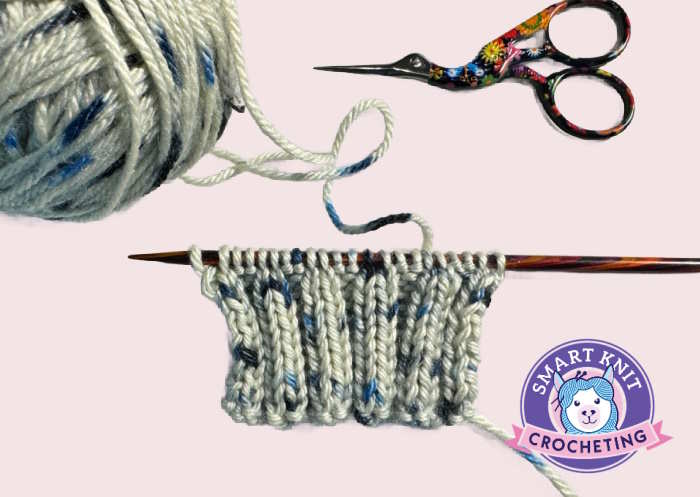
The 2 x 2 ribbing stitch is a classic knitting pattern that creates a stretchy, textured fabric with vertical columns of knit and purl stitches. The resulting fabric is reversible, meaning it looks the same on both sides and has great elasticity.
This makes the 2 x 2 rib ideal for projects that require a snug fit, such as cuffs, hems, and necklines of sweaters, hats, and socks. Even though there are many rib stitches, this one has always been my favorite.

Other Names for 2 x 2 Ribbing
- 2 x 2 ribbing
- Double rib stitch
- Knit 2, purl 2 rib
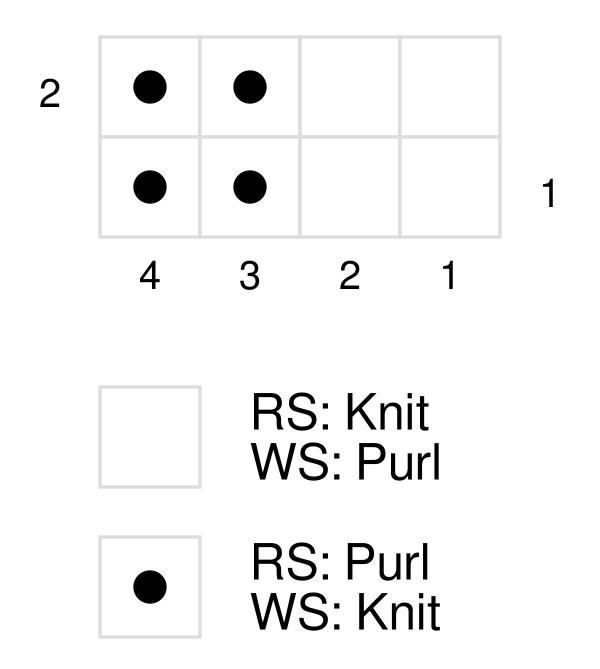
2 x 2 Rib in Chart Form
Why Learn the 2 x 2 Rib Stitch
The 2 x 2 rib is a versatile stitch pattern every knitter should know. It provides excellent structure and stretch to knitted garments, ensuring a comfortable and secure fit.
This rib stitch pattern can be found on the hems of sweaters, brims of hats, cuffs of socks, and sweater cuffs.
Additionally, the 2 x 2 rib is a simple pattern that is easy to memorize. It is perfect for beginners who want to expand their knitting skills beyond basic knit and purl stitches. It is considered to be one of the basic rib stitches.
Supplies Needed
- Knitting needles in a size appropriate for your yarn
- Yarn of your choice
- Scissors
- Tapestry needle
- Stitch Markers (optional)

Abbreviations
- k: knit
- p: purl
- CO: Cast on
- BO: Bind off
Skills Needed for 2 x 2 Ribbing
How to Weave in Ends
Instructions for a 2 x 2 Rib Swatch
This rib stitch is worked on an even number of stitches. If you work it on an odd number of stitches, the first and last stitches of the row will be the same.
Cast on a multiple of 4 stitches. For this swatch, let's cast on 20 stitches.
Row 1: *k2, p2; repeat from * to end of the row.
Row 2: Knit the knit stitches and purl the purl stitches as they appear. In other words, *k2, p2; repeat from * to end of row.
Repeat Row 2 for the desired length of your swatch. For this example, let's work a total of 20 rows.
Bind off in pattern, making sure to knit the knit stitches and purl the purl stitches as they appear.
Special Notes and Tips for Beginners
- Track your stitches and maintain the k2, p2 pattern throughout your work. If you lose track, look at the previous row to see which stitches should be knit and purled.
- Maintain consistent tension to ensure even ribbing. The knit and purl stitches should be the same size and tightness. More about that in a moment.
- When working the 2 x 2 rib over many stitches, use stitch markers to help you keep track of your place in the pattern. Place a marker after every 20 or 30 stitches, depending on your preference.
- This is a reversible stitch. The wrong side and the right side of the fabric are identical.
- This stitch falls into the categories: Revesible Stitches, Knit and Purl Stitches, and Rib Stitches
Troubleshooting: Uneven Knit Stitches
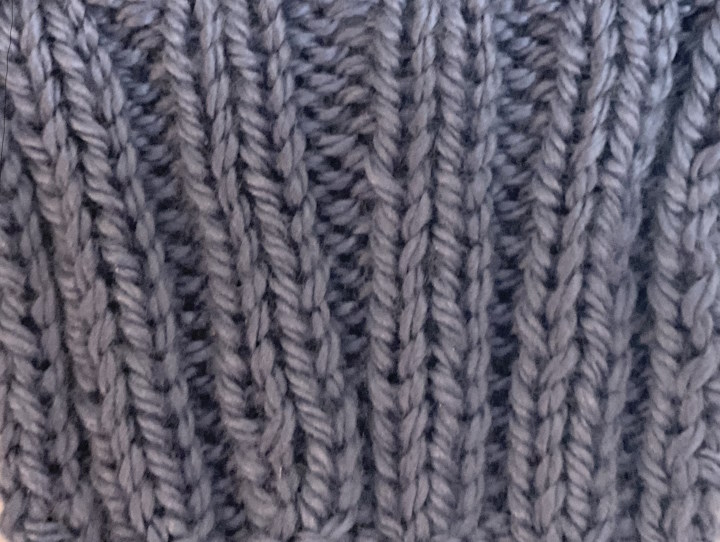
In the 2x2 rib stitch, there are two columns of knit stitches followed by two columns of purls. When working the 2 x 2 rib stitch, you may notice that one knit stitch appears more prominent than the one next to it.
This is a common issue due to how the yarn is wrapped around the needle when transitioning between knit and purl stitches.
This unevenness occurs because the yarn must travel a longer distance when moving from a knit stitch to a purl stitch (or vice versa) than when moving between two knit stitches or two purl stitches.
This extra distance can cause the stitch to be slightly looser, making it appear larger.
To minimize this effect, try the following tips:
- Maintain consistent tension: Focus on keeping your tension even throughout your work. This may take some practice, but it will help create a more uniform appearance.
- Tug the yarn slightly: After purling the second stitch and before knitting the next stitch, give the yarn a gentle tug to tighten up the slack. This will help even out the size of the knit stitches.
- Use smaller needles: If your ribbing is uneven, use needles one size smaller than recommended for your yarn. This will create a tighter fabric and help minimize the size difference between stitches.
- Work on the tips of your needles to create the stitch, then move the stitch down to the full diameter of the needle.
Remember that some unevenness is normal and may become less noticeable with practice and after blocking your finished project. Don't be discouraged if your ribbing isn't perfect at first – with time and experience, you'll develop the skills to create beautifully even 2 x 2 rib stitches.
How to Bind Off the 2x2 Rib Stitch
The easiest way to bind off the 2x2 rib stitch is to use the traditional bind-off in a pattern. This means you knit the knit stitches and purl the purl stitches when binding off.
To make it stretchier, go up one or two needle sizes. So, for example, if you use a needle number 7 (4.5 mm), bind off using a number 9 (5.5 mm). I recommend checking out this article, Comparison of 20 bind-off methods for stretchier bind-offs.
How do You Increase Evenly in 2x2 Ribbing?
Many patterns ask you to increase a certain number of stitches evenly across the last row of ribbing without telling you how to do this. The most common knit increase made in ribbing is the bar increase or knit front and back (kfb).
To make the increased stitches invisible or
nearly invisible, there are a few rules:
- Do not increase in the first or last stitch of the row.
- Place the first increase in the 3rd stitch from the ends.
Here is a little formula that I learned from Arenda Holladay. Don't worry; you don't need a degree in advanced mathematics to make this work:
- Subtract one from the number of stitches to increase across the row. So, if the design calls for increasing ten stitches, 10-1=9
- Divide this number by the number of stitches on the needle. For example, if you have 72 stitches on the needle, divide 72 divided by 9 = 8.
- You should plan on eight stitches between each increase.
Last Words
The 2 x 2 rib stitch is a fundamental knitting pattern that creates a stretchy, elastic fabric perfect for garment edges and cuffs. Its simple repeating pattern makes it easy to learn and execute, even for beginners. By mastering the 2 x 2 rib, you can add a professional touch to your knitted projects and create comfortable and stylish items.
Grab your needles, and let's knit!
Janice


