- Home
- How to Knit: Basics
- Weaving in Ends, Kintting
Weaving in Ends Knitting
Weaving in Ends Knitting by Janice Jones
Weaving in ends is an essential step in any knitting or crochet project. In addition to ensuring your work stays intact and doesn't unravel, it also gives your project a neat and professional look.
Yet, it's a step that can often be overlooked or rushed. If you're tired of messy or bulky ends ruining the aesthetic of your work, then mastering the art of weaving in ends is a skill you need to acquire.
Whether you're a beginner or an experienced crafter, these techniques will take your projects to the next level and have you feeling confident and proud of your work. So, let's get started and learn how to weave in ends like a pro!
Weaving in Ends Knitting: Four Examples
 Weave in Ends: Garter Stitch Knitting
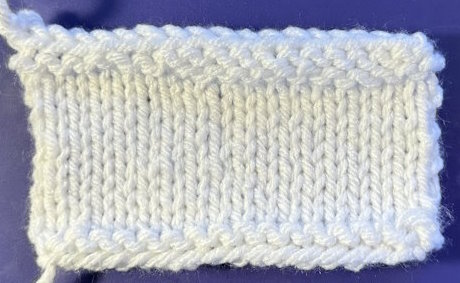 Weave in Ends: Stockinette titch
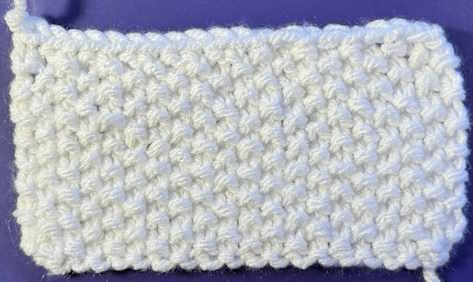 Weave in Ends: Seed Stitch Knitting
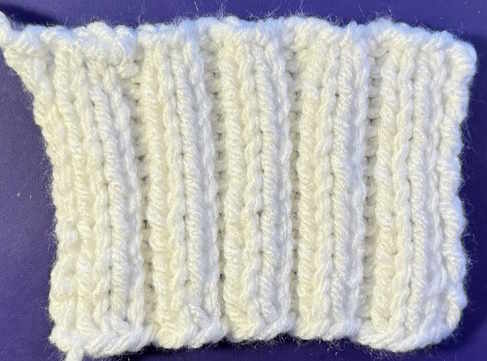 Weave in Ends: Ribbing
Why is Weaving in Ends Knitting Important
Weaving in ends is essential for securing your work and preventing it from unraveling. Leaving loose ends can cause your project to fall apart, especially after washing or wear.
It's also crucial for achieving a neat and professional finish. Nothing ruins the aesthetic of a beautiful knit or crochet project faster than bulky or messy ends.
Weaving in ends can help to
hide them and create a seamless look. It's a small step that can make a big
difference in the overall appearance of your project.
When is Weaving in Ends in Knitting Not Necessary?
If you are creating a project with seams, such as a sweater, you may be able to weave in your ends into the seam you will be sewing. Otherwise, if your project is flat without any additional finishing techniques, weaving in those tails is necessary.
Weaving in Ends in Garter Stitch

Garter stitch is a common stitch pattern in knitting, and it's essential to know how to weave in ends in this stitch so they are secure and do not show on the right side of the fabric.
You will weave in the ends on the wrong side of the fabric, using two ajacent ridges that are not the cast on or bind off edges. When worked this way, your weave in is virtually invisible (see below).
This weave in technique is called a modified duplicate stitch.
Garter stitch is made up of smiles or umbrellas and frowns or rainbows. We will work into the smiles and frowns.
 "Smile"
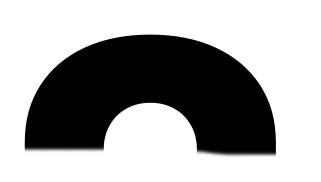 "Frown"
Weaving in Ends: Garter Stitch: Wrong Side Showing
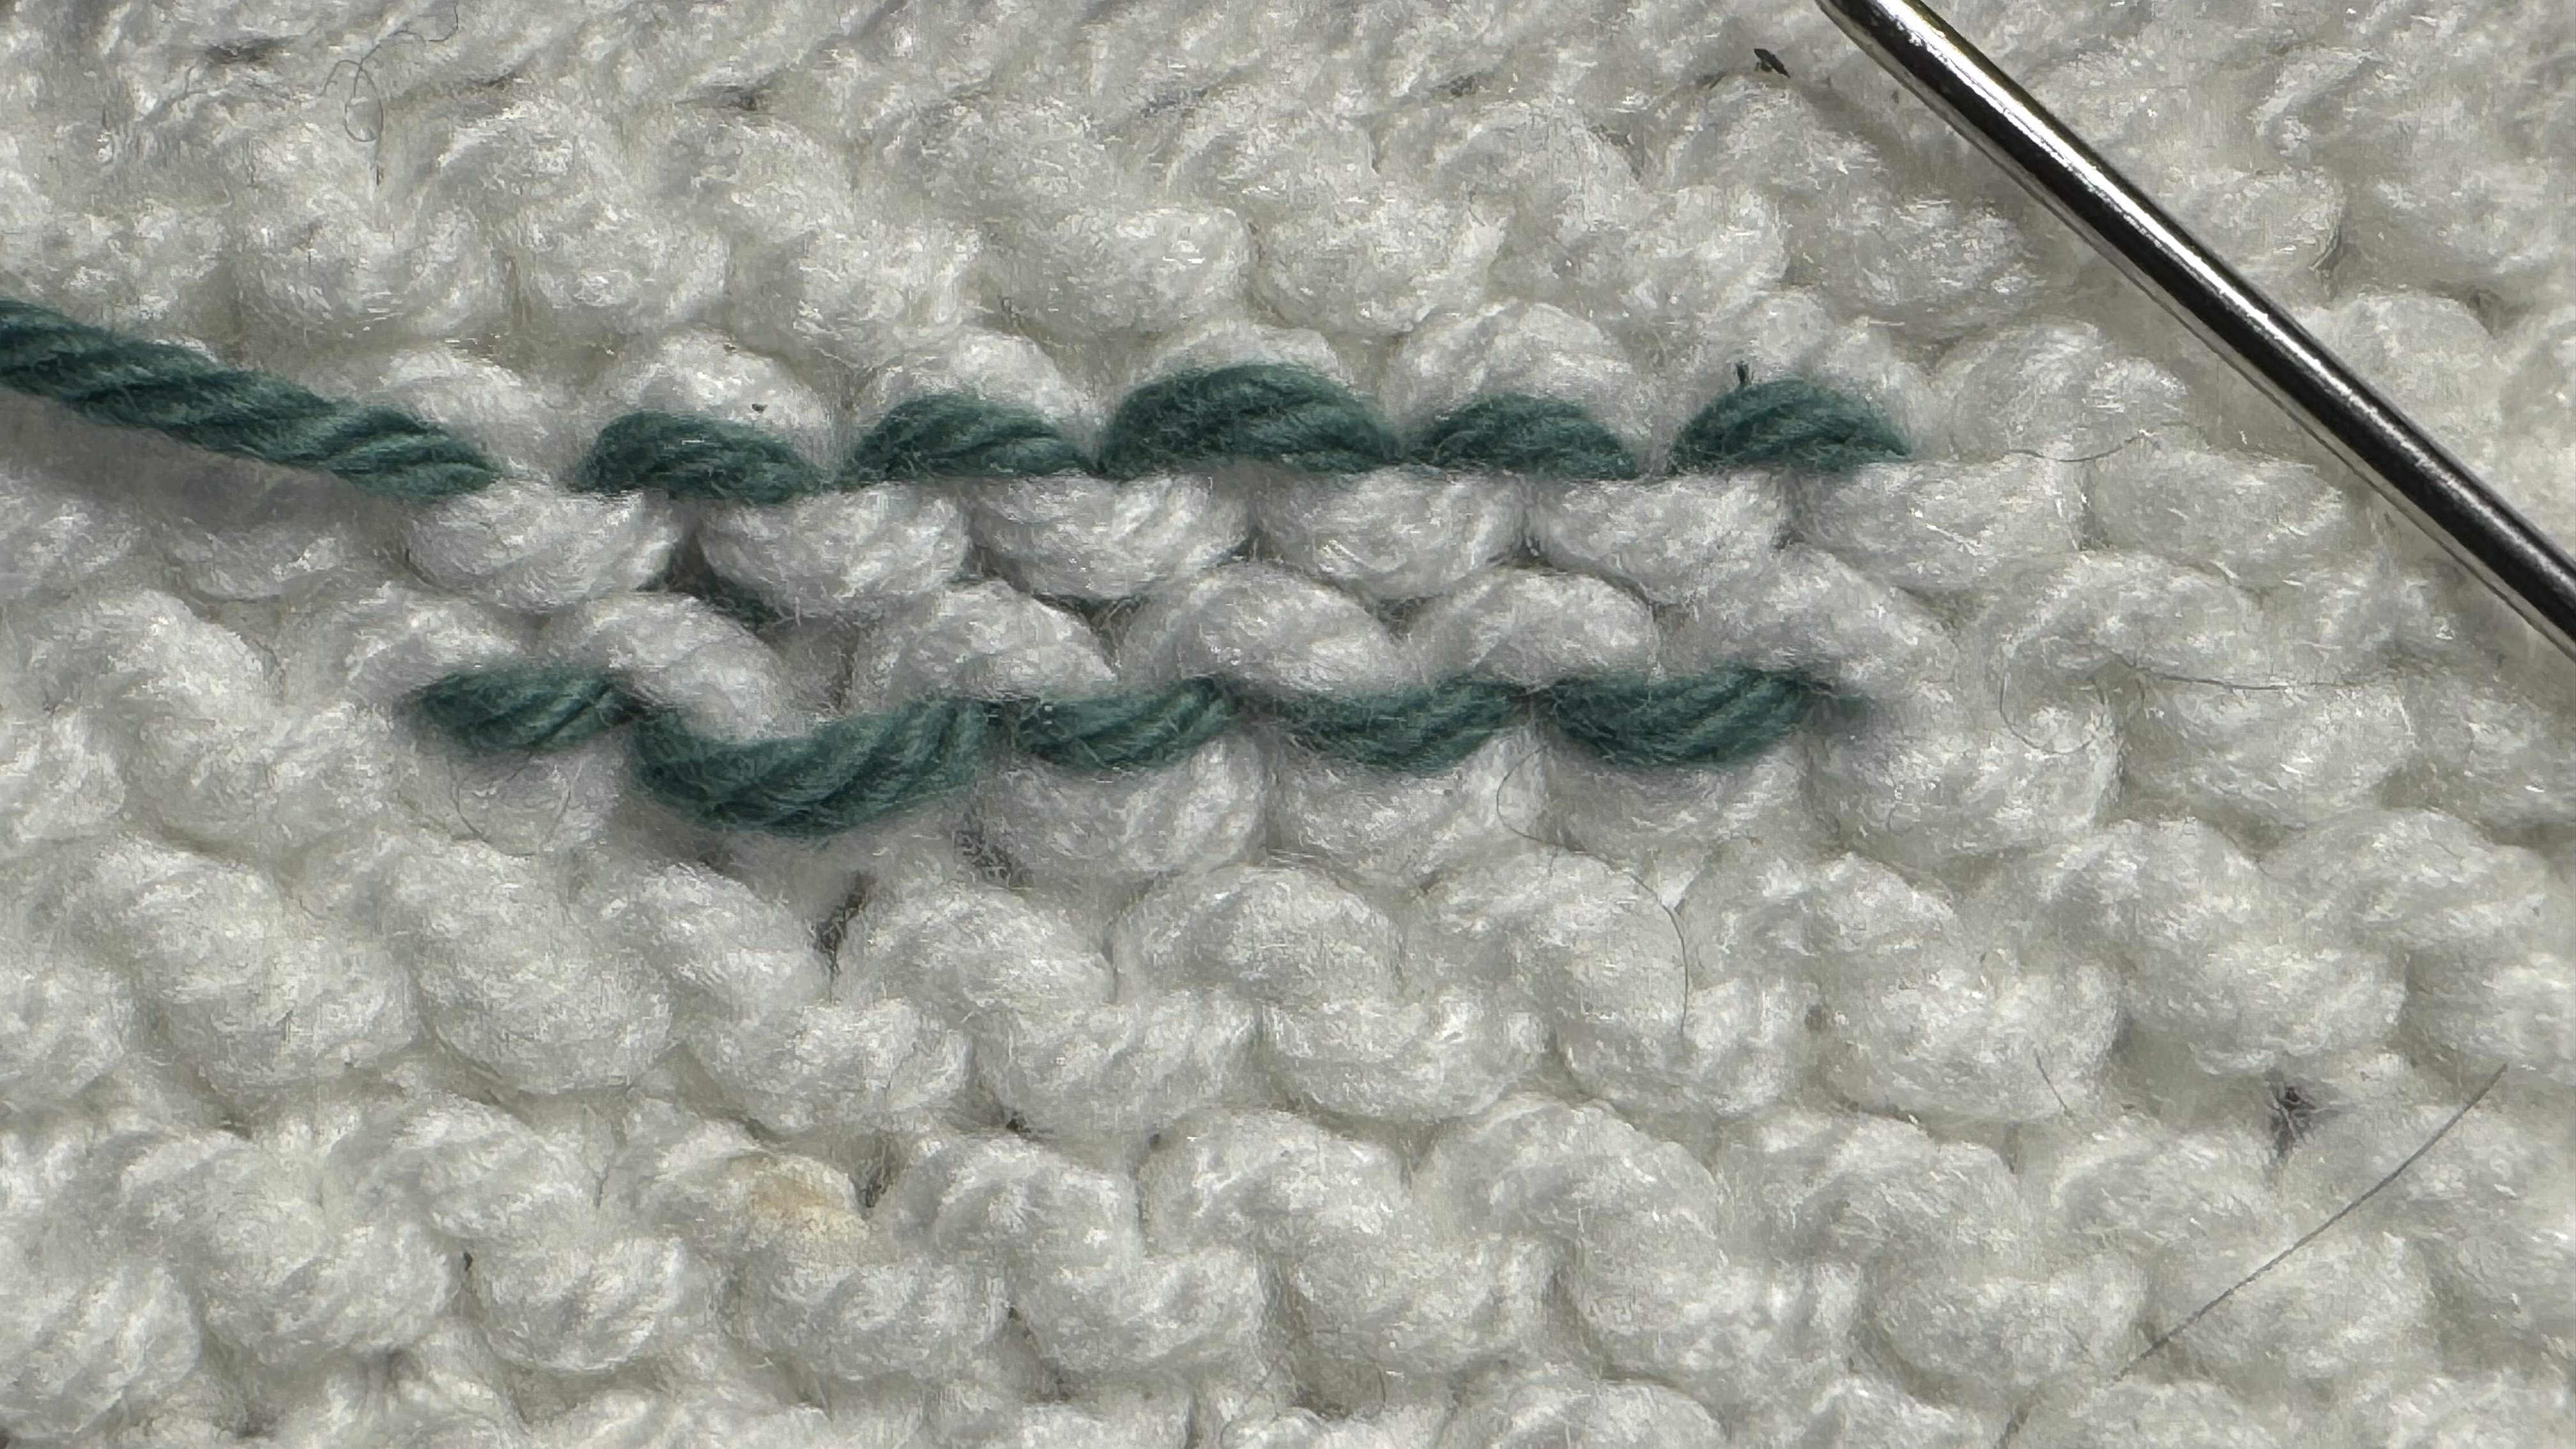 This is what it will look like on the wrong side. You would typically use your yarn tail to weave in ends. I used a contrasting color so you could see it better.
Weaving in Ends: Garter Stitch: Right Side Showing
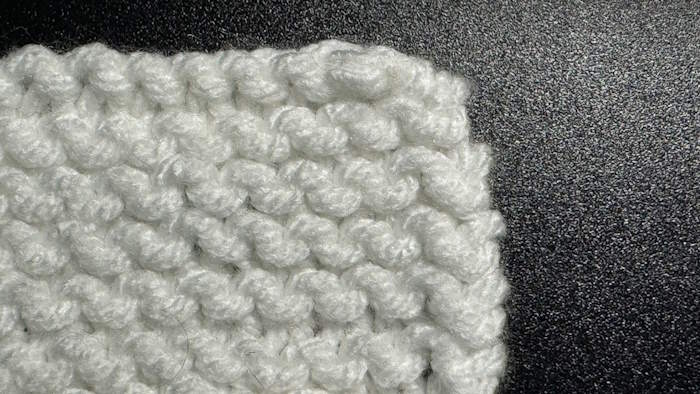 This is the right side showing. The tail weaves on the reverse side are virtually invisible.
Step-by-Step Instructions
1. Hopefully you have about a 6-inch tail. Thread a tapestry needle with the tail and get the tail to the ridges where you will begin to weave.
You will work into two ridges or a total of four rows. Do not use the edge or selvages stitches. Do not work into the cast on or bind off ends. Start at the closest smile.
2. Find a frown near the edge where the tail is located.

3. With your yarn needle threaded with the tail, go under the frown and then move diagnonal to the right to the first smile. Go under the smile.
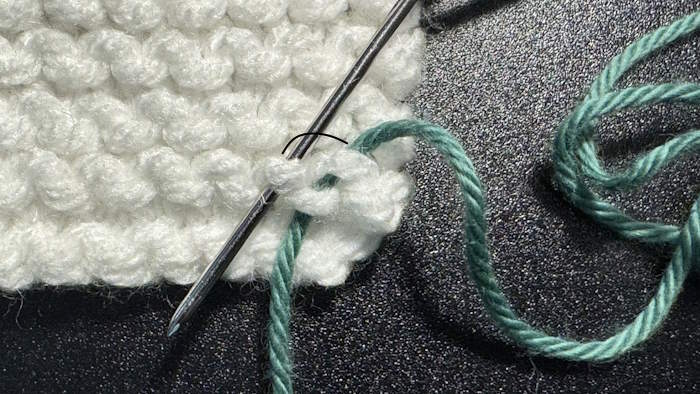
4. Move to the left and go under the frown that is next to the one where your needle and yarn are located. Go under the frown and then back to the smile where your yarn is attached.
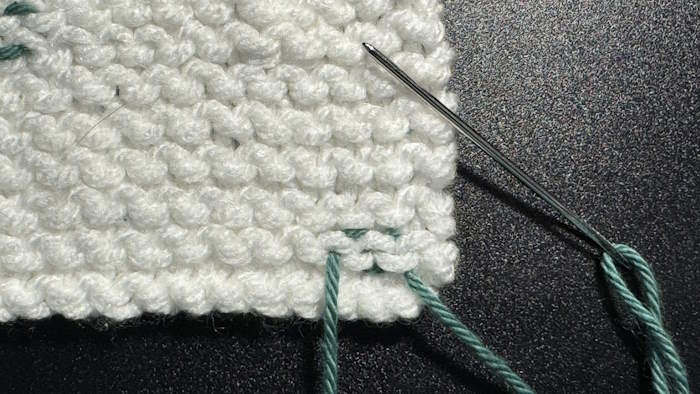 Work this pattern for about an inch to ensure the ends will not ravel out, then cut the ends closely.
Technique for Weaving in Ends in Stockinette Stitch
We are again going to use the duplicate stitch to weave in ends in the stockinette stitch pattern, similar to what we did with the garter stitch. It is done on the wrong side and it's ok to split the stitches for an even more invisible look.
You will be working with the frowns and smiles again. The next two photos show what this looks like on the right and wrong side. As you can see, it is almost invisible even with a contrasting yarn. Using the same yarn will make it virtually invisible.
Weaving in Ends: Stockinette Stitch: Wrong Side Showing
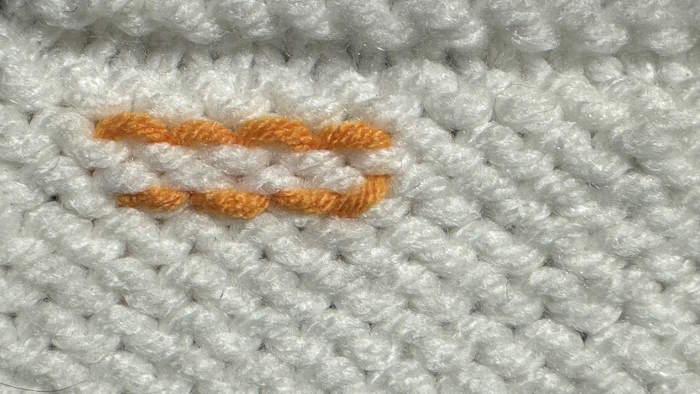 This is what it will look like on the wrong side. You would typically use your yarn tail to weave in ends. I used a contrasting color and the duplicate stitch method so you could see it better.
Weaving in Ends: Stockinette Stitch: Right Side Showing
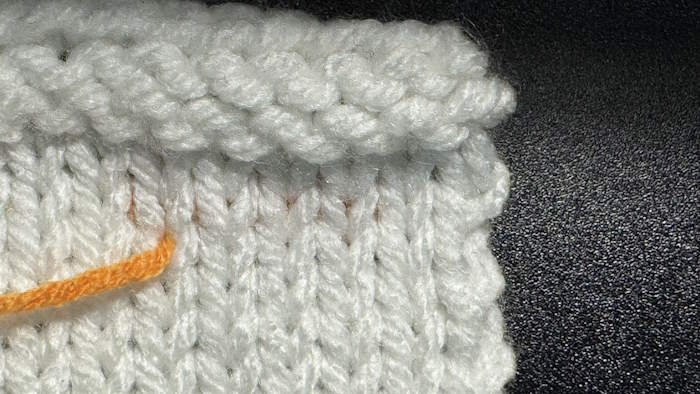 This is the right side showing. The tail weaves on the reverse side on the right side of the orange yarn tail are virtually invisible.
Step-by-Step Instructions
1. Hopefully you have about a 6-inch tail. Thread a tapestry needle with the tail and get the tail to the ridges where you will begin to weave. Again, you will work into two ridges or a total of four rows. Do not use the edge or selvages stitches. Do not work into the cast on or bind off ends. Start at the closest smile.
2. Insert your yarn needle under the frown and then under the smile above and diagnonally to the right.

3. Follow the smiles and frowns to the left to the next smile. Place your needle under the smile and then back under the initial frown. (First stitch completed)
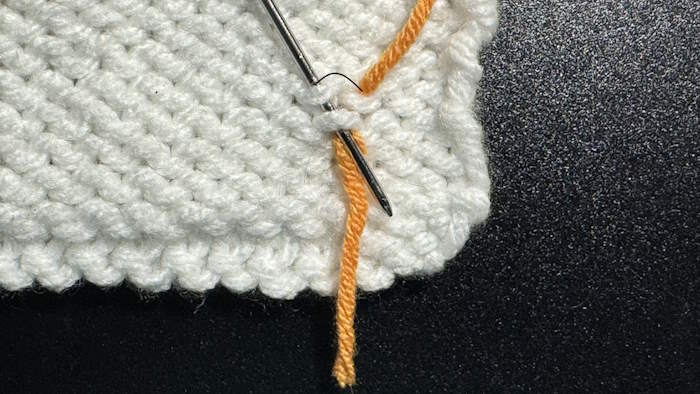
4. Moving to the left, place your yarn needle under the next frown and then up and diagnonally towards the right to the next smile.
 Continue moving to the left in a diagonal pattern.
5. Continue in this manner for about 4 stitches or about one inch. This should be plenty to assure that your end is secure and will not ravel out.
 This is how the ends would appear on the wrong side of the fabric after they were successfully woven in.
Weaving in Ends Knitting Rib Stitches
This is an easy way to weave in ends in many different kinds of ribbing stitches. It's both stretchy and invisible on the right side. I found an video, shown below that shows you how to do it.
Weaving in Ends: Ribbing: Wrong Side
 This is how weaving in ends in ribbing appears on the wrong side. If you are not using a contrasting color as I have, the weave should not show even on the wrong side.
Weaving in Ends: Ribbing: Right Side
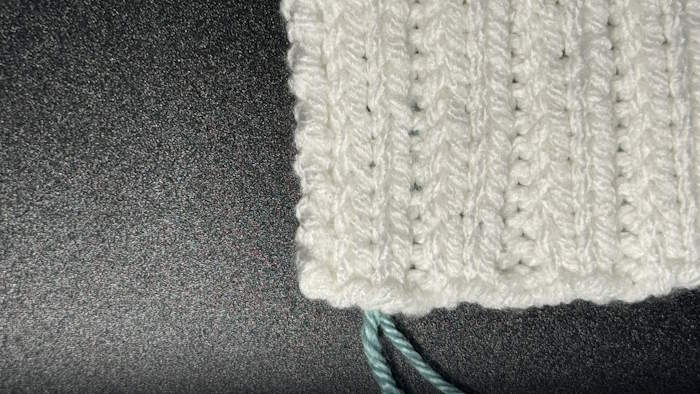 I have woven in ends on the wrong side in a contrasting color. It's hard to see any evidence of it on the right side.
Weaving in Ends: Ribbing: Step-by-Step Tutorial
- Bring your 6 inch yarn tail away from the edges and into the row of ribbing you will use for weaving in ends.
- Beginning on the right side of the row of stitches, pick up the first loop from right to left. Continue picking up the next four or five stitches from right to left.
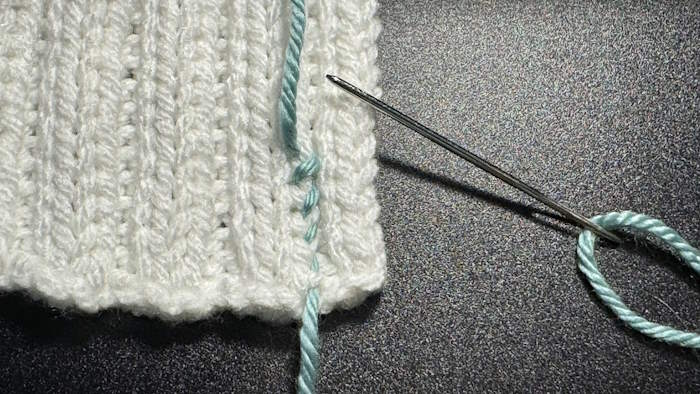 After inserting your needle under one loop, move up, picking up the same loop in every row.
3. On the next stitch, insert your yarn needle from right to left under the V shaped stitch. You may split your yarn if you are worried the weaving will show through on the right side.
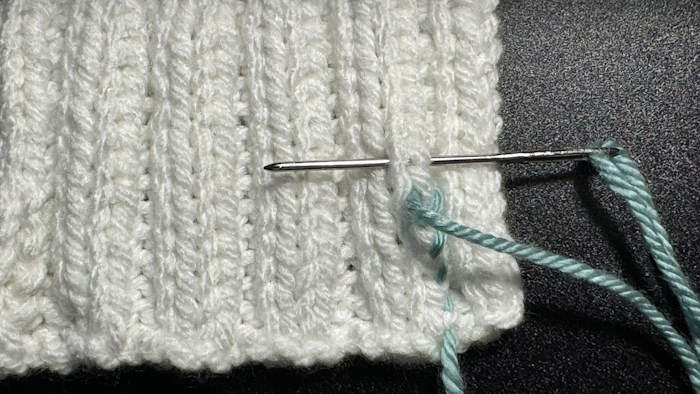 After working your way up the column several stitches, go under both sides of the rib columns.
4. On the other side of the stitches work back down picking up stitches from right to left until you reach the same place where you begin.
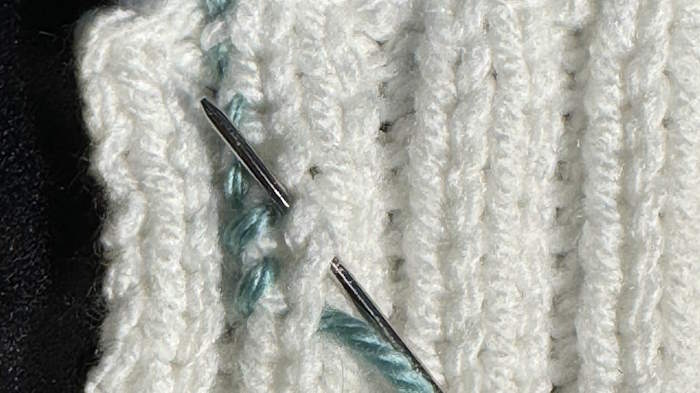 I have flipped the swatch over to work up the second column of stitches rather than working down.
Weaving in Ends: Ribbing: Video Tutorial

Weaving in Ends Knitting Seed Stitch
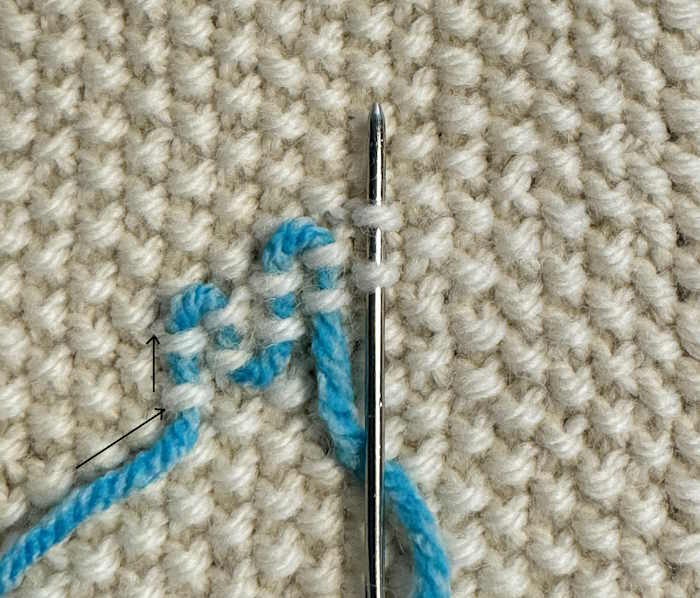 Work up and to the right as you weave in ends in the seed stitch pattern.
The seed stitch is yet another challenge for weaving in ends because if you do it in a way that it is similar to the other methods listed above, the ends show on the right side. For this reason, there are other options.
For weaving in ends in seed stitch, we will be going through the purl bumps on the wrong side of the fabric.
Step-by-Step Video Weaving in Ends, Knitting: Seed Stitch
- Insert the needle under the two closest purl bumps in a vertical column.
- Move over to the next column and find the purl bump just slightly above the one where you are and insert your needle through it and the one direcly above.
- Move to the next column and repeat the process again.
- You may do it one more time if you prefer and then snip the yarn tail close to the fabric.
How to Weave in Ends When You are working with other Knit Stitch Patterns
The garter, stockinette, rib and seed stitch patterns are very common knitting stitches that beginners learn, but they are by no means the only knit stitch patterns you will encounter.
There are many, perhaps thousands of knit stitch patterns from which to choose, so how do you know how to weave in ends in one of these more unfamiliar patterns.
One method, according to Nimble Needles is to weave in ends on the diagnonal from right to left working through purl bumps.
Another way is to bring your needle from the back to the front side between a V stitch and then weave your needle under every other horizontal loop of yarn that stretches between the ‘V’s.
Which ever method you choose, it's important to remember the goals of weaving in ends:
The goal of weaving in ends knitting is to ensure that the ends do not unravel, causing your finished project to be undone and does not show on the right side.
Common Mistakes to Avoid When Weaving in Ends Knitting
Too Loose
One common mistake when weaving in ends is not weaving them in tightly enough. Loose ends can cause your project to unravel, defeating the purpose of weaving them in. If the stitches are too loose, you maybe able to detect them on the right side.
Too Tight
If you pull the end too tightly, the fabric will pucker.
Showing on the Right Side
Another mistake is weaving the ends in the wrong direction, causing them to poke through on the right side of the work. Try splitting the yarn used to make the stitches where you are weaving in the ends.
Don't work into the edges, either the sides or the cast on or bind off edges
Working into the selvage stitches will make the edges look wrong and could interfer with the seam if you will be seaming your fabric. If you worked hard to make your cast on or bind off edges perfect, using them to weave in ends will undo all of your hard work.
Weaving in ends as you go ensures that you don't miss any and that they're woven in securely.
Tools You Need for Weaving in Ends
Weaving in ends requires a few essential tools. A tapestry needle is a must-have, as it allows you to weave in the ends seamlessly. A pair of sharp scissors is also necessary to trim the ends neatly.
If you're working with a particularly delicate project, a pair of tweezers can be helpful in guiding the ends through the stitches.
Tapestry Needles: Choose one that is appropriate for the yarn you are using. The thicker the yarn you use, the larger the eye of the needle you should choose. It's best to buy an assortment so you have the right needles available for all of your projects.
How to Troubleshoot Problems with Weaving in Ends
Sometimes weaving in ends can be more challenging than expected. If you're having trouble weaving in ends, try using a different technique or adjusting your tension.
If the ends are too short to weave in, you can try splicing them together with a Russian join or a felted join. If you're working with a particularly stubborn yarn, try using a dab of fabric glue to secure the ends.
Practice Exercises for Weaving in Ends
To master the art of weaving in ends, try practicing on a swatch or a small project. Knit a few rows in garter stitch and practice weaving in the ends using different techniques.
Once you're comfortable with garter stitch, move on to stockinette stitch and other stitch patterns. The more you practice, the more confident you'll be in weaving in ends.
Final Thoughts about Weaving in Ends Knitting
Weaving in ends is a crucial step in knitting that ensures your projects don't unravel and have a polished look. There are various techniques to weave in ends, depending on the stitch pattern and type of project.
It's essential to avoid common mistakes and use the right tools to ensure your ends are woven in securely. By practicing on swatches and small projects, you'll become a pro at weaving in ends in no time. So don't let your knitting unravel – learn how to weave in those pesky ends!
Weaving in Ends Knitting: Pin Now
About Janice
Hi, I’m Janice, the voice behind Smart-Knit-Crocheting. I love to knit and crochet and even more, I love teaching others what I know.
Though I learned to knit and crochet as a child, I didn’t get serious about these amazing hobbies until I retired. I’m a certified knit and crochet instructor through the Craft Yarn Council and am working on becoming a Master Hand Knitter through The Knitting Guild Association.
I’m currently living with my husband of over 50 years and our 6 Shih Tzu dogs.
I love hearing from you, so please drop me a line and let me know what you’re working on, whether you love knitting or crocheting more, and if you have any questions. Please visit my about me page for more information.
Happy Crocheting


