- Home
- Reversible Knit Stitch Patterns
- Waved Welt Knit Stitches
Waved Welt Knit Stitch Pattern: Beginner-Friendly Tutorial
Waved Welt Knit Stitch Pattern by Janice
When it comes to creating unique and visually striking knitted pieces, the waved welt knit stitch is a technique that can add a beautiful texture and dimension to your projects.
This stitch pattern creates a wavy, ribbed effect that is perfect for adding interest to scarves, hats, and even sweaters.
The waved welt knit stitch is a variation of the traditional rib stitch, and it involves alternating knit and purl stitches in a specific pattern to create the distinctive wavy texture. The resulting fabric has a stretchy and reversible nature,
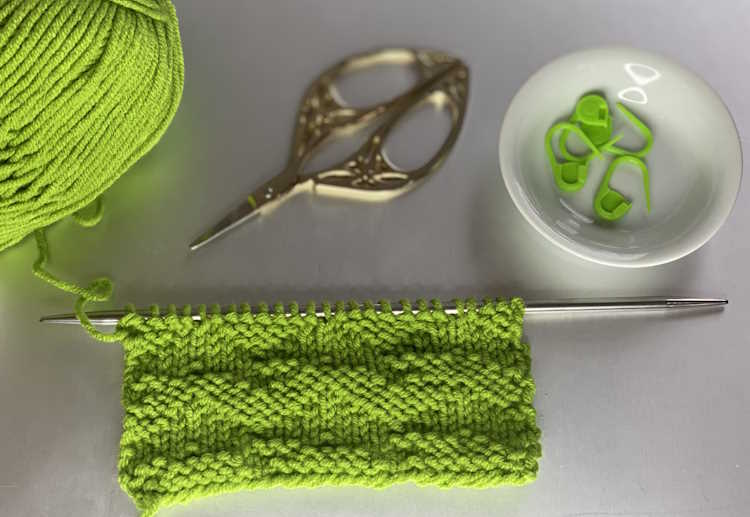 Waved Welt Knit Stitch Pattern
What Can We Use the Waved Welt Knit Stitch For?
This pattern works great when using a smooth yarn with good stitch definition. Choose this knit pattern for scarves, cowls, hats and headbands, or even a sweater.
Skill Level

Beginner / Easy
Abbreviations
K - Knit
P - Purl
CO - Cast On
BO - Bind Off
* * Repeat the instruction between the two astericks
Skills Needed
Notes
- This is an 8-row repeat
- Worked on Multiples of 8 plus 1
- Reversible
- Slightly stretchy
- Use a stitch marker to help keep track of stitch repeats
- Use a row counter to help keep track of row counts
Is This Stitch Reversible?
This is a reversible pattern. Both the front and back are identical.
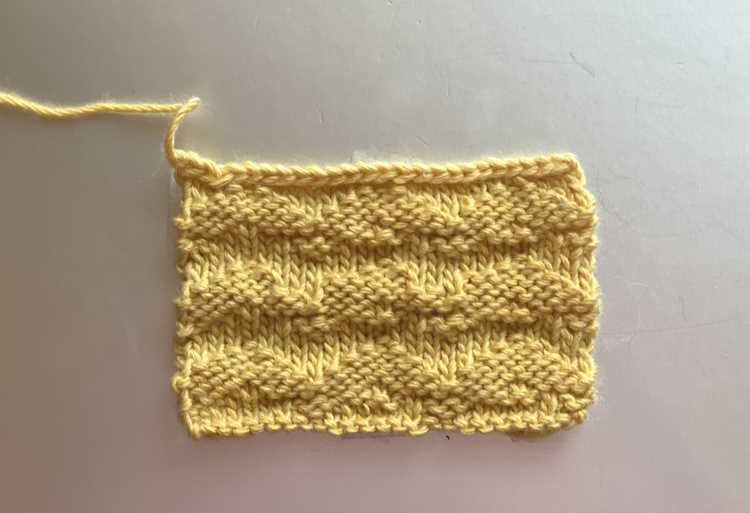 Waved Welt Knit Stitch Pattern, Right Side
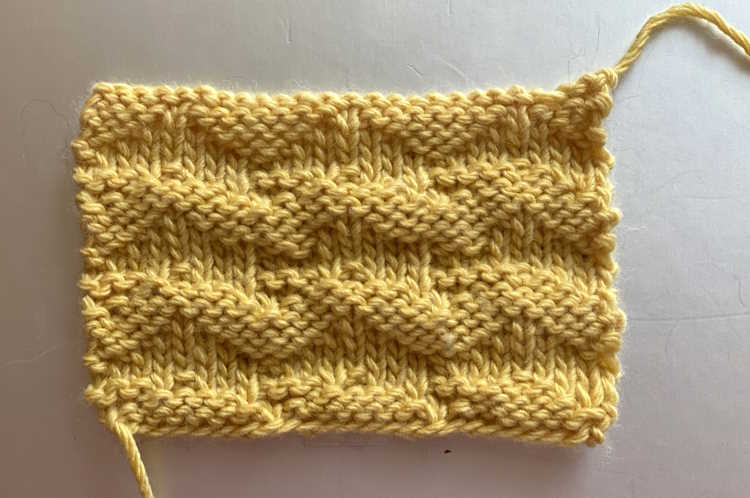 Waved Welt Knit Stitch Pattern, Wrong Side
Supplies Needed for This Tutorial
To begin, you'll need a pair of appropriately sized knitting needles that complement the weight of your chosen yarn. Additionally, selecting a yarn that showcases the texture of the stitch is key to achieving the desired effect.
Consider opting for a yarn with good stitch definition and a composition that aligns with the drape and warmth you envision for your finished project.
- Scissors
- Yarn Needle for Weaving in ends
- Stitch Markers (optional)
- Row Counter or Paper and Pencil for keeping track of your work (optional)
Directions for Working Flat
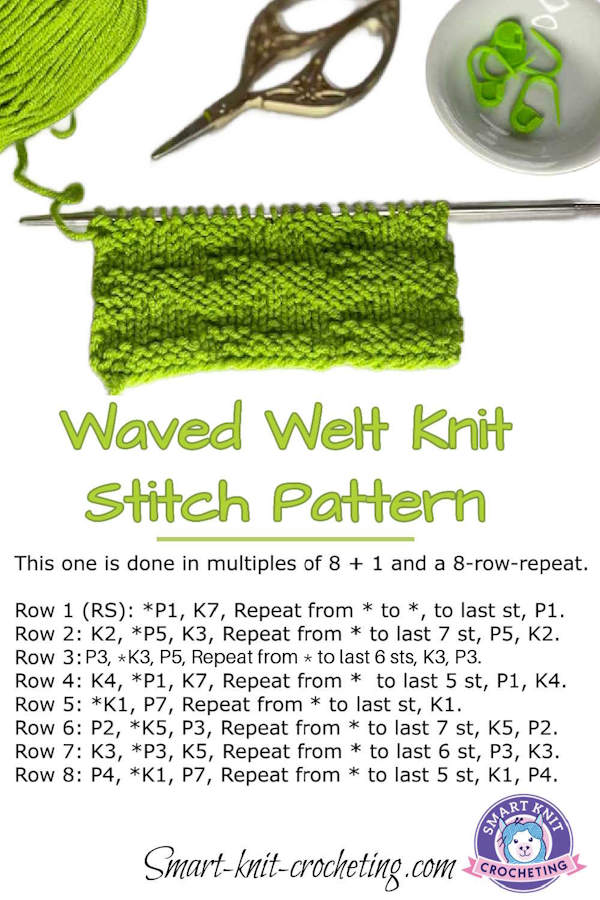
This one is done in multiples of 8 + 1 and an 8-row repeat.
Row 1 (RS): *P1, K7, Repeat from * to *, to last st, P1.
Row 2: K2, *P5, K3, Repeat from * to last 7 st, P5, K2.
Row 3: P3, *K3, P5, Repeat from * to last 6 st, K3, P3.
Row 4: K4, *P1, K7, Repeat from * to last 5 st, P1, K4.
Row 5: *K1, P7, Repeat from * to last st, K1.
Row 6: P2, *K5, P3, Repeat from * to last 7 st, K5, P2.
Row 7: K3, *P3, K5, Repeat from * to last 6 st, P3, K3.
Row 8: P4, *K1, P7, Repeat from * to last 5 st, K1, P4.
Repeat these 8 rows until you reach your desired length. Bind off and weave in ends.
Directions for Working in the Round
Cast On: A multiple of 8 stitches + 1 (for balance).
- Round 1: P1, K7; repeat to end of round.
- Round 2: K2, P5, K3; repeat to end of round.
- Round 3: P3, K3, P5; repeat to end of round.
- Round 4: K4, P1, K7; repeat to end of round.
- Round 5: K1, P7; repeat to end of round.
- Round 6: P2, K5, P3; repeat to end of round.
- Round 7: K3, P3, K5; repeat to end of round.
- Round 8: P4, K1, P7; repeat to end of round.
Repeat Rounds 1–8 until your piece measures the desired length.
Waved Welt Knit Stitch Instructions in Chart Form
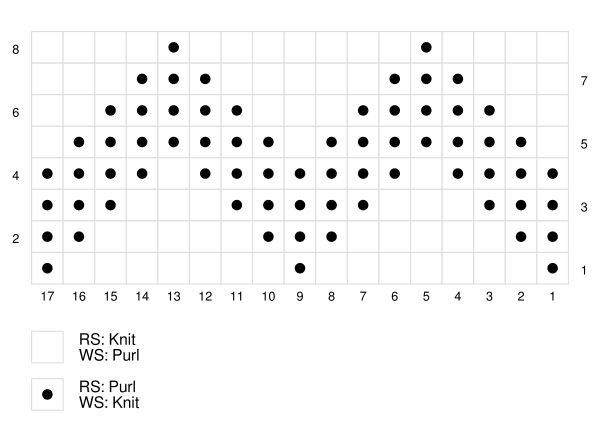 Waved Welt Knit Stitch Instructions in Chart Form
Instructions for Working in the Round
To work this stitch seamlessly in the round:
- Cast on a multiple of 8 stitches + 1 (e.g., 17, 25, 33).
- Join in the round without twisting, and place a marker to indicate the starting point.
- Work the following 8-round repeat:
- Round 1: P1, K7; repeat around, end with P1.
- Round 2: K2, P5, K3; repeat around, end with K2.
- Round 3: P3, K3, P5; repeat around, end with P3.
- Round 4: K4, P1, K7; repeat around, end with K4.
- Round 5: K1, P7; repeat around, end with K1.
- Round 6: P2, K5, P3; repeat around, end with P2.
- Round 7: K3, P3, K5; repeat around, end with K3.
- Round 8: P4, K1, P7; repeat around, end with P4.
Repeat Rounds 1–8 for the pattern.
Tips for Success for Working in the Round
- Place a stitch marker at the beginning of the round to help keep track of where the repeat starts.
- Use a row counter or tally marks to keep track of the 8-round cycle.
- Swatching in the round (using the magic loop or two-circular-needle method) is recommended to check gauge and texture before starting a project.
| Flat Knitting | In the Round |
|---|---|
| Row 1 (RS): *P1, K7*; repeat to end | Round 1: *P1, K7*; repeat to end |
| Row 2 (WS): *P2, K5, P3*; repeat to end | Round 2: *K2, P5, K3*; repeat to end |
| Row 3 (RS): *P3, K3, P5*; repeat to end | Round 3: *P3, K3, P5*; repeat to end |
| Row 4 (WS): *P4, K1, P7*; repeat to end | Round 4: *K4, P1, K7*; repeat to end |
| Row 5 (RS): *K1, P7*; repeat to end | Round 5: *K1, P7*; repeat to end |
| Row 6 (WS): *K2, P5, K3*; repeat to end | Round 6: *P2, K5, P3*; repeat to end |
| Row 7 (RS): *K3, P3, K5*; repeat to end | Round 7: *K3, P3, K5*; repeat to end |
| Row 8 (WS): *K4, P1, K7*; repeat to end | Round 8: *P4, K1, P7*; repeat to end |
Hints
Do you get confused about where you are at in a pattern? You are not alone, we all do. Here are a couple of hints to help you stay organized.
Use stitch markers to organize yourself within a row.
Use row counters or paper and pencil tally system to keep track of where you are within your 8-row repeat.
Pin for Future Reference
I hope you have enjoyed this knit stitch pattern tutorial. Please check back frequently, as I am adding new tutorials at the rate of about 2 or 3 per week.
Happy Knitting,
Janice
