- Home
- Types of Knit Stitches
- Knitting Rib Stitches
- Slip Stitch Rib
- Mistake Rib Stitch Pattern
Mistake Rib Stitch Pattern: Beginner-Friendly Step-by-Step Tutorial
Mistake Rib Stitch Pattern by Janice
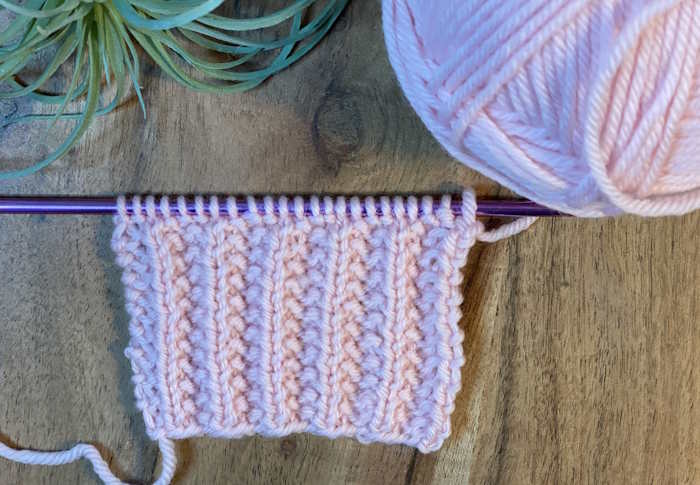
The mistake rib stitch is a super easy pattern with offset stitches that give it the characteristic name. It works just like the 2 x 2 rib stitch, but adding an extra stitch causes it to look like a mistake.
By adding just one stitch when you cast on stitches, the normal 2 x 2 rib will be displaced by that one stitch, creating a more textured fabric.

This reversible pattern makes it perfect for scarves, neck warmers, and hats where both sides are visible. Since it can be worked flat with just one row of instructions, it’s perfect for working while watching television or relaxing.
I have provided the instructions for working this stitch in the round and when worked flat.
Table of Contents
Working the Mistake Rib Stitch in the Round
Skill Level
Abbreviations
Skills Needed
Notes about the Mistake Rib Stitch
Right and Wrong Sides of the Mistake Rib Stitch
Supplies Needed
Written Instructions for Working the Mistake Rib Flat
Ideas for Using this Pattern in a Project
Mistake Rib Stitch Pattern Chart form Instructions
Working the Mistake Rib Stitch in the Round
You can work this pattern either flat or in the round. There is a tiny difference when working the pattern on circular needles. You will work two rounds rather than the one-row repeat on flat needles.
If you decide to try this in the round, I recommend placing a stitch marker at the beginning to help you keep track of where the round begins.
Cast on in multiples of four stitches, being careful not to twist the stitches.
Round 1: *K2, P2, repeat from the* to the end of the round
Round 2: P1, *K2, P2, repeat from* to the last 3 stitches, K2, P1
Repeat rounds 1 and 2 until you reach your desired length.
Bind off in a pattern and weave in ends.
Skill Level
Basic

Abbreviations Used
K – Knit
P – Purl
* * Repeat the instructions between the asterisks for the number of times indicated in the instructions
CO – Cast On
Sts - stitches
Skills Needed
How to Cast on
How to Bind off
How to Knit
How to Purl
How to Weave in Ends
Notes about the Mistake Rib Stitch
- Worked over a multiple of 4 plus 3 stitches.
- One Row Repeat
- Reversible
Is this a Reversible Pattern?
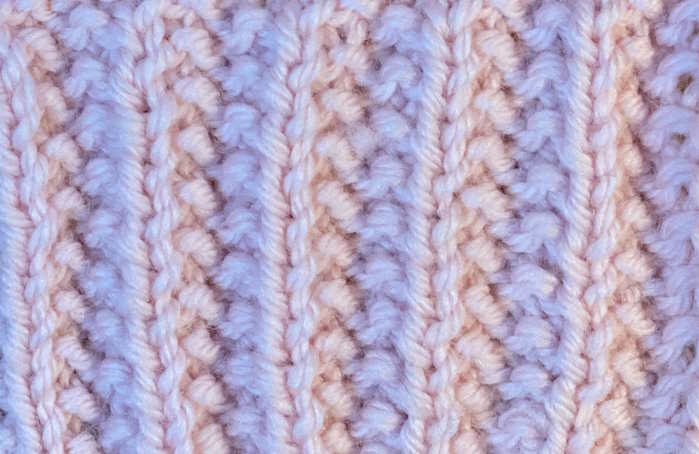
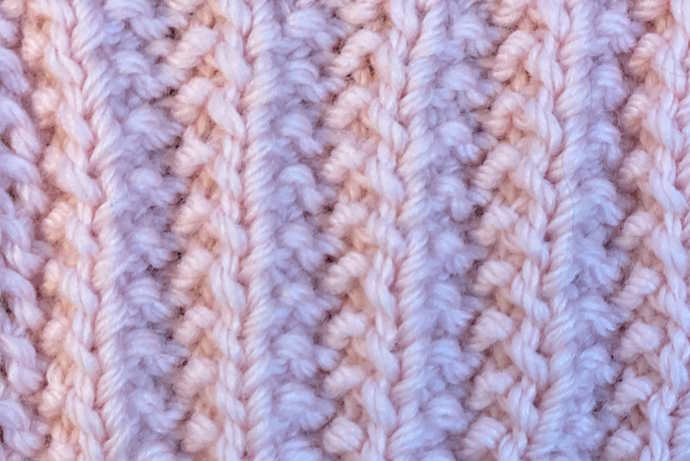
This knit pattern is reversible. Notice the photos below. They are identical.
 Mistake Rib Stitch Right Side
 Mistake Rib Stitch Pattern, Wrong Side
Supplies Needed
1. Yarn
2. Knitting Needles
3. Scissors
4. Yarn Needle for Weaving in Yarn
5. Stitch Marker (optional)
Written Directions
The pattern is worked over a multiple of 4+3 stitches.
I used Cascade Yarns 220 Superwash Merino Wool and
US 7 (4.5 mm)
I cast on 23 stitches (4x5) + 3 sts.
All rows: *K2, P2, repeat from * to last 3 sts, K2, P1.
Repeat this row until you have reached your desired length, then bind off in pattern, meaning you will knit the knits and purl the purls as you remove them from the needles.
Weave in ends.
Ideas for putting this stitch to use
Any place where you might use a rib pattern can also be used to create a fancy, textured rib, such as the Mistake Rib. Scarves, fingerless gloves, cowls, and neck warmers are great project ideas for this stitch.
Knitting Charts
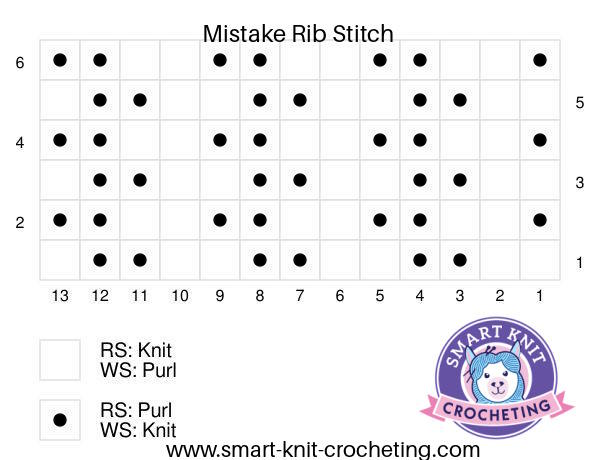
Most knitters just getting started rely on written instructions such as those above to help them learn how to knit. But instructions are also available in the form of charts.
Charts using universally understood symbols become more critical as patterns become more elaborate. The mistake rib stitch is a straightforward, beginner-friendly pattern that can be understood by reading written instructions.
It is essential, however, to learn how to follow easy charts at an early stage.

References Used
Knitting For Dummies Paperback
Mistake Rib Stitch Pattern: Pin for Future Reference
About Janice
Hi, I’m Janice, the voice behind Smart-Knit-Crocheting. I love to knit and crochet and even more, I love teaching others what I know.
Though I learned to knit and crochet as a child, I didn’t get serious about these amazing hobbies until I retired. I’m a certified knit and crochet instructor through the Craft Yarn Council and am working on becoming a Master Hand Knitter through The Knitting Guild Association.
I’m currently living with my husband of over 50 years and our 6 Shih Tzu dogs.
I love hearing from you, so please drop me a line and let me know what you’re working on, whether you love knitting or crocheting more, and if you have any questions. Please visit my about me page for more information.
Happy Crocheting


