- Home
- How to Knit: Basics
- Learn to Knit for Beginners
Learn to Knit for Beginners: A Step-by-Step Guide
Learn to Knit for Beginners by Janice Janice
Learning to knit can be the perfect hobby if you have always loved handcrafted items and have an itch to create something of your own. But if you are new and wondering how tangled balls of yarn can lead to beautiful creations, don’t worry. We've all been there.
You're about to embark on an exciting journey with this definitive guide that helps you "learn to knit for beginners." From choosing your first set of knitting needles to binding off your first project, I promise you a hand-held, step-by-step tutorial.
 Learn to Knit for Beginners
Learn to Knit for Beginners: Table of Contents
Definition and Benefits of Knitting
- The Tools needed for knitting (Needles, Yarn, All the Rest)
- Basic Knitting Terminology
- Holding the Needles and Yarn
- Basic Knitting Techniques: Slip Knot and Cast On
- Basic Stitches: Knit and Purl
- Recognize and Counting Stitches
- Removing Stitches: Bind Off Instructions
- Weaving in Ends
- Your Very First Project
- Learn How to Read Knitting Instructions
- Unraveling Knitting Mistakes
- Next Steps
Definition and Benefits of Knitting
Knitting, at its core, is a therapeutic craft, engaging fine motor skills to create charming, handmade fabrics.
Each stitch becomes a meditative process, producing remarkable mental and well-being effects. The act of knitting offers multi-faceted benefits.
- Boosts dexterity
- Improves concentration
- Achieves a state of calm mindfulness.
- Can lead to social interactions and new friends.
- Improves self-esteem.
- Relieves stress.
- Provides an outlet for creative expression.
More About the Health Benefits of Knitting and Crocheting
And I'll bet you thought knitting was all about making things, right? I thought so too until I started really getting into the meditative and healing properties.
In this rather extensive tutorial, I will walk you through all the skills you need to pick up your first knitting needles and yarn. Feel free to jump around if you have already mastered some skills. Some information below is meant to be read, while others require hands-on practice.
Learn to Knit for Beginners
Step One: Learn about the Tools & Materials Needed for Knitting
 Learn about the Tools & Materials Needed for Knitting
All crafts require some supplies and tools. If you decide to sew, you’ll need a sewing machine. Knitting is no exception, but the good news is that initially, the cost is minimal.
But, there is a massive selection of supplies such as yarn and needles, and a little explanation is in order. Learn more about supplies and tools for knitting. This article also covers information on yarn and needles.
Different Types of Yarn: Sizes, Fibers, and Weights
 Different Types of Yarn: Sizes, Fibers, and Weights
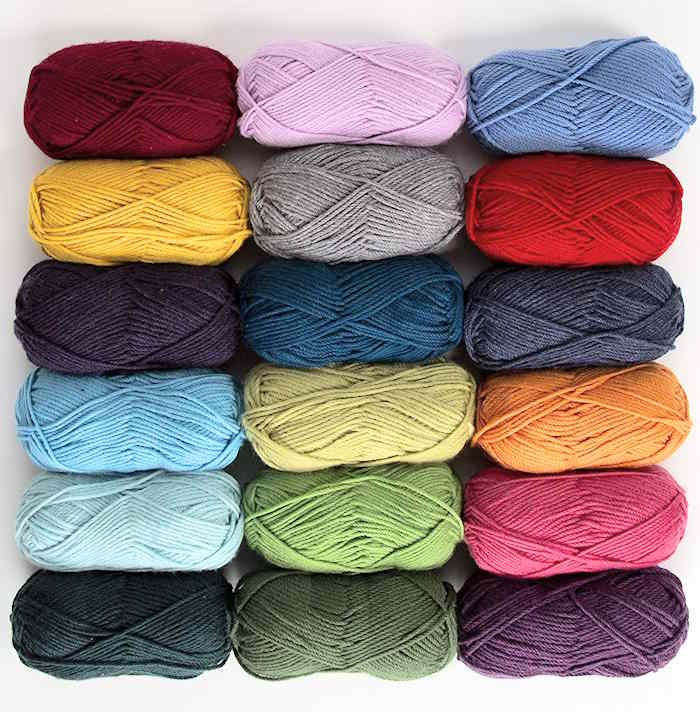
Before you can knit, you need some yarn. If you’ve gone into your local yarn shop or big box craft store, you've seen many kinds of yarn in a vast array of colors.
But before you go out and purchase some yarn, you will need to learn a bit about what you are purchasing. Yarn is available in many different weights and fibers. Each yarn’s weight corresponds to a specific type of needle. Make sense? Well it didn't to me when I first started.
So, jump over to my page and read everything about yarn. Next, check out the article about choosing the best yarn for beginning knitters.
The yarn label will help you decide if the yarn is right for your project, but understanding all the information on the label or ball band can be confusion. Learn more about reading yarn labels.
But don’t run out to buy any just yet because you will also need some needles.
Understanding Knitting Needles: Types and Sizes
 Understanding Knitting Needles: Types and Sizes
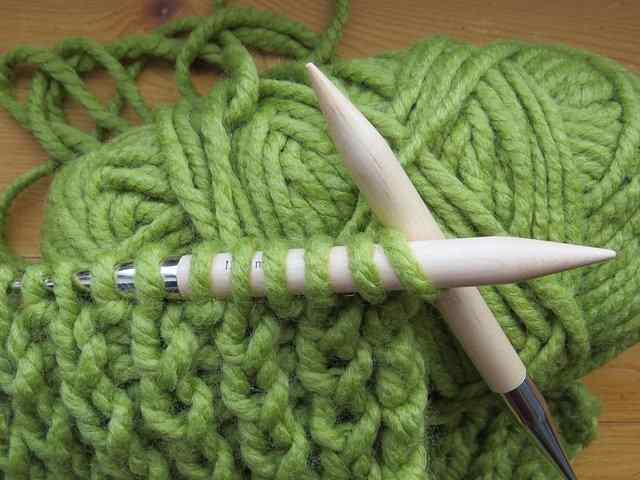
Understanding all the knitting needle types and sizes is a class in and of itself. We have straight, circular, double-pointed, and even cable needles. Each needle is made using a different material, including wood, plastic, steel, and aluminum, to name a few.
Each has its pros and cons. Needles also come in a huge range of sizes, from tiny to gigantic, and each serves a purpose. So, save yourself some money and read my pages on knitting needles. Then check out some of the other things that you may need by reading the next section.
Additional Tools: Stitch Markers, Tapestry Needles, Measuring Tape, etc.
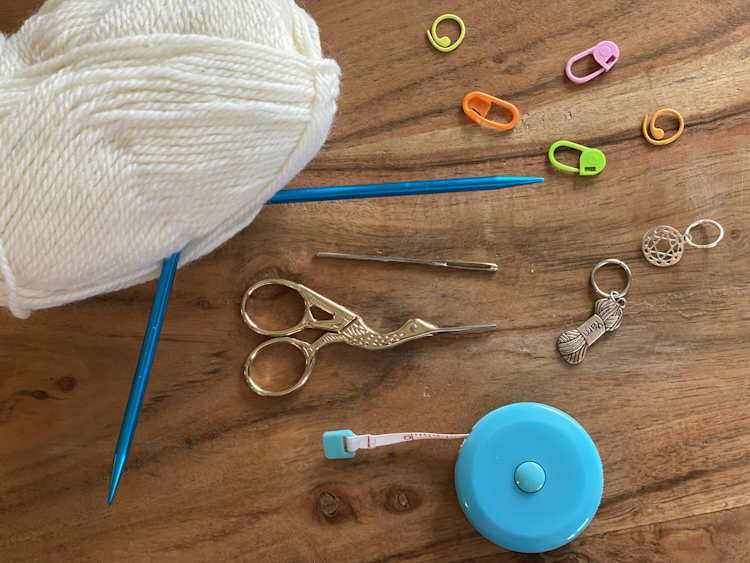
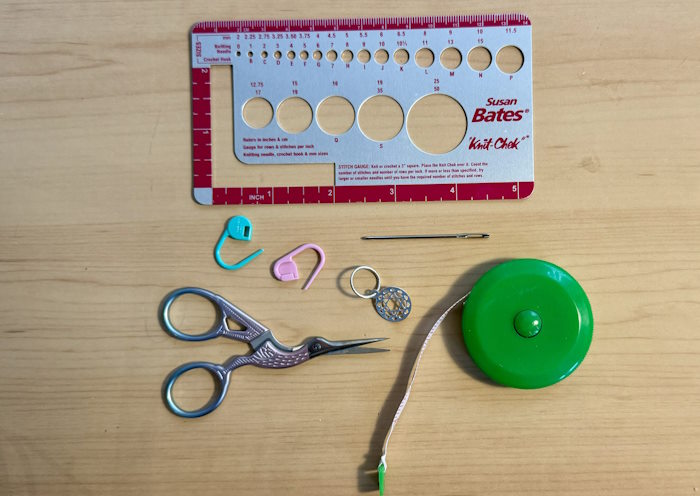 Some of the tools needed for knitting include a pair of scissors, a tape measure, some stitch markers, a tapestry needle, and a ruler; all are very reasonable in price.
By now, you may be thinking that this new hobby may be more costly than you initially thought, and it can be, but not initially. To learn to knit, you only need one pair of needles, one skein of yarn, and a pair of scissors. But once you enter your favorite craft store or explore Amazon, you’ll likely encounter a few more tools.
Eventually, you will need a few of these; luckily, most are very reasonable. Please don’t feel you need to purchase everything at once. Again, I encourage you to check out my page on tools of the trade to find out what they are and why you may ultimately need them. Jump over to my page on tools of the trade.
Step Two: Mastering The Basic Knitting Terminology
 Mastering The Basic Knitting Terminology
Like any craft, knitting has its own words and terminology to explain how to do something or label a technique.
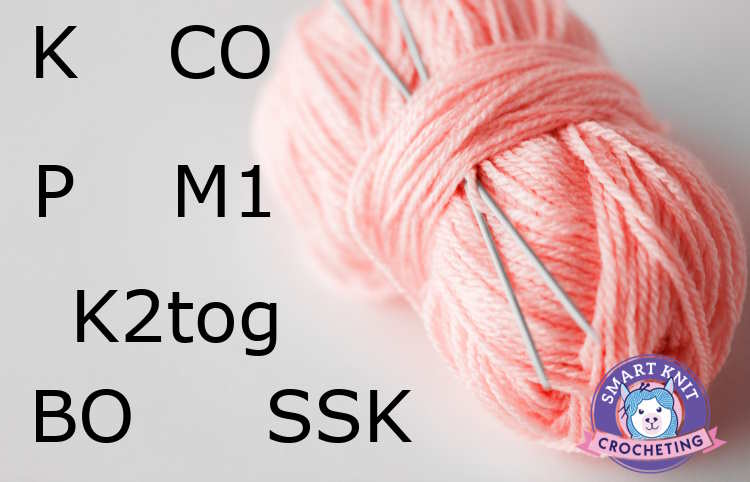
Beyond the new vocabulary you will develop, you will also learn that many of the words use abbreviations or symbols in patterns to simplify and reduce the length of the pattern.
For example, the word knit is abbreviated K. This jargon is not meant to intimidate you and will become second nature as you progress. It may seem like a foreign language, but it's not as hard as it sounds. Learn more about basic knitting terminology.
But don't get intiminated by the long list of terms and abbreviations. You will learn the most basic ones first and then as you gain experience, you'll learn more. Absolutely no need to memorize the list!
Step Three: Learn the Basics: Holding the Needles and Yarn
By now, you are likely weary of reading and want to jump in. Step three is all about learning the first steps of knitting. Before you move forward, you will need some things, namely needles and yarn.
May I suggest you purchase the following items:
- One pair of straight knitting needles (Size 7 or 8 (4.5 to 5.0 mm) in wood or bamboo
- One skein of a light-colored yarn, either white or a light pastel color. Acrylic is very inexpensive and acceptable for our purposes here. A worsted weight yarn is appropriate for a size 7 or 8 needle, but you want to read or re-read my page on needle sizes and how to match the needle size to the yarn.
- Pair of Scissors
- Tapestry Needle
How to Hold Your Needles and Yarn
So, you have your needles and yarn and are ready to start. First, let’s learn how to hold those needles. There are two common ways western knitters hold the needles and yarn: English and Continental. (There are others, but we won't get into them in this beginner tutorial)
The English method requires you to hold the yarn (called working yarn) in your dominant hand and the Continental method is worked while the working yarn is held in your nondominant hand.
Now jump over to my page on holding your needles and yarn and experiment with both methods to see which method feels more comfortable. Don’t worry if you can’t decide which method is best for you.
Once you start knitting, you may want to try both before advancing to your preferred method. OR, you may be one of those people who are equally comfortable doing both methods.
Good For You.
Continental Style
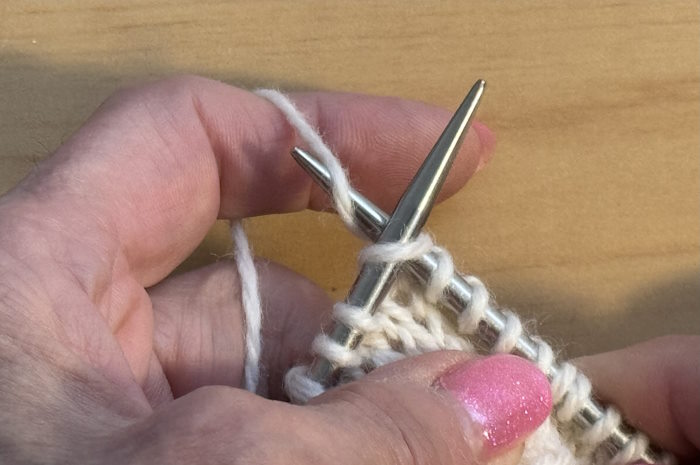 When you hold the yarn in your left hand, you are using the Continental Style.
English Style
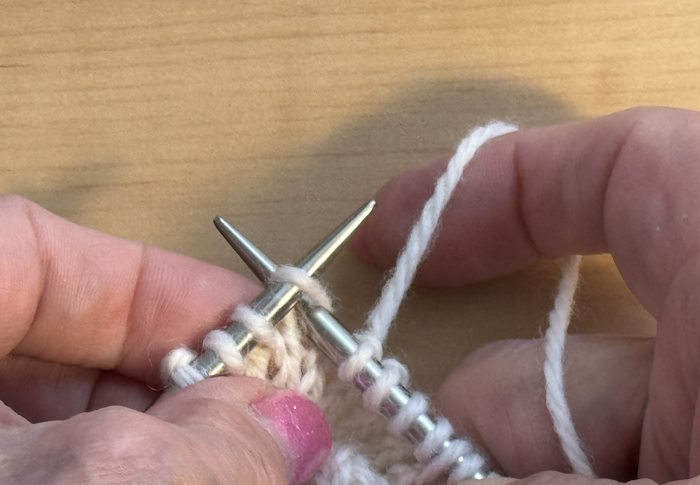 When you are holding the yarn in the right hand, you are using the English method.
Step Four: Learning Essential Knitting Techniques: Slip Knot and Cast On
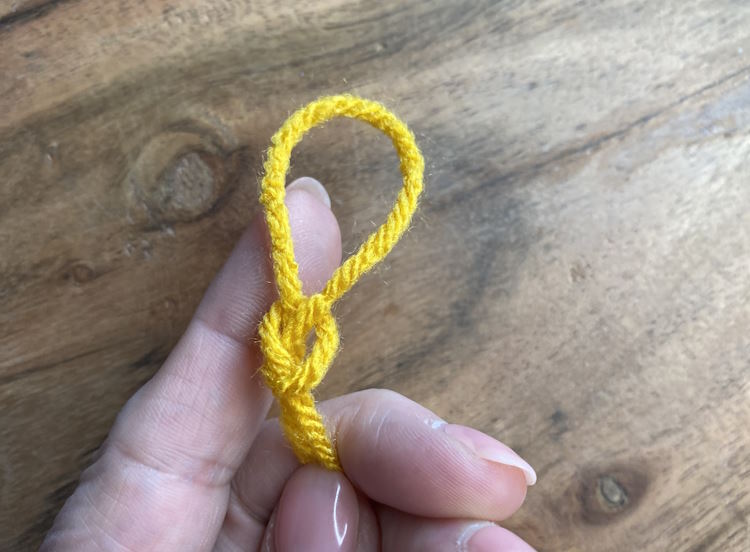
Before we can knit, we need to get some stitches onto our needles. We call that “casting on, or abbreviated “CO,” for short. The very first stitch we make is a slip knot.
 Learning Essential Knitting Techniques: Slip Knot and Cast On
Slip Knot
Though technically not required, most beginning knitters start out with a slip knot. It is not difficult to learn and there are more than one way to accomplish this simple knot. Here is a step-by-step tutorial on how to make a slip Knot.
Cast On
Once we master this easy knot, we can decide how to get those stitches on the needle. I have provided several cast-on methods, but may I suggest you choose the Knit Cast On, Longtail Cast On, or Thumb Method?
These methods are the easiest to learn, in my opinion. However, if you are keen on getting right into kniting, there is a cast on method called the knitted cast on and it is also beginner friendly.
For the knitted cast on method, you don't have to estimate how much yarn to pull from the skein before starting. You just leave about a six-inch tail for weaving in later. (I'll talk about weaving in tails later in this article.
Step Five: The Basic Stitches: Knit and Purl
There are only two basic stitches to learn because all additional stitch patterns make use of these two stitches, Knit and Purl (abbreviated K and P, respectively) in one way or another.
The Knit Stitch
 The Knit Stitch
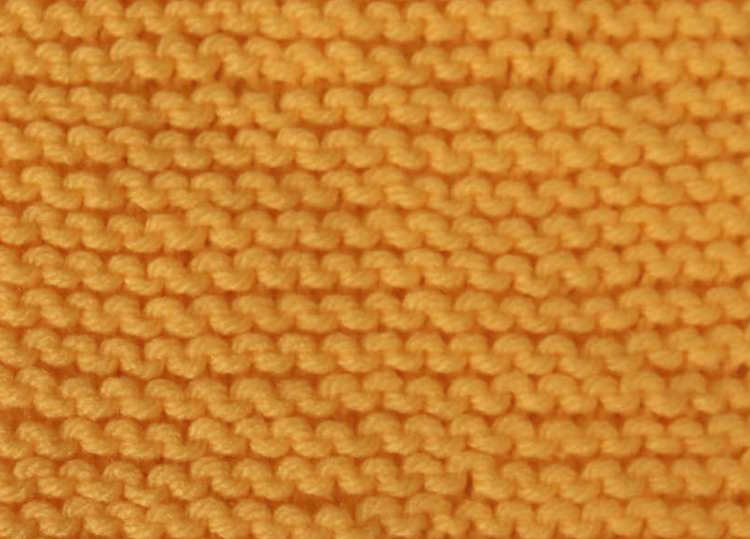
The knit stitch is the most basic, and you can use this stitch to make many projects, such as fingerless gloves, hats, scarves, washcloths, or coasters. Some people love this stitch so much that they never advance beyond the knit stitch.
When you use the knit stitch to create fabric, you use the garter stitch pattern. The garter stitch pattern can be worked in rows with a pair of straight needles or in the round using circular needles.
For this tutorial, we are using straight needles to work in rows. Now jump over to the knit stitch page and learn the techniques to create the garter stitch pattern.
Some knitters never learn to purl or hate to purl and stick with the knit stitch. You can make a very nice scarf, hat or washcloth but only making knit stitches.
The Purl Stitch
 The Purl Stitch
The purl stitch is the next stitch we will create. Once you feel comfortable with the knit stitch, check out the page on the purl stitch page and practice making purl stitches.
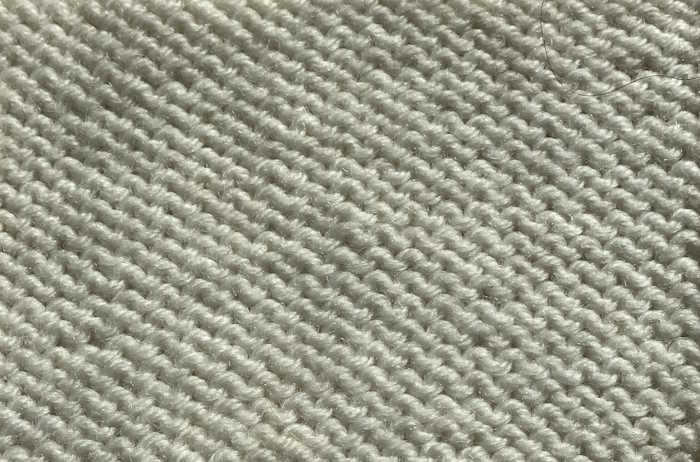
If you create fabric using only purl stitches, row after row, you are making the reverse stockinette stitch pattern as shown in the photo above.
The more common way to incorporate purl stitches is by knitting basic patterns such as the stockinette stitch pattern or ribbing.
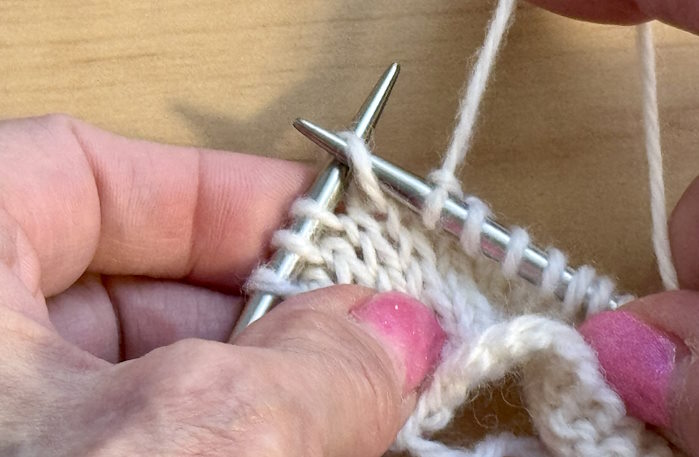 To make a purl stitch, you would insert your needle in the front with the yarn held in the front of the needle.
Stockinette Stitch
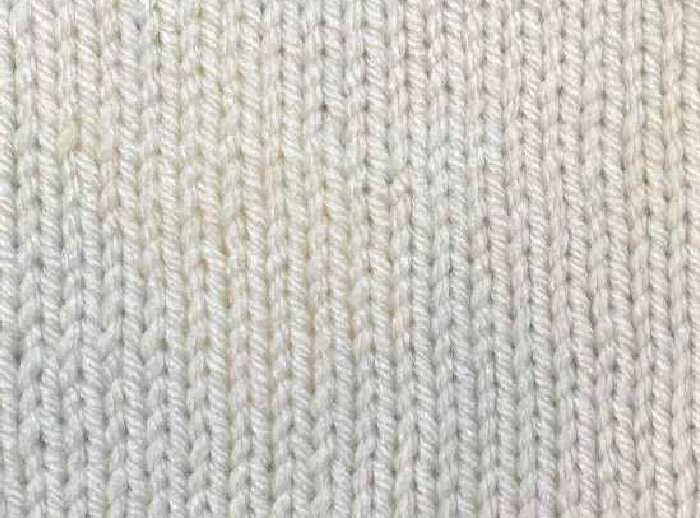 Stockinette Stitch
You create the stockinette stitch pattern if you alternate between one row of purl stitches and one row of knit stitches.
The stockinette stitch is a very common pattern used in many projects, so it does make sense to learn how to knit and purl.
Once you learn how to make the knit and purl stitches, the real fun begins. There are infinite possibilities and if you want to take a peak, check out my page on knit and purl stitches. A super easy way to practice the stockinette stitch is to make a stockinette stitch dishcloth.
Learn More About Knitting Stitches for Beginners
Step Six: Recognize and Count Stitches
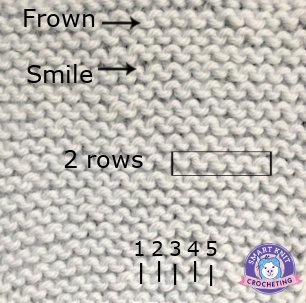 Recognize and Count Stitches
I never realized how much math went into knitting and crocheting. I say that, but math isn't really that big of a problem, but for someone with a math phobia, it is!
The good news is that beginners only need know how to count and most of us do that very well.
Why count your stitches?
In knitting (and crocheting for that matter), it is easy to gain or loose a stitch here and there when we are just learning. You might start with 20 stitches on your needles and then after four rows, your stitch count is 22. You might be wondering why this even matters. Well, for starters, if you are making a scarf, which is a project that many beginners tackle, you want it to be a long rectangle and not shaped like some irregular quadrilateral.
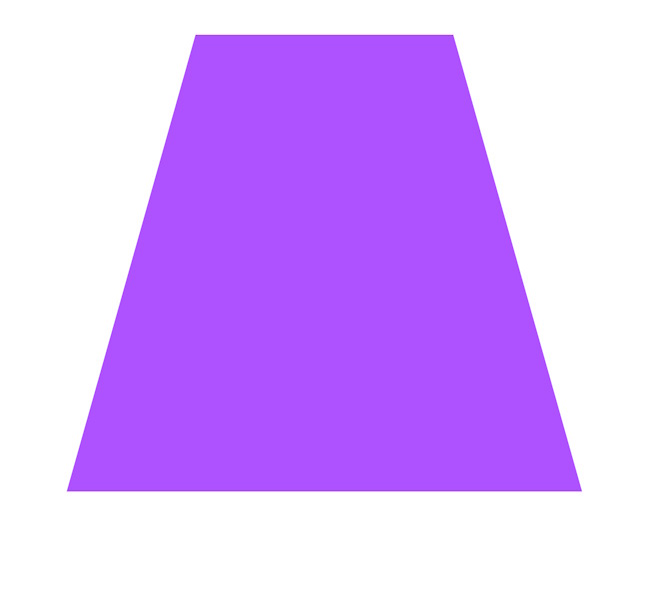 A irregular quadrilateral is a shape that has uneven edges. In the case of a scarf, one end may be wider than the other end.
Why did that happen?
In step 10 below, I cover the most common knitting mistakes and how to fix them. Hint: You probably added more stitches while working on a row)
It's well and good to know how to fix mistakes, but you must first recognize you've made a mistake and that is where counting and being able to identify stitches comes into play.
Once you can recognize your stitches you can count them. Counting will also be very important when you make your first gauge swatch, but we won't grapple with that just now.
Step Seven: How to Remove Stitches from the Needles: Bind Off
Once you have practiced placing stitches on the needle, knitting, and purling and feel comfortable with these three skills, it’s time to end and remove the stitches from the needles.
We call the removal of stitches from the needles binding off (Abbreviated BO) in US Terms. Here, we come to another little tidbit of knowledge. As I just mentioned, we call it binding off in the US. If you are in the UK, you call it Casting Off. Both terms mean the same thing.
We have many cast-on methods, but the same is true for binding-off methods. I will show you the easiest one to learn, and then, as you progress through your knitting adventure, you may pick up other methods that appeal to you or maybe more appropriate for what you are creating.
Once you have mastered the basic bind-off method, you will want to learn how to weave in your ends. Cutting the yarn close to your last stitch might initially seem appropriate, but please don’t.
If you just snip your yarn without weaving the end, the seam will eventually ravel out and you will be left with a big mess. Rather, after you have bound off your last stitch, leave a yarn tail of about six inches. You will want to learn how to weave in the yarn ends.
Step Eight: Weaving in Ends
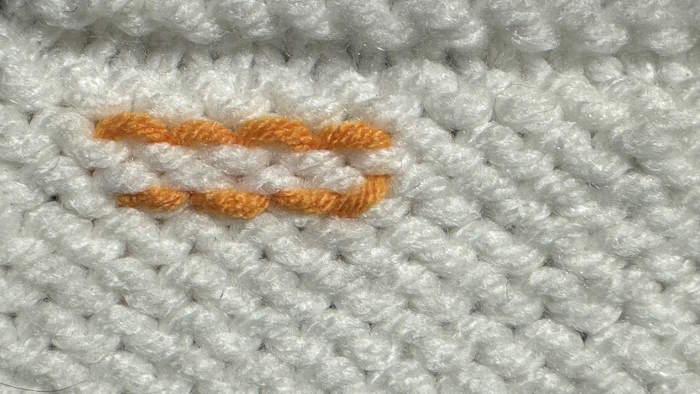 Learn to weave in ends in Stockinette Stitch
Once you've finished a swatch or project, you might think it's fine to cut the yarn and move on.
Not so fast.
If you just finish knitting and cut off the yarn, there is a very good possibility that all of your stitches will ravel out leaving you with a pile of yarn instead of your new masterpiece.
That is where weaving in ends comes into play. If you've never tried to weave in ends so they don't show on the right side of the fabric and stay in place, you should jump over to my article on weaving in ends.
Step Nine: Learn to Knit for Beginners: Your First Project
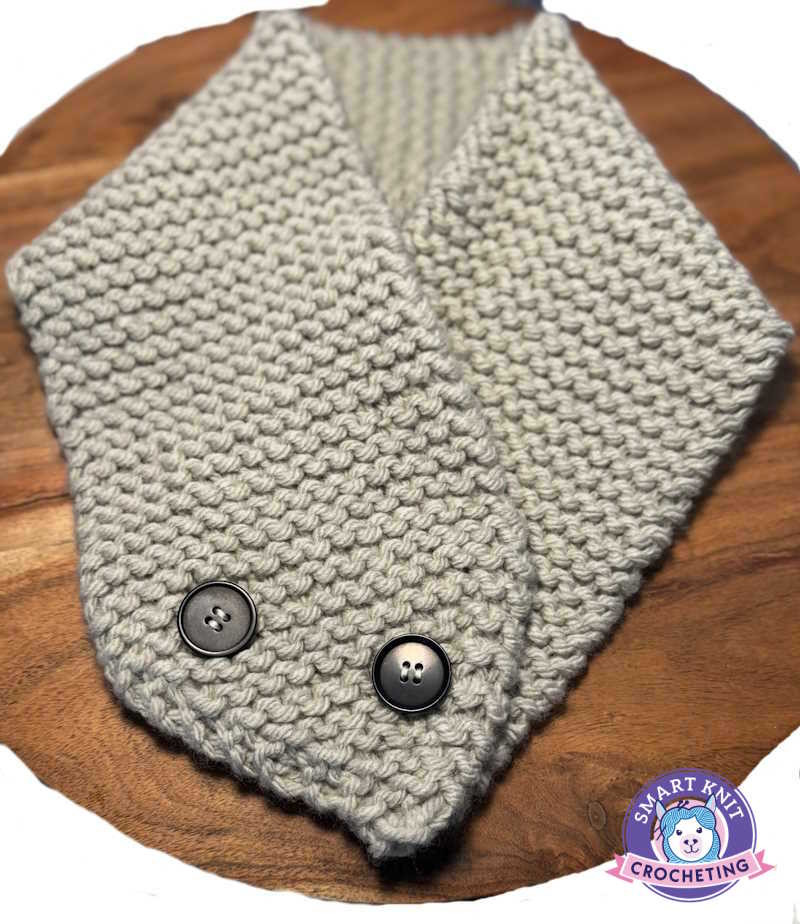
You are probably wondering when you will make your first project, and that time has come.
May I suggest that the first project you tackle have these four characteristics:
- Very Easy
- Practical
- Pretty
- Quck
For this reason, I usually recommend making a washcloth or dishcloth, a coaster set, or a pair of fingerless gloves. These three projects fulfill all my "requirements" for first projects and you can make them as pretty as you like. Before I give you some actual free patterns, lets look at how the Craft Yarn Council classifies project levels.
Understanding Craft Yarn Council's Project Levels
Are you ready to tackle your first project? Many people just begin to knit, but others have a specific project in mind that requires understanding how to read a pattern.
Knit patterns can be written in your language or in pictorial charts. Most beginning level patterns rely on written instructions. It seems straight forward, but you might benefit from understanding how to read knitting instructions.
The Craft Yarn Council has simplified how designers grade patterns from ultra-beginners to advanced. If you are just getting started, I would recommend finding a project that is labeled as basic. Many basic patterns are included on this website.
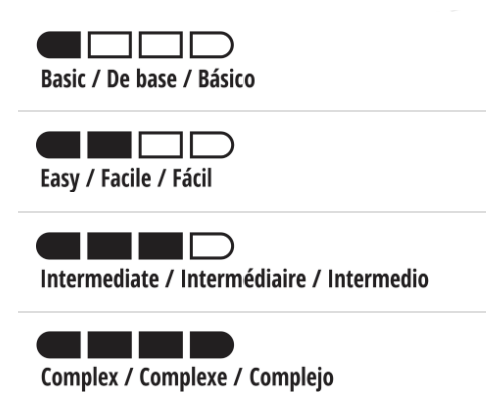 The Craft Yarn Council Difficulty Levels are based on the complexity of the project and not how long a person has been knitting or crocheting.
Items Not Suitable for First Projects
Some of these may seem silly to you as beginning knitters, but many people try to tackle them anyway.
- Items that take too long to make (blanket, shawls, scarf). You will get bored and may not want to finish them.
- Items that require any fitting such as baby clothes, sweaters (even easy ones), socks, or mittens.
- Items requiring more skills than are listed on this page.
- To recap, you will still need to:
- Select the appropriate tools and supplies
- Cast on beginning with a slip knot
- Execute the correct type of stitch pattern (knit, purl, or both)
- Bind off
- Weave in Ends
I have several ideas for you on my page about your first knitting project.
The ideas on this page do not require you to read or understand written knit patterns, but if you want to learn how to read a pattern first, that’s fine. Just keep reading.
Index of Easy Beginner Level Knit Projects
Step Ten: Guide to Reading Knitting Patterns and Instructions
Written Instructions
Most beginning knitters want to create something when they leap into knitting. If this sounds like you, you will want to learn how to read a pattern.
In my page about learning to read a knitting pattern, I cover all the basics, including what information is typically covered on the pattern and an explanation for each.
You will also need to learn a few abbreviations, but good patterns often include a list of abbreviations and an explanation for anything other than the most basic.
Knitting Charts
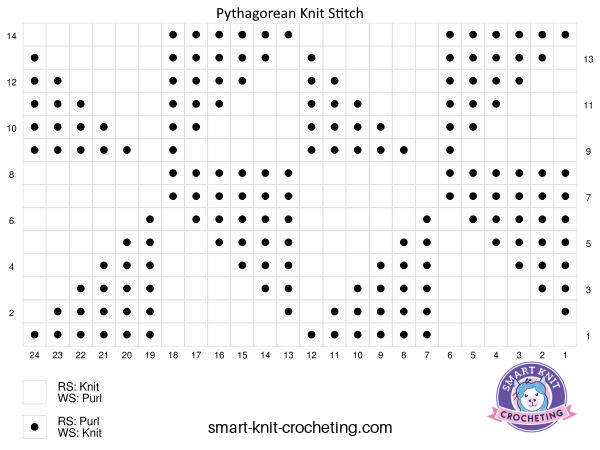
As projects become more complicated, you may encounter a knitting chart. Knitting charts use symbols, sometimes in different colors, instead of written instructions. Some patterns will provide both.
Charts are universal, meaning you don’t need to understand the abbreviations or English to use them to make a project. Some knitters prefer charts because they give you a visual idea of what the stitch should look like.
While this is not an absolute beginner skill, reading the introductory information on knitting charts is recommended.
Step Eleven: Unraveling Common Knitting Mistakes
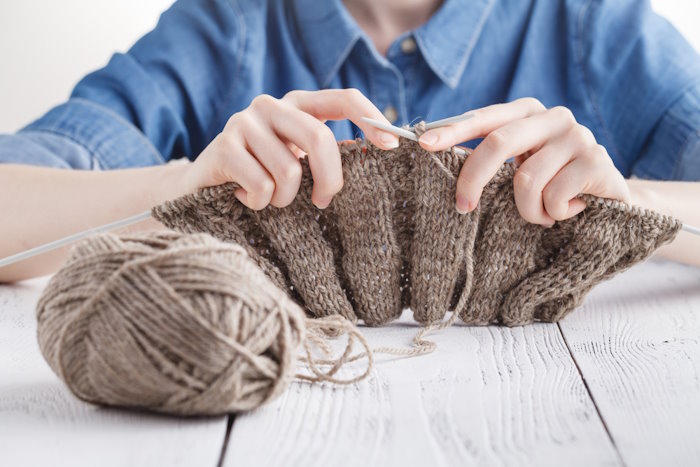 Learn to Knit for Beginners: Learn How to Correct Mistakes
No one likes to talk about mistakes, but errors are inevitable. Consider mistakes as an excellent learning tool and a way to improve our knitting.
Since most mistakes are universal, I have written a page about common knitting mistakes and how to correct them. This page is worth checking out, and if you think you’ve made a mistake and it’s not included on this page, don't hesitate to contact me; I will help you.
Step Twelve: What Comes Next?
We’ve covered the essential skills for a beginner to master to learn how to knit. But there is so much more. When you are ready to move forward, here are some basic skills to progress to more complicated projects.
- How to Increase stitches in knitting
- How to decrease stitches in knitting
- What is Gauge and How to Measure it
- How to Block Knitting Projects
- New Knit Reversible Stitch Patterns
- Ribbing and Rib Stitch Patterns
- Knitting in the Round
- Cables
- Seaming
- Lace and Eyelets
- Colorwork
Conclusion: Learn to Knit for Beginners
Embarking on a knitting journey sounds intimidating initially, but armed with the right tools, patterns, and techniques, it opens a world of creativity and relaxation.
From deciphering the type of needles and yarn in the knitting world to mastering basic knitting terminology and techniques, this article has provided a comprehensive guide for beginners eager to dive into this timeless craft.
Learn to Knit for Beginners: Pin for Future Reference
About Janice
Hi, I’m Janice, the voice behind Smart-Knit-Crocheting. I love to knit and crochet and even more, I love teaching others what I know.
Though I learned to knit and crochet as a child, I didn’t get serious about these amazing hobbies until I retired. I’m a certified knit and crochet instructor through the Craft Yarn Council and am working on becoming a Master Hand Knitter through The Knitting Guild Association.
I’m currently living with my husband of over 50 years and our 6 Shih Tzu dogs.
I love hearing from you, so please drop me a line and let me know what you’re working on, whether you love knitting or crocheting more, and if you have any questions. Please visit my about me page for more information.
Happy Crocheting
