- Home
- How to Knit: Basics
- Kitchener Stitch
Kitchener Stitch Tutorial: A Seamless Finish for Your Knitting
The Kitchener stitch (also known as grafting) seamlessly joins two live sets of stitches in knitting—meaning stitches that are still on the needles. It’s widely appreciated for creating an invisible, stretchy bind-off, making it perfect for finishing hats, joining shoulders, or closing the toes of socks.
While it's most commonly used with stockinette stitch, it also works beautifully with ribbing and garter stitch patterns.

A Bit of History
(Feel free to skip this if you're just here for the how-to!)
Though in use earlier, the stitch was named after Horatio Herbert Kitchener, 1st Earl Kitchener and British Secretary of War, who popularized it during World War I. He encouraged British and American women to knit socks for soldiers, distributing patterns that used a seamless graft to avoid irritating seams—crucial for comfort in trenches.
The Knit Kitchener Stitch
What You Will Need
- Your knitting project with live stitches on two needles
- Tapestry needle
- Yarn (same weight and color as your project)
Tip: For practice, use a contrasting yarn to clearly see each step. If this is practice, create two small swatches of stockinette stitch with the same number of stitches. Do not bind off.
Preparation
- Ensure both needles hold the same number of stitches.
- Cut your working yarn, leaving a tail about 3 times the width of your stitches, plus a few extra inches to weave in the end.
- Thread your tapestry needle.
Positioning
- If you’re right-handed, point the needles to the right (and vice versa for left-handers).
- Hold both needles parallel with the right sides of the fabric facing you.
- The working yarn should come from the rightmost stitch on the back needle.
Kitchener Stitch: Set-Up
- Insert the tapestry needle purlwise into the first stitch on the front needle. Leave it on the needle.
- Insert the tapestry needle knitwise into the first stitch on the back needle. Leave it on the needle.
Now you’re ready to begin!
The Four-Step Mantra
Memorize this:
Front knit off
Front purl on
Back purl off
Back knit on
Repeat
Step-by-Step Instructions
Step 1: Insert the tapestry needle knitwise into the first stitch on the front needle. Slip it off.
Step 2: Insert the needle purlwise into the next front stitch. Leave it on.
Step 3: Insert the needle purlwise into the first stitch on the back needle. Slip it off.
Step 4: Insert the needle knitwise into the next back stitch. Leave it on.
Repeat steps 1–4 across your row. Gently pull to keep tension even.
Step One
 Step 1: Insert your tapestry needle into the first stitch on the front needle as if to knit. Slip this stitch off the needle.
Step Two
 Step 2: Now, insert the tapestry needle into the second stitch on the front needle as if to purl and leave it on the knitting needle. Tug a little on the yarn to pull up the slack.
Step Three
 Step 3: Insert your tapestry needle into the first stitch on the back needle as if to purl and slip the stitch off of the needle.
Step Four
 Step 4: Insert the tapestry needle into the second stitch on the back needle as if to knit and leave the stitch on the needle. Pull your yarn tight.
Finishing Up
- Insert the needle knitwise into the front stitch and remove it.
- Insert the needle purlwise into the back stitch and remove it.
- Weave in the remaining tail securely on the wrong side of your work.
When you have two stitches remaining—one on each needle:

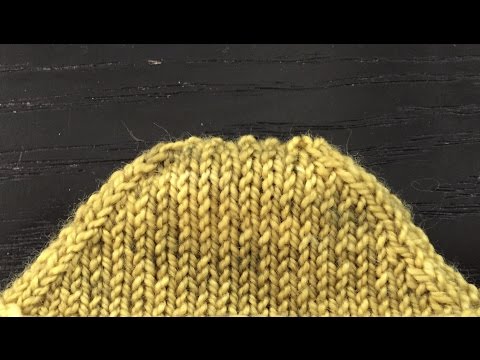
 Locating the Kitchener stitch on the front side of the fabric is challenging.
When Not to Use the Kitchener Stitch
Use this quick reference to decide when Kitchener stitch isn't the right choice for your project:
- I want a decorative or visible seam
- I need a firm, non-stretchy edge (e.g., sweater shoulder seams)
- I'm working with ribbing or garter and don’t want to modify stitches
- I need a faster or easier seaming method
- I prefer to avoid sewing with a tapestry needle
- My edge has already been bound off (not live stitches)
💡 If you’ve checked one or more of these, consider using a 3-needle bind-off, mattress stitch, or whip stitch instead of Kitchener.
Kitchener Stitch "Without the Ears"
I found this method to be the neatest way to do the Kitchener Stitch. Here is a video I found.
Tips for Success
- Practice on a swatch first.
- Keep your tension even—not too tight, not too loose.
- Don’t rush—focus on the mantra: Front knit off, Front purl on, Back purl off, Back knit on.
Tips for Success
Frequently Asked Questions
What is the mantra for the Kitchener stitch, again?
What is the mantra for the Kitchener stitch, again?
Front knit off,
Front purl on,
Back purl off,
Back knit on,
Repeat
Can you do the Kitchener stitch with an even or odd number of stitches?
Can you do the Kitchener stitch with an even or odd number of stitches?
It works best with an even number of stitches to maintain symmetry.
Is the Kitchener stitch the same as grafting?
Is the Kitchener stitch the same as grafting?
Yes, both mean the same thing.
Can you rip out Kitchener Stitch and redo it?
Can you rip out Kitchener Stitch and redo it?
Yes, but go slowly. Use a blunt needle or small crochet hook to carefully undo.
Can the Kitchener Stitch be knitted and purled instead of sewn?
Can the Kitchener Stitch be knitted and purled instead of sewn?
Yes. I found a video that walks you through how to do this without sewing or using a tapestry needle. It requires a third knitting needle of the same size as the other two, but the setup and positioning are the same. This method is NOT the three-needle bind-off, so don’t get those confused.

Kitchener Confidence Quiz
Last Words
At first glance, the Kitchener stitch can seem tricky—but once you practice a few times, it becomes second nature. It provides a smooth, invisible, and stretchy seam that looks and feels professional.
Just remember the mantra and take your time.
Happy Knitting
Kitchener Stitch: Pin for Future Reference

Disclosure: This post contains affiliate links, which means if you make a purchase from one of these links I will get a small commission.

Hi, there, I'm Janice, the voice behind this website and avid knitter and crochet enthusiast. I want to share my passion with you and help you learn how to knit or crochet, smarter.
Most Popular Pages
All Types of Crochet Stitches

36 Reversible Knit Stitch Glossary

How to Crochet the Second Row

Dog Sweater Patterns

Working with Alpaca Yarn

Free eBooks, Just for You
Get my beginner eBook guides to Knitting and Crocheting, just for signing up for my monthly newsletter.
Choose one or both when you sign up.


About the Author: Please allow me to Introduce myself

I'm Janice, the voice and writer behind Smart-Knit-Crocheting. I'm passionate about crocheting and knitting and I love being able to pass my passion onto my readers. I've been knitting and crocheting daily for about five years, but I first learned from my grandmother as a child, many years ago.
I'm a certified knitting and crochet instructor from the Craft Yarn Council and my goal is to present instructions and patterns in an easy way to understand for the absolute beginner. Always feel free to contact me (form below) if you have any questions, or just want to say hello.
Thank you for visiting Smart-Knit-Crocheting. I hope this and all of my tutorials will give you the inspiration to continue your knit or crochet journey. For a complete list of all the pages on my site, please visit my table of contents.
I participant in the Amazon Services LLC Associates Program, an affiliate advertising program designed to provide a means for sites to earn advertising fees by advertising and linking to Amazon.com. “As an Amazon Associate I earn from qualifying purchases.” These earnings go towards supporting my website.

Home | Contact | About | Privacy Policy | Disclaimer
I DO NOT SELL ANY PERSONAL INFORMATION FROM THIS WEBSITE. PLEASE SEE MY PRIVACY POLICY FOR MORE DETAILS.
Copyright © 2006-2025 Smart Knit Crocheting. All Rights Reserved
Please Share
Remember, Sharing is Caring