- Home
- How to Knit: Basics
- Illusian Knitting
Illusian Knitting or Shadow Knitting: Beginner Tutorial
Illusian Knitting, also known as Shadow Knitting or optical illusion knitting, is a fascinating technique that creates patterns or images only visible from certain angles or when viewed from a distance.
It's not new, but it was new to me when I discovered it while investigating all the different types of colorwork. Luckily, it's not difficult. Many sources say that it is beginner-friendly because it only requires you to know how to knit and purl. I wanted to go one step farther and see if I could create my own patterns, which I'll share with you in a moment.
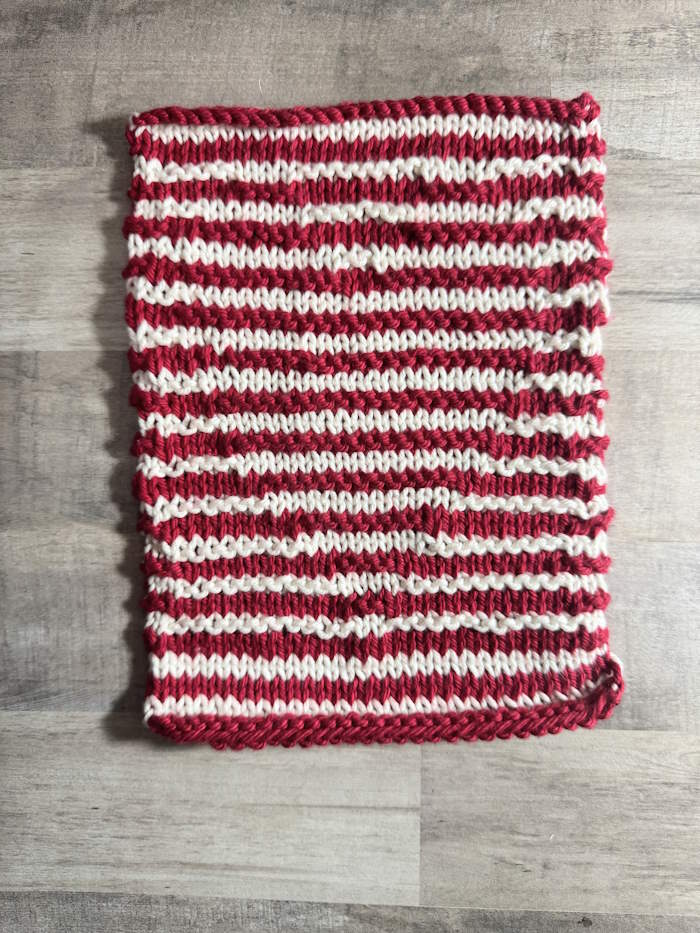
The basic principle of shadow knitting involves creating a textured surface using two contrasting colors of yarn. When viewed straight on, the knitted piece appears as simple stripes. However, a hidden pattern or image emerges when viewed from an angle or a distance.
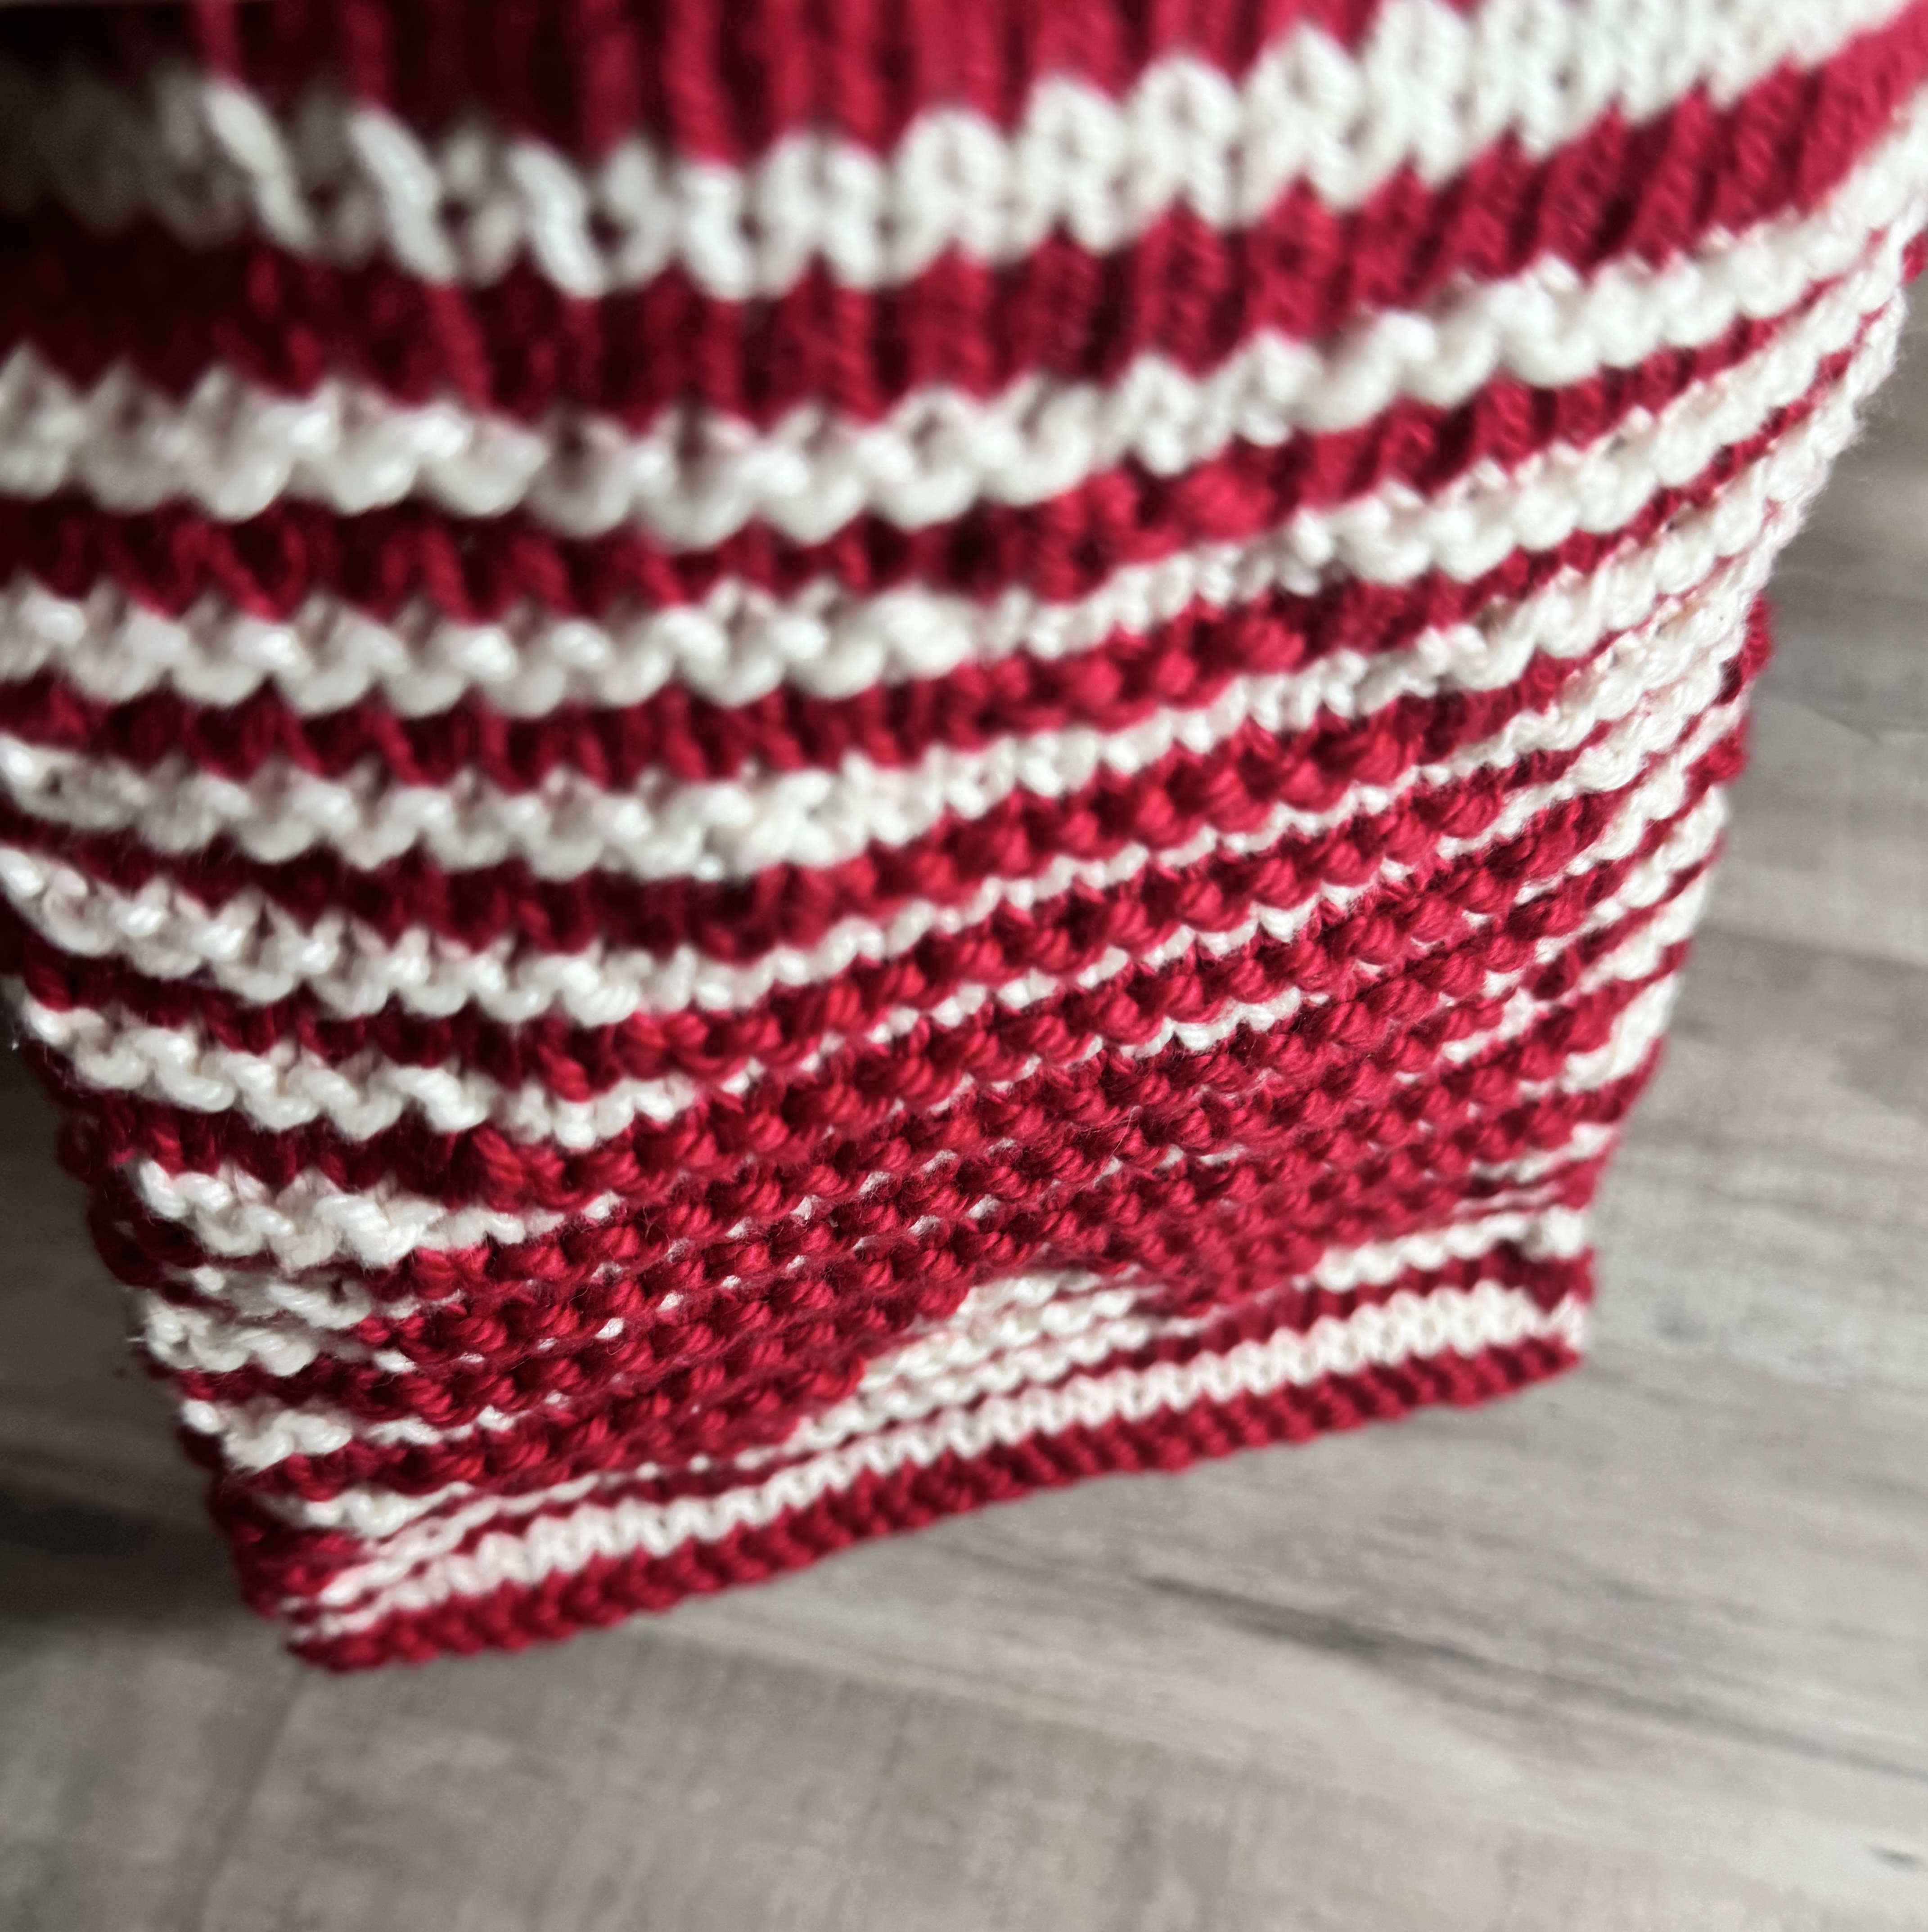 This is a heart shape upside down
This optical illusion is achieved by alternating rows of knit and purl stitches in specific sequences. The raised (knit) stitches catch the light differently than the recessed (purl) stitches, creating areas of light and shadow.
When combined with strategic color changes, these variations in texture produce the illusion of a hidden design.
This technique is relatively modern, gaining popularity in the late 20th and early 21st centuries. Steve Plummer and Pat Ashforth, a British couple known as "Woolly Thoughts," are often credited with popularizing illusion knitting.
Before that, techniques in Japanese Knitting likely popularized the techniques in Western countries.
What You Need to Know About Shadow Knitting
- Worked with two contrasting colors of yarn: one color is the background, and the other creates the hidden pattern.
- Two rows of each color are worked, creating the striped appearance on the front side. All the stitches on the right side are knitted.
- Only one color is used across each row, and the ends are carried up to the side of the fabric.
- It works entirely with knit and purl stitches, which produce texture variation. One color is primarily knitted, while the other is purled.
- The hidden pattern emerges when viewed from an angle.
- Shadow Knitting patterns can be charted or written. On the chart, each square represents a stitch and indicates whether it should be knit or purled.
- Maintaining even tension is crucial for the illusion to work effectively. This is not always easy to accomplish when changing from knit to purl stitches. However, uneven stitches can distort the hidden pattern.
- It is not reversible, but you may be able to see the pattern more clearly on the wrong side.
Materials Needed for Shadow Knitting
The materials needed for Shadow Knitting are the same as those required for other types of knitting.
Yarn: The most important thing to remember is choosing two contrasting colors (usually light and dark). You should also choose a yarn that gives a good stitch definition, such as a smooth yarn, nothing fuzzy.
Find two colors of yarn that match in weight and fiber type. So, for example, you wouldn’t want to choose a CYC #5 acrylic and a DK cotton. That won’t work.
Needle types and sizes: Any needles can be used, but you want to strive for a tight gauge, so you may want to go down one or more needle sizes
Stitch markers (optional)
Row counters (optional)
Scissors
Tapestry needle
What can you do with Shadow Knitting
- Scarves, cowls, and shawls
- Blankets and Afghans
- Sweaters and garments
- Home decor items
Carrying Yarn Up the Side of Your Work
In shadow knitting, you will work with two yarns and knit or purl two rows with each one. You won’t want to cut your yarn after each color change because that would create many ends that need to be woven in. Instead, you can carry your yarn up the side of your project. There are many different ways to do this.
This is the easiest, in my opinion.
When changing the color of yarn at the beginning of a row, move the old color to the back, pick up the new color, and start knitting. Do not make this stitch tight, as it could cause the fabric to pucker.
Reading a Shadow Knitting Chart
- Shadow knitting patterns are typically presented in chart form.
- Each row on the chart represents two rows of knitting (one in each color)
- The odd-numbered rows represent the right side.
- Each square on the chart represents one stitch. Symbols within the square will tell you whether to knit or purl. Refer to the chart key to know what the symbols mean.
- Unless otherwise indicated, charts are read from the lower right corner. That first lower right-hand square is the first stitch on the right side. Follow the stitches from right to left across the row for the first right-hand side. Move up one row and read the stitches for the wrong side row from left to right.
- If written correctly, all odd-numbered rows are right-side rows (read from right to left), and all rows marked with an even number are wrong-side rows (read from left to right).
- Charts should include a key that identifies the symbols used on the chart.
How to Proceed
You can either use a shadow knitting pattern that someone else has written or design your own. I recommend initially using someone else’s pattern until you get comfortable with the process. After that, feel free to create some designs of your own.
Work a Simple Shadow Knitting Design
Here is a simple design for your first project.
Create Your Own Design
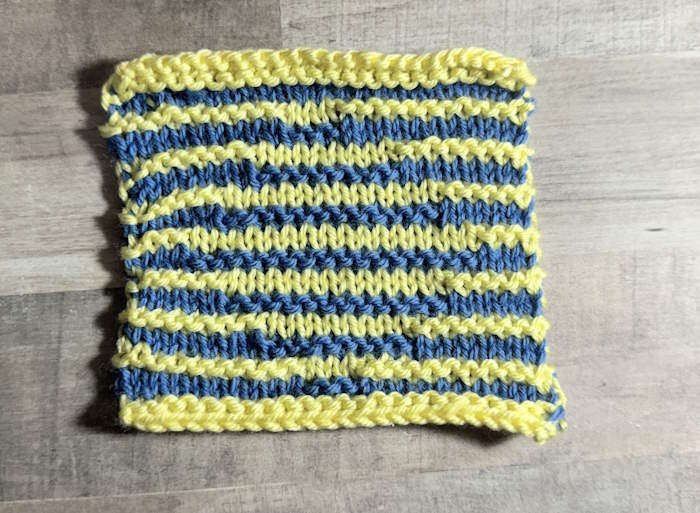
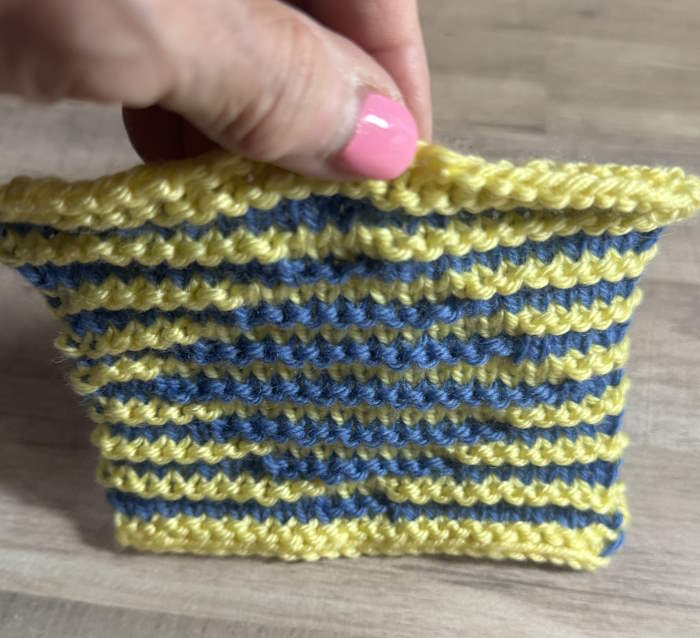
Even if you have never designed a knit pattern, you can make a shadow knitting project without to much difficulty.
When designing your Illusion Knitting pattern, I recommend starting with simple designs such as squares, triangles, or circles and then working towards something more complex, such as hearts, stars, or letters. I provide some additional information below about designing your own.
What will you need:
- Graph paper (knitting graph paper is great, but any other graph paper will do initially
- Pencil and eraser
- Colored Pencils
- Black pen or Sharpie
Design Your Own: Step One
Start with a piece of graph paper (Ordinary or knit). You may also prefer to make your own using MS Word and the Insert Table command. Another way to do make this is with the help of an online app such as Stitch Fiddle. You can also purchase illusian or shadow knitting graph paper.
Determine how many columns you will need for your project. Each column represents one stitch. For this example, I have marked off 24 columns. Number the rows and columns if desired.
Sketch your design within your grid. I’d recommend starting with something simple, such as squares or stripes unless you are good at drawing and love challenges.
You can use a ruler to draw the squares within the grid. Remember that diagonal lines and curves can be challenging in shadow knitting, so don’t start with a diamond shape.
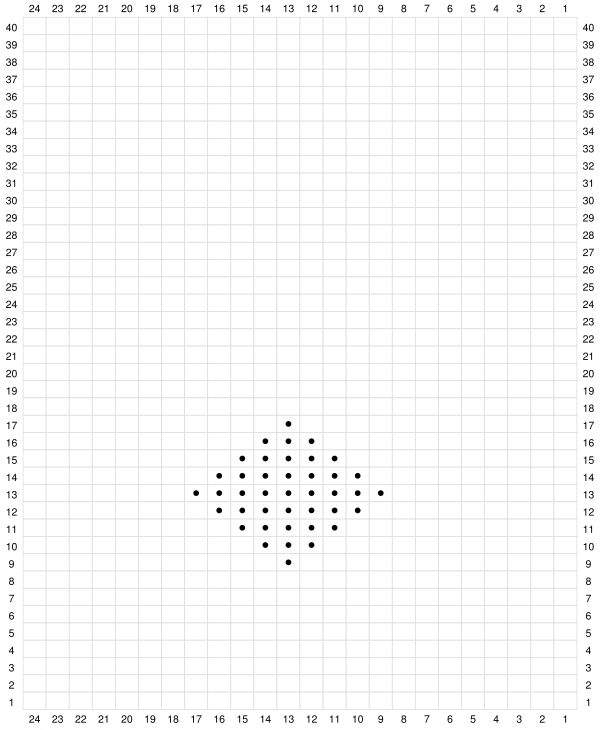
Step Two: Expand Your Sketch, Vertically
Chart your design again, but this time put three blank rows between each of your original ones.
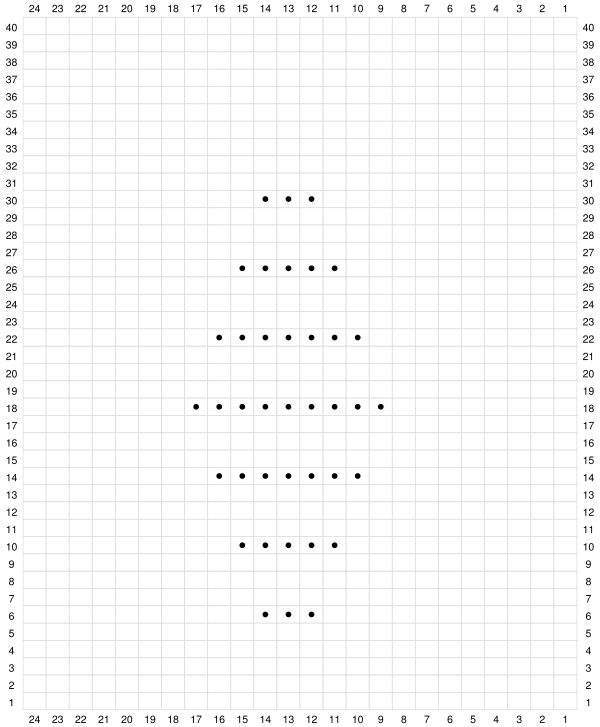
Step Three: Expand Horizontally
Expand your design horizontally so it fills up more of the grid space. (See photo below)
Step Four: Color in the Lines
You will need two colored pencils or if you prefer, leave part of the chart white and color in the other part. To do this, color the first two rows with one color, the next two rows with the contrasting color, and then alternate to fill up the grid.
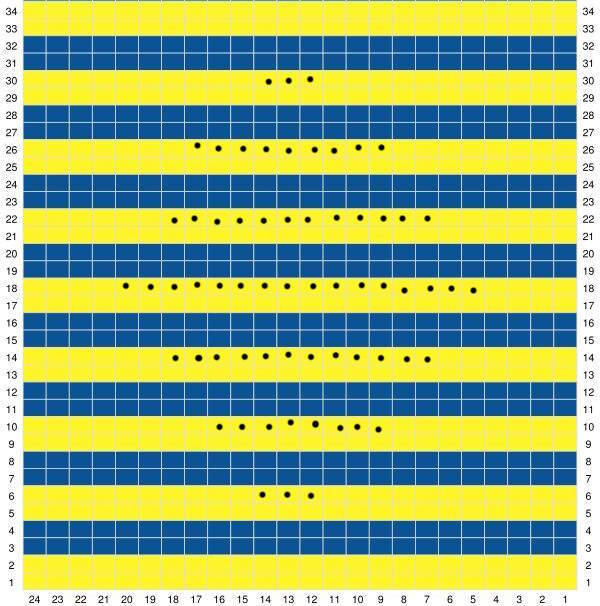
Step Five: Create Written Instructions from Your Chart
Follow the chart to write directions. The written for the chart pictured above looks like this:
Yellow: (main color, MC)
Blue: (contrasting color, CC)
Abbreviations
K = knit
P = Purl
With yellow (MC) Cast on 24
Row 1 (RS): With yellow, K
Row 2 (WS): With yellow, K
Row 3: With blue, K
Row 4: With blue, P
Row 5: With yellow, K
Row 6: With yellow, K11, P3, K10
Row 7: With blue, K
Row 8: With blue, P11, K3, P10
Row 9: With yellow, K
Row 10: With yellow, K8, P8, K8
Row 11: With blue, K
Row 12: With blue, P8, K8, P8
Row 13: With yellow, K
Row 14: With yellow, K6, P12, K6
Row 15: With blue, K
Row 16: With blue, P6, K12, P6
Row 17: With yellow, K
Row 18: With yellow, K4, P16, K4
Row 19: With blue, K
Row 20: With blue P4, K16, P4
Row 21: With yellow, K
Row 22: With yellow, K6, P12, K6
Row 23: With blue, K
Row 24: With blue, P6, K12, P6
Row 25: With yellow, K
Row 26: With yellow, K8, P8, K8
Row 27: With blue, K
Row 28: With blue, P8, K8, P8
Row 29: With yellow, K
Row 30: With yellow, K11, P3, K10
Row 31: With blue, K
Row 32: With blue, P11, K3, P10
Row 33: With yellow, K
Row 34 With yellow, K
Repeat if desired or bind off.
Conclusion
In conclusion, Illusion Knitting, also known as Shadow Knitting, is an intriguing and accessible technique that allows knitters to create fascinating optical illusions.
This method combines simple knit and purl stitches with strategic color changes to produce only visible patterns from certain angles or distances. While it may initially seem complex, the technique is beginner-friendly, requiring only basic knitting skills.
The article comprehensively introduces Shadow Knitting, covering its history, basic principles, materials needed, and potential applications. It also offers a step-by-step guide for creating your own Shadow Knitting designs, enabling knitters of all skill levels to experiment with this unique technique.
Following the instructions, readers can learn to read Shadow Knitting charts, carry yarn up the sides of their work, and even design their own patterns. This versatile technique opens up a world of creative possibilities for knitters, allowing them to produce eye-catching scarves, blankets, sweaters, and home decor items.
With practice and patience, anyone can master this technique and create stunning, conversation-starting pieces that will impress.
About Janice
Hi, I’m Janice, the voice behind Smart-Knit-Crocheting. I love to knit and crochet and even more, I love teaching others what I know.
Though I learned to knit and crochet as a child, I didn’t get serious about these amazing hobbies until I retired. I’m a certified knit and crochet instructor through the Craft Yarn Council and am working on becoming a Master Hand Knitter through The Knitting Guild Association.
I’m currently living with my husband of over 50 years and our 6 Shih Tzu dogs.
I love hearing from you, so please drop me a line and let me know what you’re working on, whether you love knitting or crocheting more, and if you have any questions. Please visit my about me page for more information.
Happy Crocheting


