- Home
- How to Crochet
- How to Read Crochet Patterns
Beginners' Guide to How to Read Crochet Patterns
How to Read Crochet Patterns by Janice Jones
Crochet is a great hobby that people of all ages can enjoy. It involves making fabric from yarn or thread using a crochet hook. Crochet patterns are instructions that help you create different designs using different stitches and techniques.
Reading a crochet pattern might seem daunting for a beginner crocheter, even like a foreign language. However, with the right guidance, anyone can learn to read and understand them.
In this beginner's guide, I will walk you through the basics of reading free crochet patterns. Remember that everyone has a different writing style, so you may see differences in patterns from one designer to another.
 How to Read Crochet Patterns
Introduction to How to Read Crochet Patterns
Before we start, it is crucial to understand that crochet patterns are written in a universal language of abbreviations and symbols known as crochet terms, even though for the beginner, it might look like some ancient form of hieroglyphics.
These abbreviations and symbols describe the stitches and techniques used in the pattern. For example, instead of writing the word "double crochet" every time it appears in the pattern, it is abbreviated as "dc." The same is true for Single Crochet stitches (sc).
Learning How to Read Crochet Patterns
Well-written crochet patterns all have certain things in common. A written pattern is perfect for an easy pattern but more complex stitch patterns may be easier to read in chart form. For this article, we will limit ourselves to reading written instructions.
Each section of the pattern provides important information, so none should be ignored. They include at least 9 sections of the pattern:
- Name of Pattern and Pattern Designer (Author)
- Introduction
- Materials List including the type of yarn used, amount, and color
- Gauge
- Finished Size
- Difficulty Level
- Abbreviations and/or Symbols
- Specialty Stitches, if needed
- Notes
- Instructions
The designer is responsible for creating a name for their design, and their name is normally added. This is important in case someone may have a question about it.
Introduction
An introduction to the pattern is often included here. Often called the "romance," it provides a quick description, reason for the creation, and anything else the designer wants to share.
Materials List
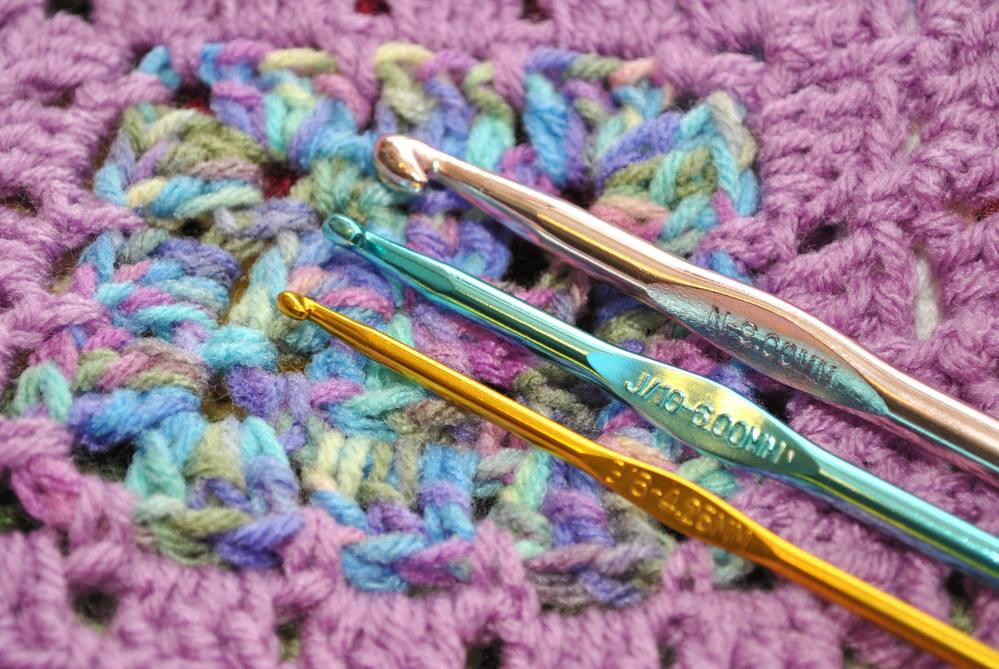
This section should list everything needed to complete the project. This will include the suggested hook size (given in US and Metric terms) and miscellaneous items such as scissors, tapestry needles, stitch markers, and, of course, yarn.
Some patterns also require additional items like pillow forms, pompoms, or purse handles.
The yarn used is listed by the Manufacture's name and name of the yarn, the yarn weight according to the Craft Yarn Council, the length of the skein in yards and meters, weight in grams/ounces, how much yarn or number of skeins needed to complete the project and the color used often listed as a number and/or name of the color.
Here is an Example of a Materials List
- Knit Picks Dishie worsted weight yarn (100 g/190 yds): I skein in color Linen
- US Size 1/9 (5.5 mm) crochet hook,
- Tapestry Needle
- Scissors
Gauge
The gauge for the stitch pattern is listed as the number of stitches and rows that fit within a 4-inch 10 x 10 cm) square area.
Making a gauge swatch before beginning the project is always a good idea. Otherwise, your project may not be the right size. This is especially crucial if you create something that needs to fit, such as a hat or a sweater.
Example of Gauge Statement: 16 dc and 12 rows = 4" [10 cm]
More about Gauge and how to Measure Gauge
Finished Size
The finished size of the project is often written in inches and centimeters.
Example: 8" x 8" (approx. 20 cm x 20 cm)
Difficulty or Skill Level
The Yarn Craft Council identifies four skill levels: Before 2019, the four Project levels were Beginner, Easy, Intermediate, and Experienced. After 2019, the four levels are Basic, Easy, Intermediate, and Complex.
The changes involved new language that defined what skills were needed based on the project. This gives you an indication of the level of difficulty for the pattern. If you are just getting started, stick with a basic or easy pattern.
Each level describes specific stitches and techniques, such as color changes, shaping, and finishing.
Basic Level
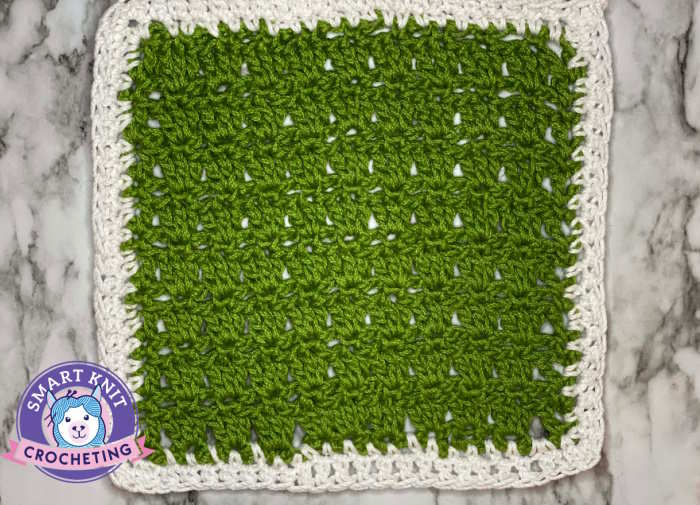 Crochet Parquet Dishcloth
"Projects using basic stitches. May include basic increases and decreases." You will see projects in this level in one color and in one or more of the basic stitches such as double crochet, half double crochet, or single crochet. Typical projects might include scarves or dishcloths. Here are a couple of examples:
Easy Level
 Crochet headband
"Projects may include basic stitch patterns, color work and/or shaping." The projects you might find in this category might include simple color changes, combination of stitches in the same row, and easy hat patterns. Here are a few examples:
Intermediate Level
"Projects may include involved stitch patterns, color work and/or shaping."
Advanced Level
"Projects may include complex stitch patterns, color work and/or shaping, using a variety of techniques simultaneously."
Common Abbreviations
Crochet language may seem very foreign initially, but once you learn a few basic stitch abbreviations, it will feel more comfortable and become second nature.
Crochet pattern abbreviations save space and make the pattern easier to read. Patterns will list standard abbreviations for most basic stitches such as:
- ch: chain
- sc: single crochet
- hdc: half double crochet
- dc: double crochet
- tr: treble crochet
- sl st: slip stitch
- RS: right side
- WS: wrong side
Familiarize yourself with these abbreviations before working on a pattern.
Find a complete list of crochet abbreviations here.
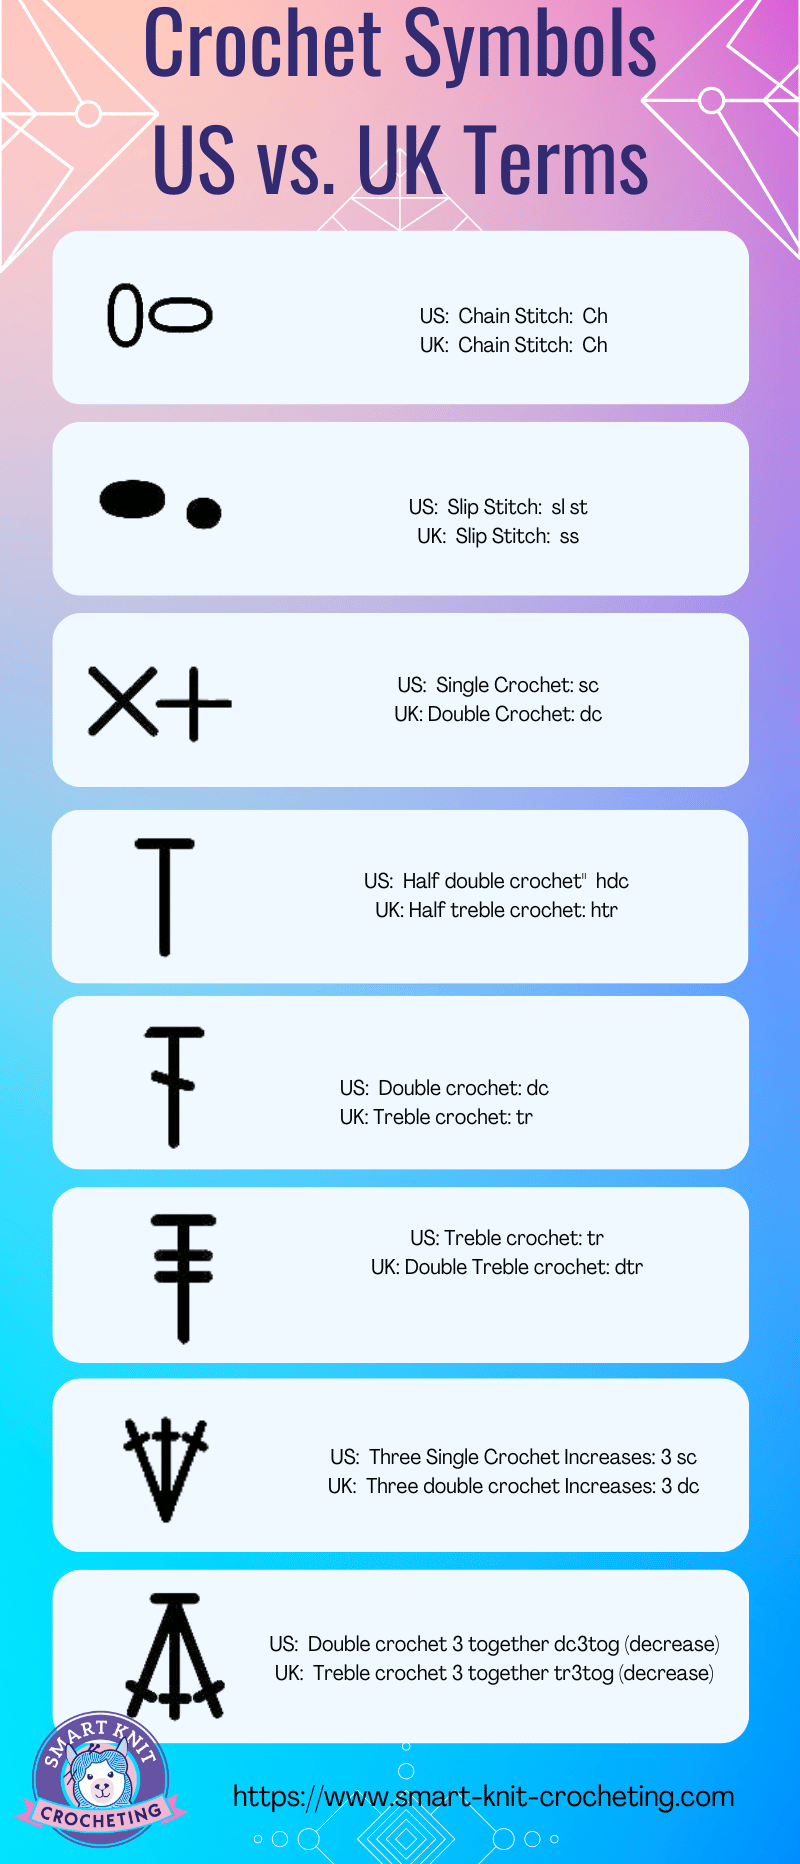
Crochet Pattern Symbols and Meanings
In addition to abbreviations, crochet patterns also use different symbols to represent different stitches and techniques. These symbols are usually included in the pattern key or legend. Some common symbols you will come across in crochet patterns include:
- YO: yarn over
- *: repeat
- (): work instructions within parentheses as many times as specified
- []: work instructions within brackets as many times as specified
- -: work instructions between hyphens as many times as specified
You will also see () and [ ] to indicate sizes if you are making something such as a sweater. The smallest size is listed first followed in parentheses by the rest of the sizes.
I always like to have the written pattern handy that I can scribble on. Circle or highlight the size you are working on, and then each time, the sizes are mentioned again. For example: XS (S, M, L) 4 dc (6 dc, 8 dc, 10 dc)
Understanding crochet symbols is essential because it can help you follow the pattern more easily. If you are unsure of what a symbol means, refer to the pattern key or legend.
Specialty Stitches
If the pattern calls for specialty stitches such as bobbles, clusters, or puff stitches, there is normally an explanation and will include abbreviations used.
EXAMPLES
Cluster Stitch (dc3tog): YO, insert hook in space, YO, draw up a loop, YO, draw through 2 loops. (2 loops left on hook) YO, insert hook back into same space, YO, draw up a loop, YO, draw through 2 loops. (3 loops left on hook) YO, insert hook back into same space, YO, draw up a loop, YO, draw through 2 loops. (4 loops left on hook) YO and draw through all 4 loops
How to Read Crochet Patterns: Pattern Notes
In the notes section, you will find any additional information the designer thinks will be helpful when finishing the project. For example, you might see notes such as, "All instructions use US terms." (as opposed to UK terms)
In addition to US or UK terms, you may also see notes on whether the pattern is worked in one piece or needs to be seamed. For beginner patterns, you might also see instructions on how to make color changes.
Finally, sometimes you might see how to handle the number of chains required at the beginning of each row. For example, "ch 3 at the beginning of the row counts as the first dc.
Example of Pattern Notes
- All instructions in US terms.
- Carry colors not used up wrong side of work.
- Ch 3 at beg of row counts as first dc.
Types of Crochet Patterns - Written vs Charted
As I mentioned briefly above, crochet patterns come in two forms: written and charted.
Written patterns use words and abbreviations to describe the stitches and techniques used in the pattern.
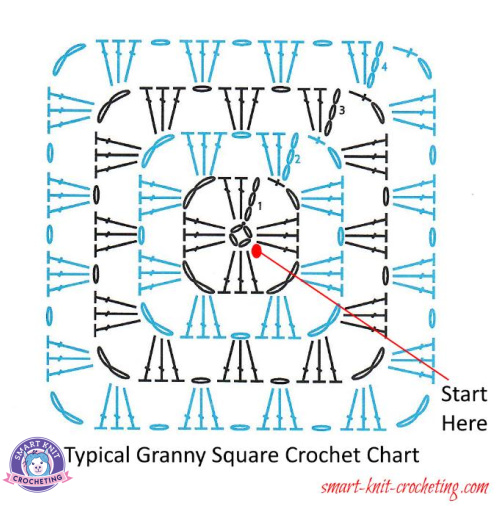
A Charted crochet diagram uses symbols to represent the stitches and techniques used in the pattern. It is a stitch diagram that includes everything you need to know to create the project. Charts show the instructions in pictorial form and many people prefer to work from them.
Charted patterns are great for visual learners because they allow you to see the pattern as a graph. When the pattern becomes more complex, a crochet chart may be easier to read.
Symbols used in Charted Patterns
Charted Crochet Pattern
Here is an example of what a charted crochet pattern might appear. This is a traditional granny square pattern.
 Granny Square
Crochet Instructions - Stitch Counts and Repeats
Once familiarize yourself with the abbreviations and symbols used in crochet patterns, you can start reading the pattern instructions.
Instructions may have one or more parts. Simple patterns such as a dishcloth have one part.
Instructions for more complex projects may include more than one section. For a sweater, for example, the instructions will be divided into parts such as the back, sleeves, front, and collar.
Instructions are the foundation for any pattern and tell you many things:
- Instructions tell you whether to work in rows or rounds.
- If working in a round, the pattern may tell you to make a magic ring or crochet a certain number of chain stitches and join with a slip knot
- How many chains to make initially? Example: Ch3, counts as first dc.
- Where to make stitches (front loop, back loop, back bump).
- Where to start the first stitch (Example: Make 1 dc in 2nd ch from hook. Translated, it means to make your first double crochet in the second chain from the hook or in other words, skip the first chain closest to the hook and make the double crochet in the next chain.
- What type of stitches to make (double crochet, single crochet)
- Pattern Instructions often include the number of stitches made in a row or round at the end of a line. Example: (14 Dc)
- Some patterns will simply tell you at the end of the row to Turn. Others will tell you how many turning chain stitches are needed. Example. Ch 3, Turn.
- How often to make stitches, called repeats. Repeats tell you how many times to repeat a specific set of stitches. If you miss a stitch or repeat, it can affect the overall design of your crochet project. You will find repeats written in different ways in a pattern depending on the designer:
A Word about Repeats
Rather than writing out each row or round of instructions, when there are stitch repeats, certain symbols are used:
- Astericks: * * Repeat the instructions between * * a certain number of times.
- Parentheses: () Instructions are worked together in the same space or stitch.
- Brackets: [] Repeat the instructions inside the brackets a certain number of times.
Finishing
Anything needed after you finish crocheting should be included in the pattern.
- Seaming
- Weaving in ends
- Adding a fringe, pompom, or border
Troubleshooting Common Pattern Mistakes
Even the most experienced crocheters make mistakes. Some common pattern mistakes include miscounting stitches, misreading the pattern instructions, and not paying attention to the stitch counts and repeats.
If you make a mistake, don't panic. Once you have found where you made the mistake, you can rip out your work and then redo. You will often hear this referred to as frogging.
How to Read Crochet Patterns: Conclusion and Next Steps for Your Crochet Journey
Reading crochet patterns may seem intimidating initially, but anyone can learn to read and understand them with practice and patience. Remember to familiarize yourself with the crochet abbreviations and symbols, observe the stitch counts and repeats, and read the pattern notes and special instructions carefully.
Now that you understand how to read free crochet patterns, it's time to start your crochet journey. Start with a simple pattern and work your way up to more complex designs. Don't be afraid to make mistakes. They are a natural part of the learning process.
How to Read Crochet Patterns: Pin for Future Reference
How to Read Crochet Patterns
If you found this beginner's guid to reading crochet patterns, helpful, you might enjoy some of our other beginner crochet guides.
About Janice
Hi, I’m Janice, the voice behind Smart-Knit-Crocheting. I love to knit and crochet and even more, I love teaching others what I know.
Though I learned to knit and crochet as a child, I didn’t get serious about these amazing hobbies until I retired. I’m a certified knit and crochet instructor through the Craft Yarn Council and am working on becoming a Master Hand Knitter through The Knitting Guild Association.
I’m currently living with my husband of over 50 years and our 6 Shih Tzu dogs.
I love hearing from you, so please drop me a line and let me know what you’re working on, whether you love knitting or crocheting more, and if you have any questions. Please visit my about me page for more information.
Happy Crocheting

