- Home
- How to Knit: Basics
- How to Increase in Knitting
How to Increase in Knitting: 6 Methods For Making Single Increases on the Knit Side
How to Increase in Knitting by Janice Jones
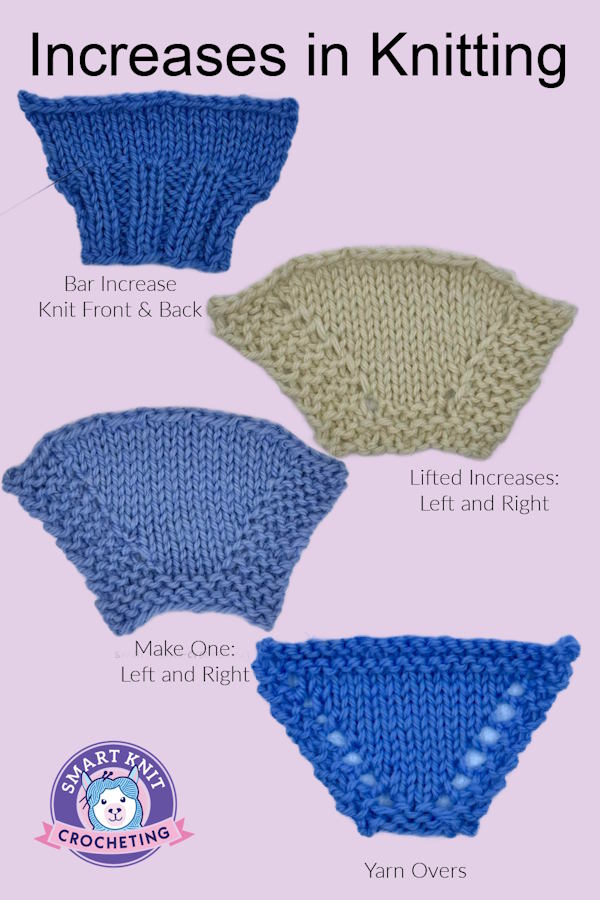
To increase stitches in knitting, you add extra loops to your needle using techniques like KFB (knit front and back), M1L (make one left), or M1R (make one right), or knit into the same stitch twice (KFB). But how do you know when and where to make those single increases?
Have you ever found yourself stuck when the pattern you're using says, increase two stitches every four rows, but doesn't give you any additional information?
It's frustrating when the pattern doesn't give you direction. You are not alone, I know, I've been there.
In this article, we'll learn six beginner-friendly methods for making single increases and I will walk you through the steps. I will also provide some tips to help you know when to use the increase and how to make them neatly.
What are Single Increases in Knitting?
Increases are a way to add to the row count of your project and are often used when shaping a garmet such as a sweater or a hat. In this article we'll explore some of the more common single increases in knitting.
Table of Contents
Helpful Information for Adding Knit Stitches Correctl
How to Increase in Knitting, Directions: 6 Ways
- Yarn Over Increase (YO):
- Knit Front and Back (KFB):
- Make 1 Left (M1L)
- Make 1 Right (M1R)
- Lifted Increase (Left Lifted Increase)
- Lifted Increase (Right Lifted Increase)
Helpful Information for Adding Knit Stitches Correctly
When I made my first sweater, I was at a total loss. The pattern just said, "increase at the beginning and end of the row, 5 times." What does that even mean?
I found that there are some "rules" that can help you understand how to add stitches, even if your pattern fails to explain how to make increases.
- Location of Increases: Don't make an increase in the first or last stitch of the row as it makes seaming difficult. Work the increase in the 2nd or 3rd stitch from the beginning of the row and 2 to 3 stitches from end of row.
- Right verses Wrong Side Increases: Increases can be made on the right side or the wrong side of the fabric.
- Increases are worked in or between stitches: Increases are either worked between stitches on in a stitch.
- Increases either slant to the right, the left, or not at all. Some don't slant at all.
Adding Stitches in Knitting: Yarn Over
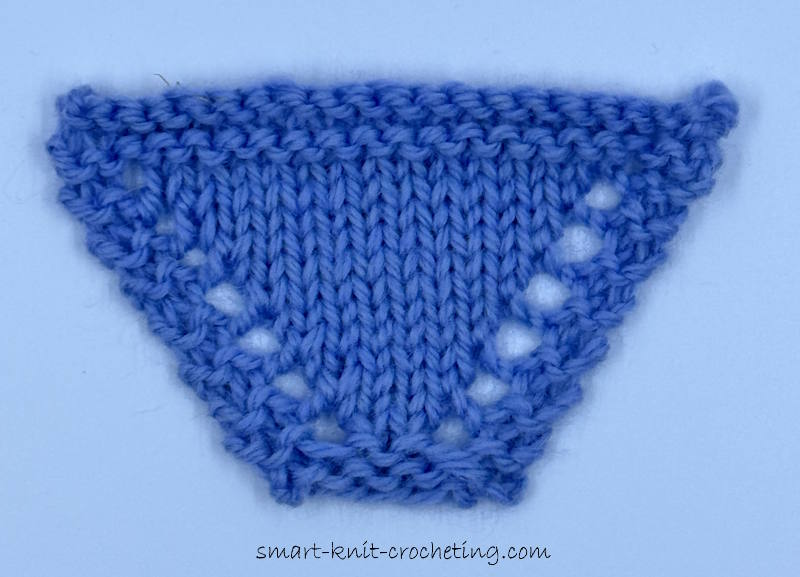
This method is straightforward and can be used on knit and purl rows. It results in small holes in the places where you've made the increase and is ideal for lace patterns or decorative elements, but may not be useful when making a sweater, unless the pattern calls for it.
- Creates a decorative hole
- Used in eyelet and lace patterns
1. How to Make Yarn Overs
It is created by wrapping the working yarn over the right needle and is done in different ways depending on whether you are working the yarn over:
- Between two knit stitches
- Between two purl stitches
- Between a knit and purl stitch
- Between a purl and a knit stitch
Learn More About Yarn Overs: Complete Discussion
2. Knit Front and Back (KFB) or Bar Increases (k1f&b or p1f&b)
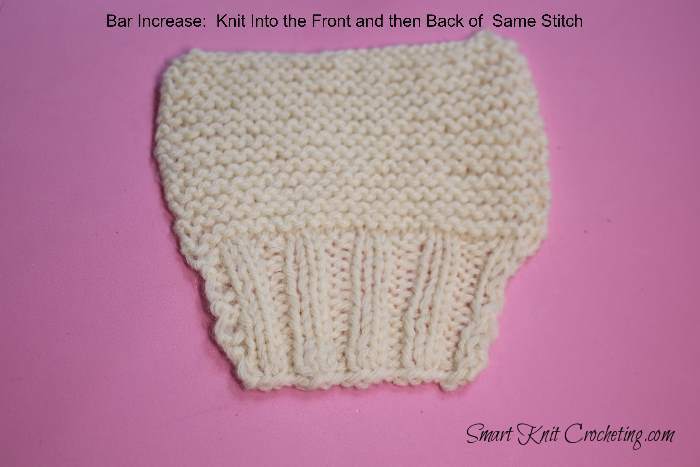
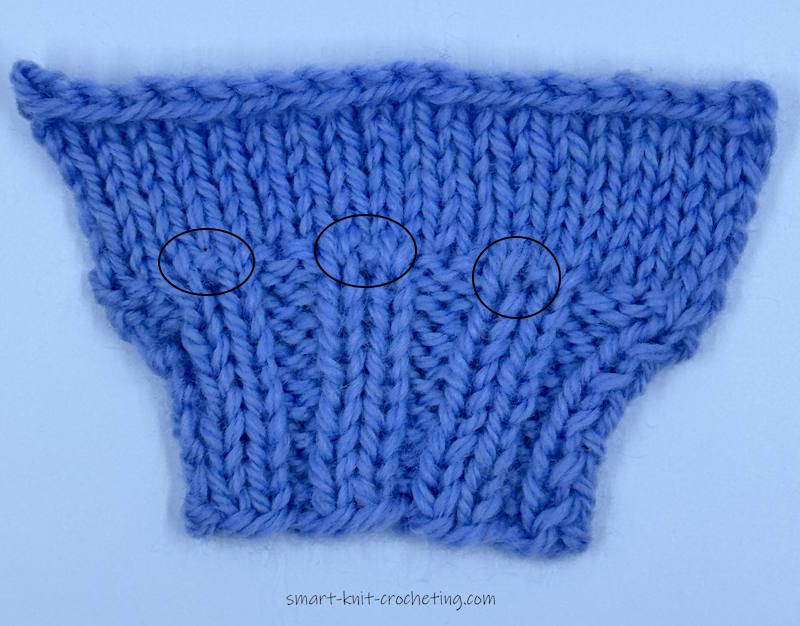
Bar Increase: Also known as "Knit Front Back" or "kfb", the Bar Increase method is possibly the first and easiest way to increase knitting stitches.
- Does not slant
- Very easy to do
- Leaves a little bar that resembles a purl bump
- Can be worked on the front or back of fabric
- Good choice when working the last row of ribbing before the pattern begins
- The pattern may be confusing especially if it says increase evenly across row.
How to Make the Bar Increase or Knit Front Back
- Insert your needle into the front of the stitch you want to increase.
- Wrap the yarn around the needle in the normal way. Pull through but don't slip the stitch off the needle.
- Re-insert the needle into the back loop, wrap the yarn around the needle in the normal way and slip the stitch off the needle. You now have two stitches where there was once one.
On the purl row: do the same, but use a purl stitch. You can repeat this process to increase the number of stitches you need.
Learn more about bar increases or kfb
Make 1 (M1L) Knitting Increase
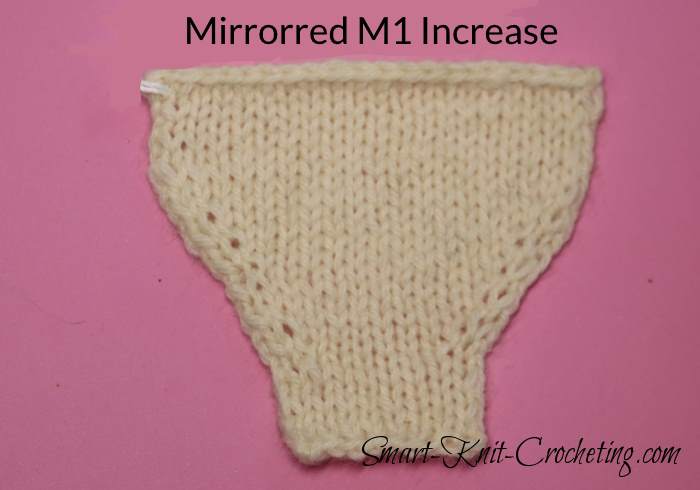
It's worked using the horizontal bar or strand of yarn between two stitches.
- Slants to the Left. Used on the left side of the fabric to blend in.
- Worked into the strand of yarn between the stitches.
- Can be worked on the Purl Side (M1LP).
- Paired with the Make 1 Right on either side of the fabric to mirror each other.
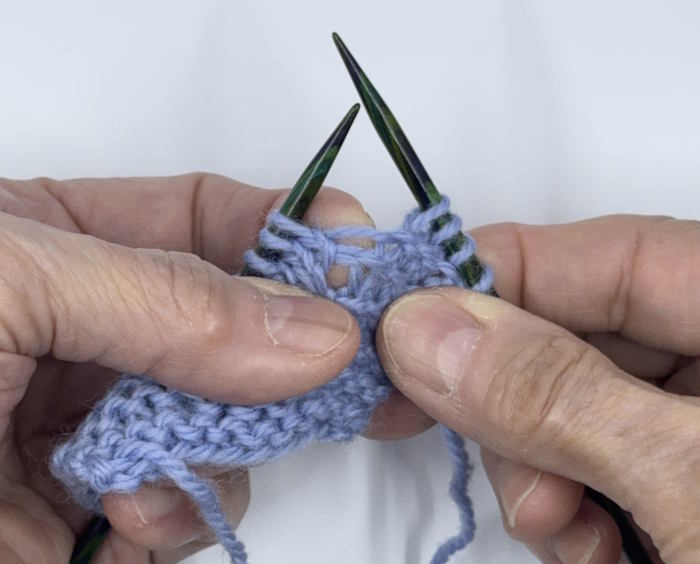 This fabric is stretched out to show the little bars between stitches. You will lift the bar onto the left needle in the directions below.
How to Make 1 Left
- Knit to the point where you want to make the increase.
- With the left-hand needle, pick up the strand between the last stitch you knit and the next stitch, from front to back.
- Knit through the back loop of this strand.
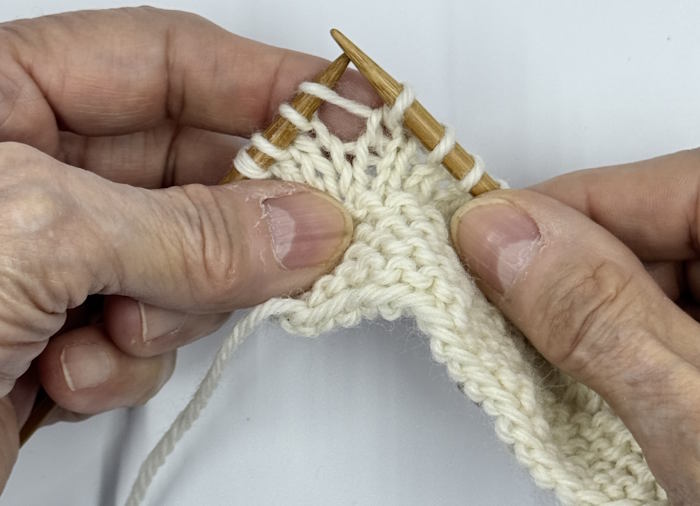 Once you lift the little bar between the two stitches, it should look like this. Notice that the new stitch on the left needle faces to the left.
Make 1 Right (M1R)
This one is similar to the M1L above but it slants to the right.
- Worked into the strand of yarn between stitches.
- Can also be worked on the purl side (M1RP).
- Paired with the MIL to mirror each other on both ends of the fabric.
How to Make 1 Right (M1R)
- Knit to the point where you want to make the increase.
- With the left-hand needle, pick up the strand between the last stitch you knit and the next stitch, from back to front.
- Knit through the front loop of this strand.
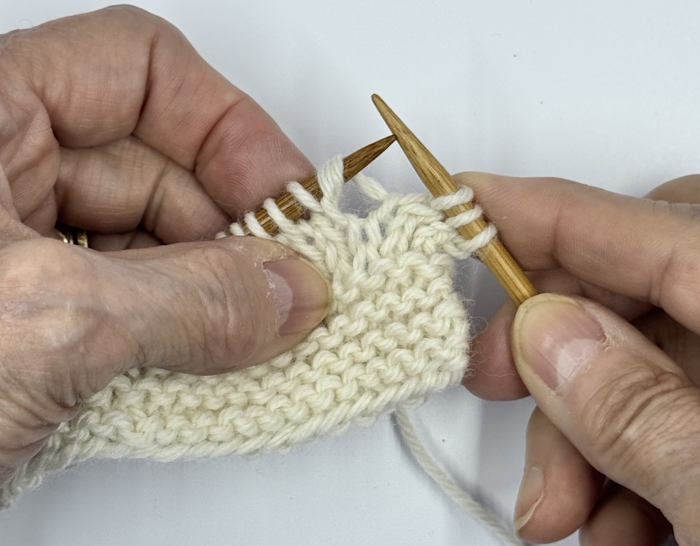 Once you lift the little bar between the two stitches, it should look like this. Notice that the new stitch on the left needle faces to the right.
Lifted Increases: Lift-Right
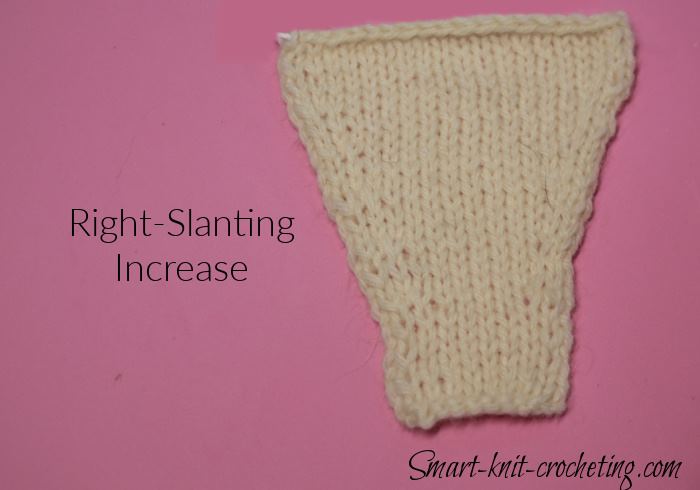
These increases can either be right-slanting or left-slanting and are worked in the "V" of the stitch just below the ones on the needles. They are normally worked every other row or spread out even further.
- Most invisible
- Can be done on the knit or purl side
- Worked in a stitch from the row below
- Paired with the Lift Left Increase
- Leans to the Right
- Can be used before or after a yarn over.
- Sometimes called Raised Increases
How to Make the Right-Slanting Lifted Increase
- Knit to the point where you want to make the increase.
- Insert the left-hand needle into the right leg of the stitch below the next stitch on the left-hand needle, from back to front.
- Knit this stitch.
- Knit the next stitch on the left-hand needle as usual.
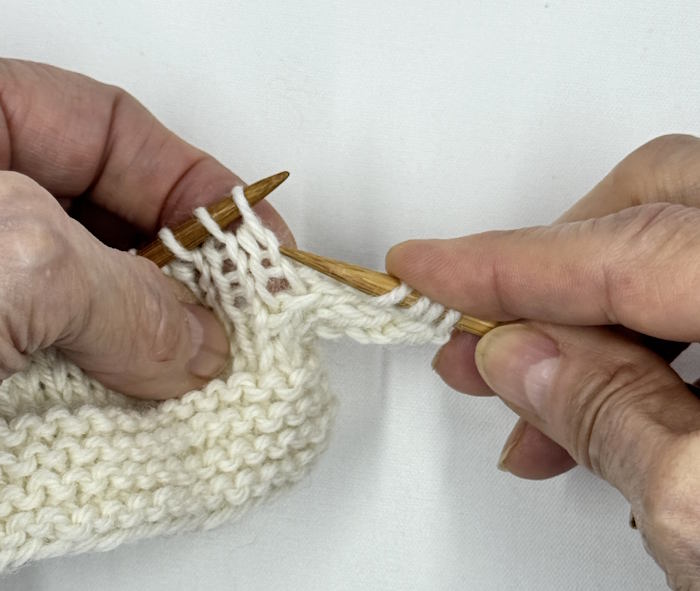 Step One: Locate the right leg of the stitch below the one on the needle.
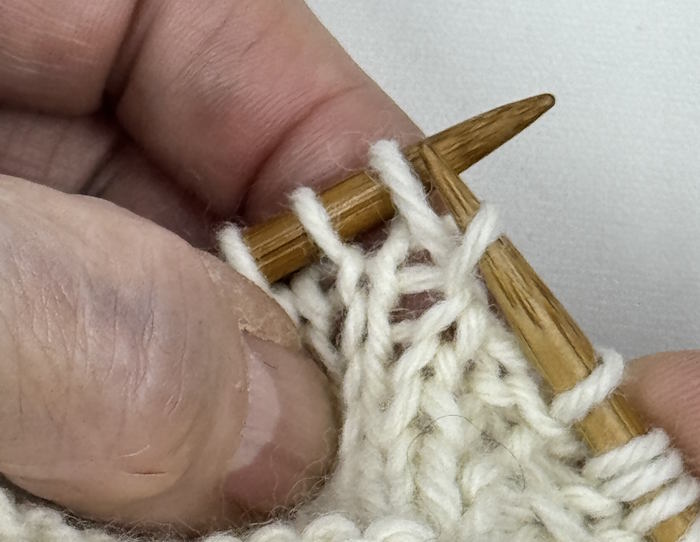 Step Two: Using your right needle tip, lift this leg onto the left needle without twisting it.
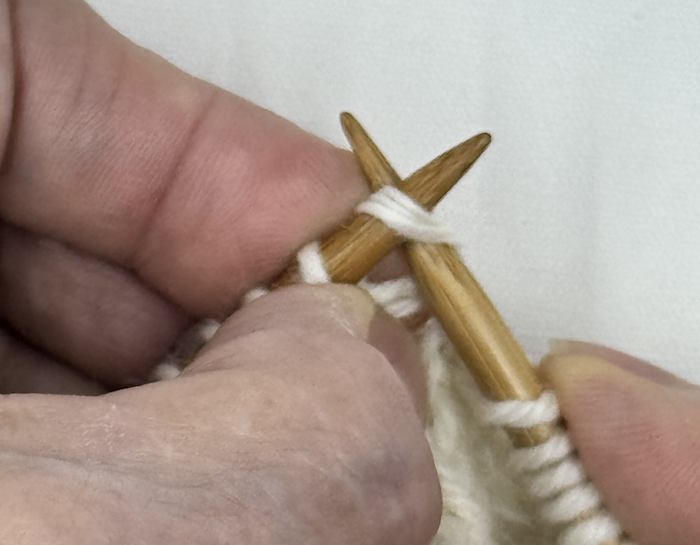 Step Three: Knit this stitch as you usually would, inserting the right needle into the front of the stitch. Then knit the next stitch on the left needle.
Lifted Increases: Left-Lifted
- Most invisible
- Can be done on the knit or purl side
- Worked in a stitch in the row below
- Paired with the Right Lifted Increase
- Leans to the Left
Left-Slanting Lifted Increase:
- Knit to the point where you want to make the increase. Knit the Stitch.
- Insert the left-hand needle into the left leg of the stitch two rows below the stitch on the right-hand needle, from front to back.
- Knit this stitch through the back loop.
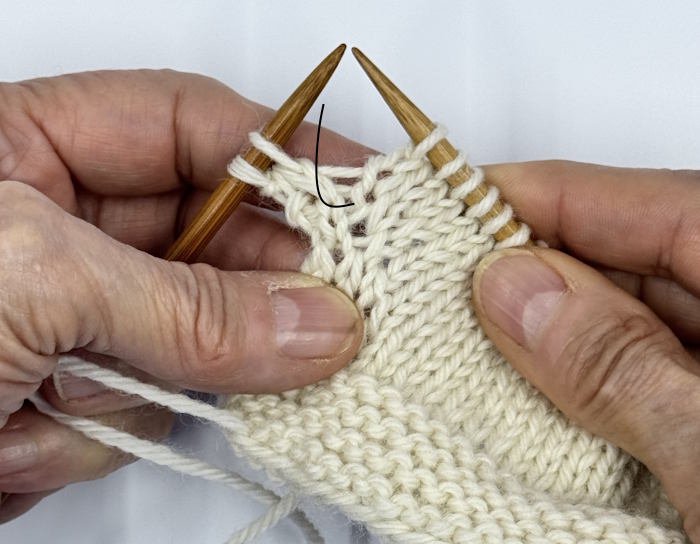 Step One: Knit to where you want to make the increase. Knit the stitch. The increase will be on the left side of the last stitch you knitted.
Insert the left-hand needle into the left leg of the stitch two rows below the stitch on the right-hand needle.
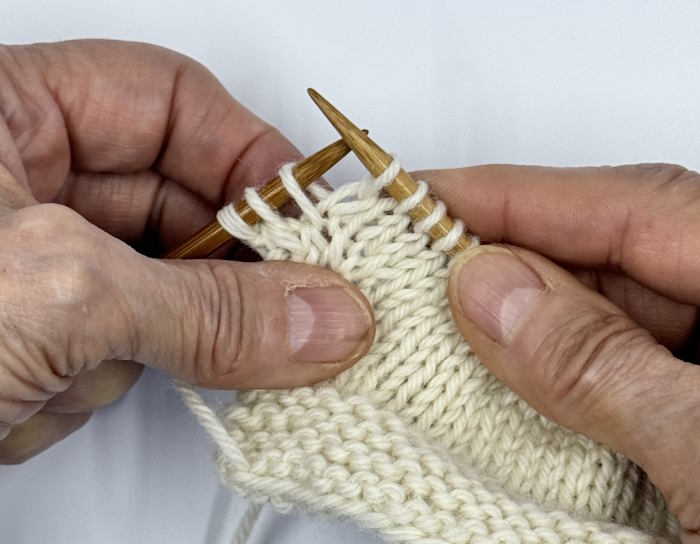 Step 2: Lift the stitch onto the left needle without twisting it.
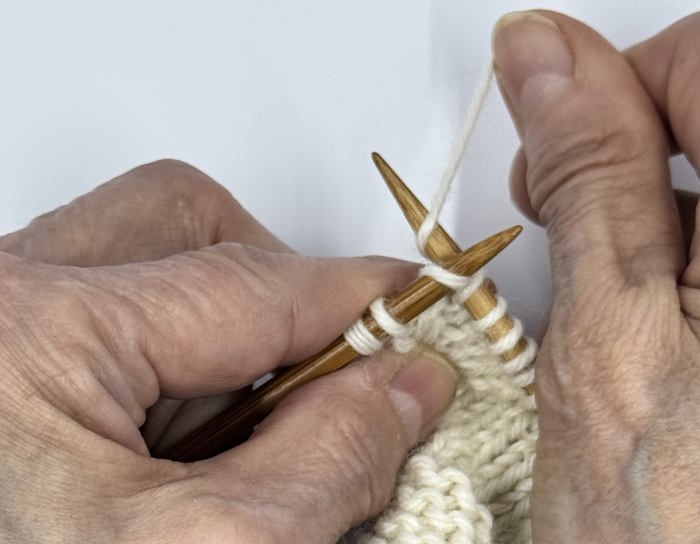 3. Knit the stitch in the usual way.
Recommended Tools and Resources for Knitting
To enhance your knitting experience and ensure successful projects, investing in quality tools and resources is essential. Here are some recommended tools and resources:
- High-quality knitting needles: Invest in a set of good-quality knitting needles that suit your preferred knitting style. Choose needles made from materials such as bamboo or metal, depending on your personal preference.
- Stitch markers: As mentioned earlier, stitch markers are invaluable when it comes to keeping track of your stitches. Invest in a variety of stitch markers, including both removable and fixed types.
- Knitting books and online resources: Expand your knowledge and skills by exploring knitting books and online resources. There are countless tutorials, videos, and blogs available that provide step-by-step instructions and inspiration for your knitting projects.
Helpful Resources and References
Here are four books I have in my personal library that I consult all the time. Check them out.
"The Principles of Knitting" by June Hemmons Hiatt
"Vogue Knitting: The Ultimate Knitting Book" by Vogue Knitting Magazine
"The Knitter's Handbook" by Montse Stanley
"The Knitter's Companion" by Vicki Square
99 Step-by-Step Methods Increase Decrease by Judith Durant
How to Increase in Knitting: Tips for Success
- To avoid stretching stitches, work on the tips of your needles.
- Slow down your speed until you feel comfortable making the increases.
- Practice by making swatches before using them on a project.
- If you have trouble keeping track of your increases, mark them with a an open stitch marker, then count the stitch markers
Frequently Asked Questions about Increasing in Knitting
What is the easiest way to increase stitches in knitting?
What is the easiest way to increase stitches in knitting?
Beginners normally learn how to knit in the front and back of a stitch before mastering other increases. (KFB). This is also called a bar increase because it leaves a little bar similar to a purl bump in the fabric.
How do you increase without leaving holes?
How do you increase without leaving holes?
There are two single increases that can leave a hole or eyelet in your fabric. A common way to increase, the yarn over, will leave a hole in the fabric. That is why the yarn over is used when making lace. The Make-one Open (M1o) will also leave a tiny opening. If you don't want a hole, try using one of the other methods described in this article.
Conclusion
These methods of increasing in knitting may seem very challenging to beginners, but don't worry. With a little practice, you'll be increasing like a Pro.
The best way to learn and practice these increase methods is to work a small swatch before beginning a large project.
So, grab some yarn and needles that correspond to the yarn you're using and let's practice making some increases.
