- Home
- How to Knit: Basics
- How to Count Knitting Stitches
How to Count Knitting Stitches and Rows
How to Count Knitting Stitches by Janice Jones
Mastering counting knitting stitches is essential for a flawless finished product, whether a simple garter stitch dishcloth or an elaborate cable sweater. In this comprehensive guide, we'll unravel the mystery of counting knitting stitches, equipping youwith the skills to stay on top of your knitting game.
Why Know How to Identify and Count Stitches
Beyond the absolute beginner project, knowing what knit stitches look like and how to count them within a pattern is essential.
A simple garter stitch scarf, for example, will look the same whether you are working on the first row or the last, but once you get beyond that and start working on projects where you may have stitch or row repeats, knowing where you are is imperative.
Most of us cannot finish an entire project in one sitting, so we rely on our ability to put our knitting down, pick it up later, and continue. This skill requires that we understand how to "read our knitting."
This means knowing how to count knitting stitches and rows.
Help with Stitches and Rows
Now, all of these directions are done after you have knitted, which is something you should do. But keeping track of the number of stitches and rows as you work is also essential. You can do several things to help you keep track of your rows and stitches.
- Stitch Markers
- Row Counters
- Paper and Pencil hash marks
- Smart Phone apps - Digital Row Counters
Stitch Markers
Stitch markers are placed every few rows, such as every ten stitches if you create a large project or mark off pattern repeats. If you are working on a stitch pattern that includes, say, eight stitches, place a marker at the beginning and end of the stitch repeat to help keep you organized.
If you don't have any stitch markers, you can always use a safety pin, but avoid those with little coils, as the yarn will get caught up in the coil and could cut the yarn.
Row Counters
To keep track of rows, you can use a row counter, an inexpensive small device that you can click or turn after you finish a row.
Paper and Pencil Method
If that seems more annoying than helpful, there is always the paper and pencil method. Keep a small notebook or a piece of paper in your knitting bag, and use a pencil to create tally marks at the end of the row.
This helps if you have a certain number of row repeats and will help you keep track of your place within a row repeat. For a project that contains a small number of row repeats, you can always identify the right side of the fabric with a stitch marker.
Smart Phone Apps
Today, we have apps we can pull up on our phones to help us keep track of your progress.
How to Count Knitting Stitches: Recognizing Knitting Stitches
Let's start with the easiest and work up to the complex.
Garter Stitch
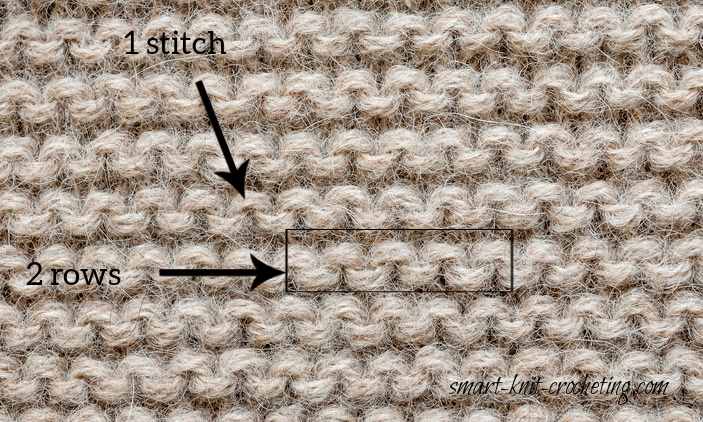
I have marked out stitches on the garter stitch swatch. A Garter stitch is a simple knitting pattern consisting of knit stitches across all rows—a loop around the knitting needle forms each stitch.
You can see individual stitches if you stretch the fabric, but your garter stitch pattern will look more like the one I marked. For this tutorial, we will be counting loops.
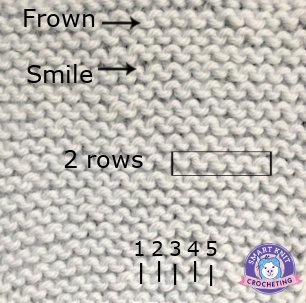
Take a close look at the garter swatch. It comprises little loops, which I call smiles and frowns. Others have called them domes and bowls or umbrellas and cups. For counting individual stitches, chose one of the methods below.
- Count the loops or stitches on the needle. Each little loop represents one stitch.
- Count all the "frowns."
- Count all the "smiles."
That will give you a stitch count.
To determine the number of rows you have worked, you can count the ridges of frowns and smiles.
Each garter ridge has two rows, so if you count ten ridges, you have 20 rows. The live stitches on your needles count, but the cast-on edge does not count in your row count. You will need these counts if you are making a stitch gauge.
If you are getting confused counting individual stitches with your fingers, try using a needle tip, either a yarn needle or another knitting needle, to help keep your place as you count.
An Exception
There is some confusion about counting rows. I know I was confused and maybe you are too.
Do you count the cast on row?
Do you count the stitches on the needle?
The simple answer is that you don't count the rows on the needle or the cast on row, BUT. According to MDK, if you use the Long Tail cast on method, and knit the first row (working flat, not joined in the round), then your cast on edge looks like a purl ridge. And if you’re counting garter ridges, there’s no reason why you shouldn’t count that to be your first ridge.
How to Count Knitting Stitches: Stockinette Stitch
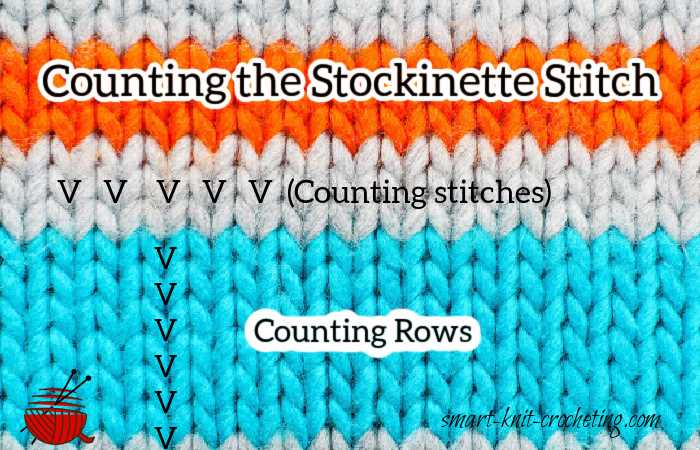
The stockinette pattern consists of one row of knit stitches on the front side of the fabric and a row of purl stitches on the wrong side.
The wrong side is often referred to as reverse stockinette stitch. The easiest way to identify stitches and count is done on the right side of the fabric.
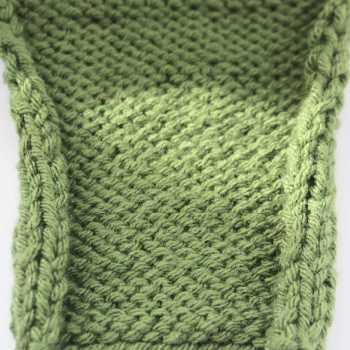 Reverse stockinette: This look can also be achieved by working all rows in the purl stitch.
Take a look at the stockinette swatch below. Notice that each stitch is identified as a little V. If you turn your swatch upside down, you can still see the little Vs.
It is best practice to hold the swatch with the cast on edge at the bottom with the needle or the bind-off edge at the top.
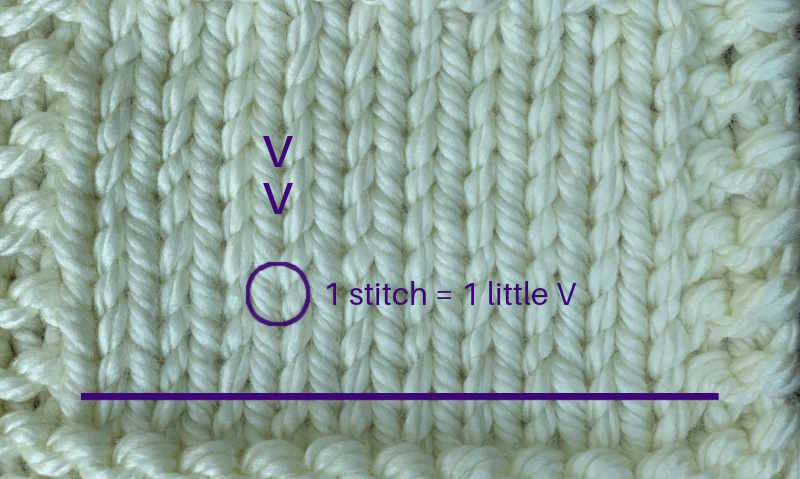 Follow the little Vs across the row of knitting to determine the number of stitches. (Stitch Count)
To find the correct number of stitches, you will count the number of little Vs. Follow the little Vs across the row of knitting to determine the number of stitches. You can also count the loops on the needle to get the number of stitches in the row.
To count the number of rows, you will want to identify a column of stitches.
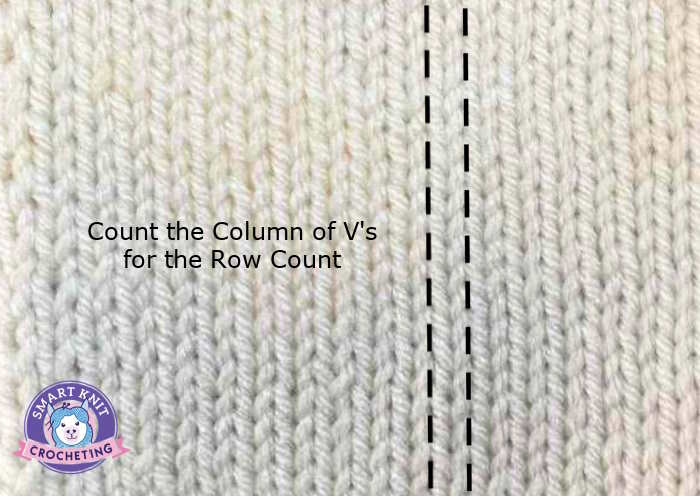 Follow the column of little v's to determine how many rows. (row count)
How to Count Knitting Stitches: Rib Patterns
Identifying and counting stitches in rib patterns is not difficult. Since most rib patterns are made up of knit and purl stitches, we can count the knits or the purls to make a row count.
The pattern instructions should state how many stitches you should have. Assuming you have not inadvertently added or dropped a stitch, the number of stitches should equal the number that you cast on initially. This can be done by counting the loops on the needle.
To ensure you haven't made any mistakes, an easy way to make a stitch count, other than counting the loops on the needle is to count the knit stitches.
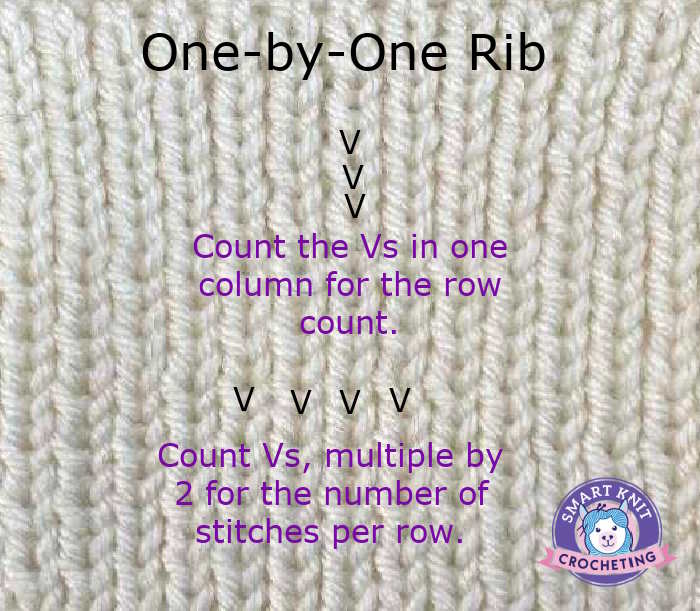
For example, if you make a 1x1 ribbing, find the vertical column of knit stitches. Count each knit column across the row. Since you are making a 1x1 rib, multiply the number you counted by 2 to get a total stitch count across the row. You can also count the purl columns if you prefer.
To determine a row count in ribbing, you will count knit stitches (count the little "v's" ) or pull the rib apart to see the little purl bumps representing the purl stitches. Count the purl bumps plus the live stitches on the needle. Do not count the cast-on edge.
How to Count Knitting Stitches: Seed Stitch
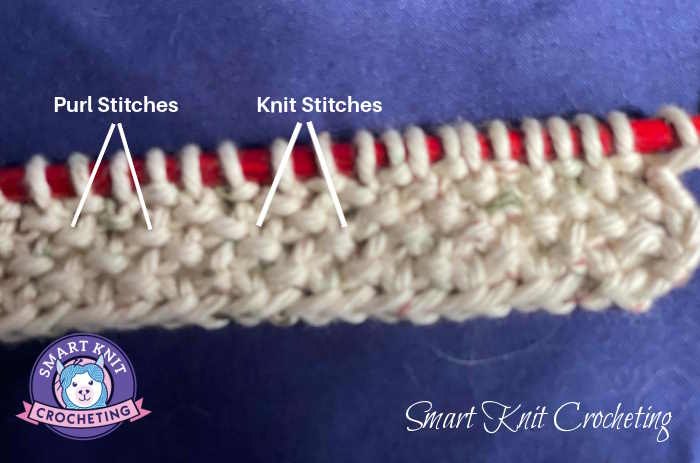
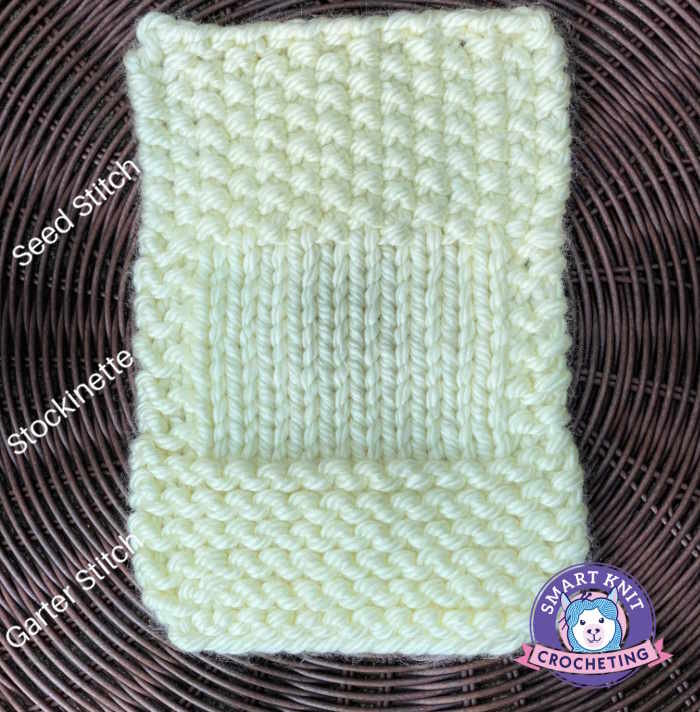
Sometimes, we need to count patterns of basic stitches, but they are more complicated than the typical garter or stockinette stitch. The Seed or Moss stitch is one example. Take a look at the flat piece of the seed stitch.
The seed stitch is a beginner-friendly pattern made by alternating knits and purls to create a thick textured fabric with no holes. Remember that the seed stitch is a two-row repeat.
Row 1: *K1, P1* across the row.
Row 2: *P1, K1* across the row.
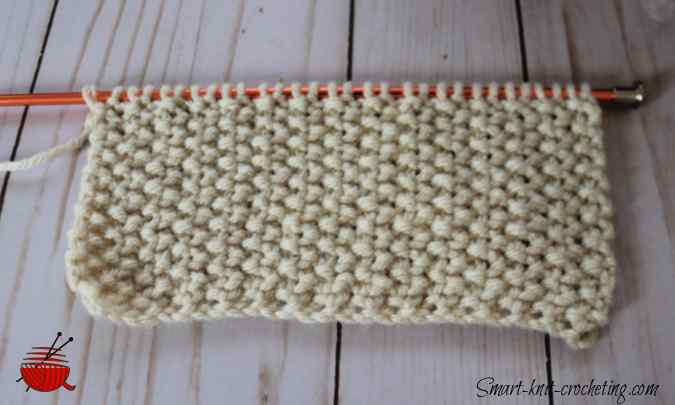
At first glance, you may think this pattern would be complex to count, but it is not as challenging as expected. Take a look at the swatch. If you stretch it out, you can see the knit stitches and the purl bumps.
If you count the purl bumps (seeds) and multiply by 2, you can get the number of rows. Do not count the cast on row. Count the row on your needle as those are your live stitches.
Likewise, you can count the bumps (seeds), across the row to get a stitch count. Multiple that number by two for the total cound.
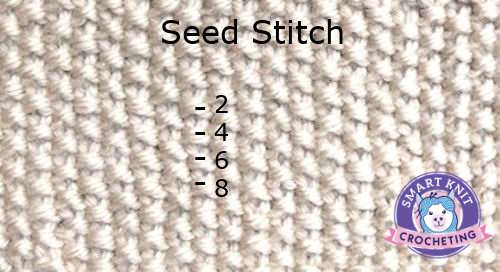 Count each bump and then multiply by 2 to get the total number of rows.
Last words: How to Count Knitting Stitches
Unless you are doing a simple small project, knowing how to identify and count knitting stitches is very important. Once you can identify what stitches look like, you can count on them taking your knitting skills to the next level.
From there, your next knitting project will be easier than you anticipated with the added confidence that you won't get lost within a row repeat, and the knitted fabric you create will look professional, something you can be proud of.
