- Home
- Reversible Knit Stitch Patterns
- Cartridge Belt Rib Stitch
Cartridge Belt Rib Stitch
Cartridge Belt Rib Stitch: Perfect for Those Who Hate to Purl
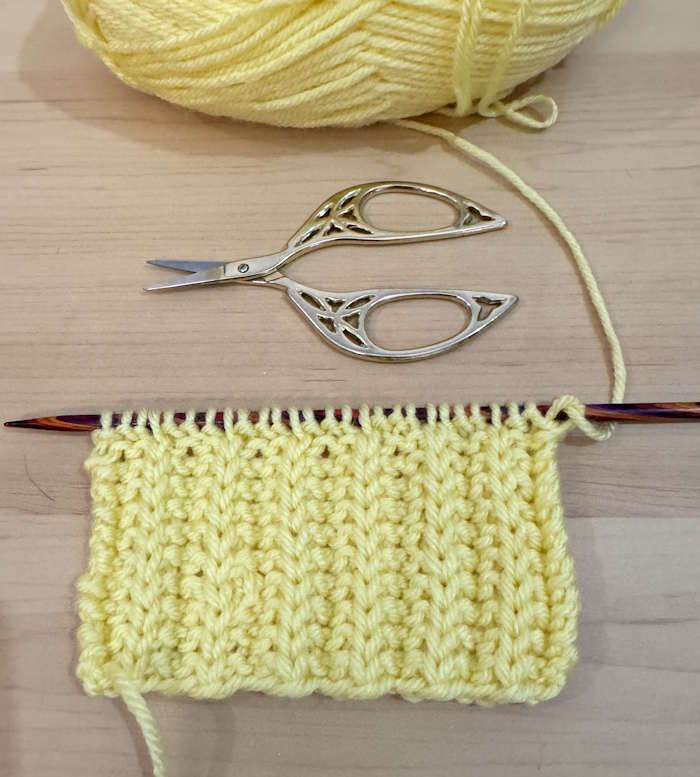
If you hate to purl but need to make a rib stitch, the cartridge belt rib stitch is perfect for you. You must know how to make the knit stitch, but the slip stitches replace all purl stitches.
This stitch creates a reversible, flat fabric, making it great for projects that require these characteristics, such as blankets, wraps, and scarves. It’s a textured, squishy fabric that doesn’t need much blocking.

It’s essential to understand the instructions and make the slip stitches correctly; otherwise, it will not resemble a rib stitch pattern. All slip stitches are worked with the yarn in front of the work and worked purlwise.
Purlwise means that you insert your right needle into the next stitch on the left needle as if you are going to create a purl stitch. Slip the stitch onto the right needle without working it.
Skill Level
Easy

Abbreviations Used
- CO = cast on
- K = knit
- Sl 1 = slip one
- RS = right side
- WS = wrong side
- Wyif = with yarn in front
- Rep = repeat
- St/sts = stitch/stitches
- * * = Repeat the instructions between the two asterisks for the number of times indicated.
Skilled Needed
- Cast on using Long Tail Cast on Method
- Knit Stitch
- Purl Stitch
- Slip one with yarn in front
- Bind off
- Weave in End
- Block (optional)
Notes about the Cartridge Belt Rib Stitch

- Instructions are written in U.S. Terms
- This stitch involves a two-row repeat and a stitch repeat of 4 + 3.
- The instructions ask you to slip one stitch with yarn in front and then slip all stitches purlwise. To slip purlwise, insert the right needle into the next stitch on the left as if to purl. Slip the stitch onto the right needle without working it.
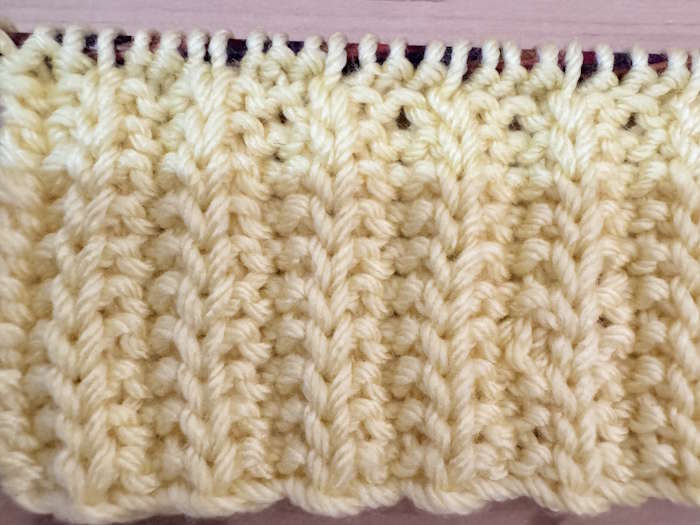
Is this Pattern Reversible
Yes, here are photos taken of the right and wrong sides
Supplies
- Yarn (I used a CYC #4 worsted weight yarn, 100% acrylic), but feel free to use whatever yarn you have on hand for this practice swatch.
- Needles: I used a number U.S. 7 (4.5 mm needles). Remember to use a needle size appropriate for the yarn you have chosen. Here is an article with more information on needle sizes.
- Scissors
- Yarn needle for weaving in ends.
Written Instructions
Cast on: Multiples of 4 + 3
Row 1: (RS): K3, *sl 1 wyif, k3; rep from * to end.
Row 2: K1, *sl 1 wyif, k3; rep from * to last 2 sts, sl 1, wyif, k1.
Repeat rows 1 and 2 until you have reached your required length.
For the best results, bind off on the right-side row. Bind off in pattern, meaning you will bind off in a k3, p1 pattern.
Instructions Written Out in Full
Row 1 (right-side row): Knit three stitches and slip one stitch purlwise with the yarn held to the front of the work. Then, repeat these two steps until you reach the last three stitches and knit the last three stitches.
On Row 2 (wrong-side row): Knit one stitch. Next, slip one stitch purlwise with the yarn held to the front of the work and then knit three stitches. Repeat these instructions until there are only two stitches on the left needle. Slip one more stitch purlwise with the yarn held to the front of the work and knit the last stitch.
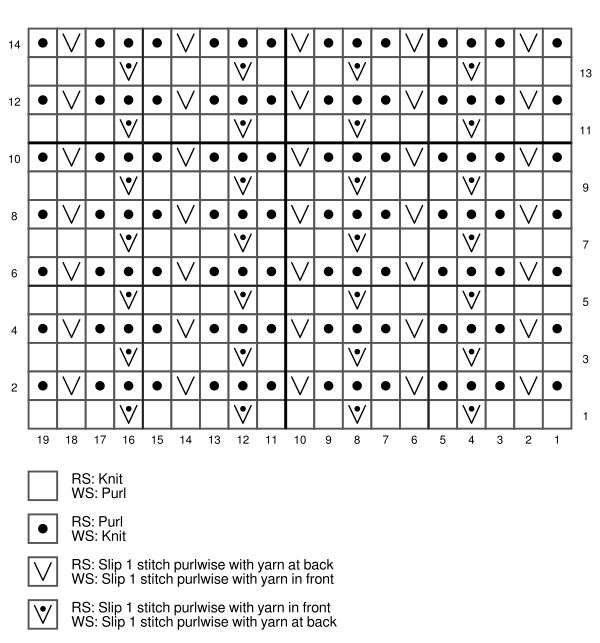
Learn How to Read Knitting Charts
This relatively easy stitch does not require a knitting chart, but it is always a good idea to learn how to read and use knitting charts.
The chart represents how your fabric should appear. Begin knitting at the lower right corner and work from right to left across the first row.
On the second row, marked with a two, work from left to right across. Continue like this, working each row and then moving up one row. Work until you have reached your desired length.

Ideas for Putting This Stitch to Use
Since this stitch is reversible, it’s the perfect choice for a blanket, shawl, scarf or cowl. It is also ideal for the cuffs, collar, and hem on sweaters, cardigans, and vests or the rim on a beanie.
Conclusion
This beginner-friendly pattern is perfect for someone who wants to learn how to work a different type of reversible rib stitch. It is worked in knit and slip stitches, which replace the typical purl stitches normally used for making ribs.
It is reversible, making it perfect for any project where the right and wrong sides show. Since it also lays flat, blankets, scarves, and wraps are the best projects for this pattern.
Reference
Walter, Barbara G. A Second Treasury of Knitting Patterns (originally published 1970)
Pin for Future Reference
If you found this tutorial helpful, May I suggest some others you might find interesting
About Janice
Hi, I’m Janice, the voice behind Smart-Knit-Crocheting. I love to knit and crochet and even more, I love teaching others what I know.
Though I learned to knit and crochet as a child, I didn’t get serious about these amazing hobbies until I retired. I’m a certified knit and crochet instructor through the Craft Yarn Council and am working on becoming a Master Hand Knitter through The Knitting Guild Association.
I’m currently living with my husband of over 50 years and our 6 Shih Tzu dogs.
I love hearing from you, so please drop me a line and let me know what you’re working on, whether you love knitting or crocheting more, and if you have any questions. Please visit my about me page for more information.
Happy Crocheting


