- Home
- How to Knit: Basics
- Slip Knot for Knitting
How to Make the Slip Knot for Knitting
Slip Knot for Knitting, by Janice |Published 02-16-2024
The very first skill most new knitters learn is how to make the slip knot. Most cast ons call for a slip knot before addition stitches to the needle. Though not entirely necessary, it's best to learn this easy skill early in your new knitting adventure.
A slip knot for knitting initiates the process; it's the first loop on your needle, which is adjustable, easily tightened or loosened. Mastering this technique is vital for every knitting project, whether creating a cozy scarf, a cuddly blanket, or an adorable pair of socks.
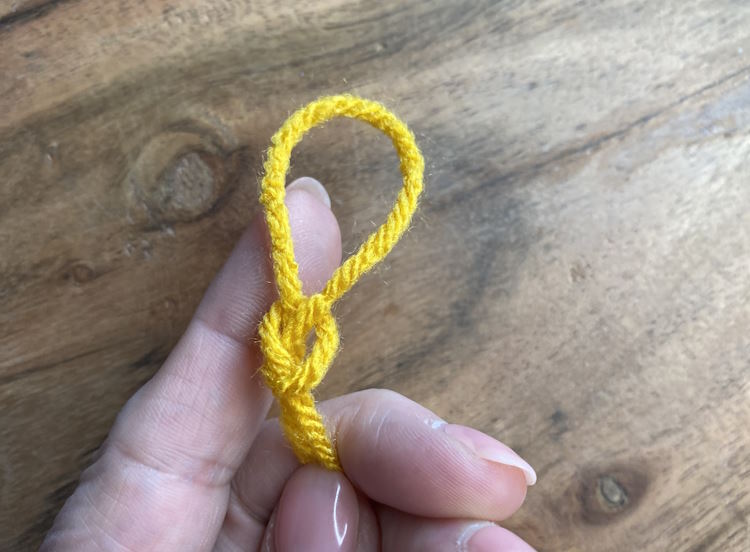 Slip Knot for Knitting
Further, the process is simple and quick to learn, setting the foundation for countless knitting achievements.
NOTE: You don’t need a slip knot to begin knitting, but for the beginner, it’s best to learn how to make one before casting stitches onto your needles.
Methods for making the slip knot for knitting
There are more than one way to make a slip knot. I recommend if you are just getting started, to try different methods and then choose one that works best for you.
Method One: Slip Stitch Construction With the Help of your Table
This is an easy method to help you see exactly how the knot is tied.
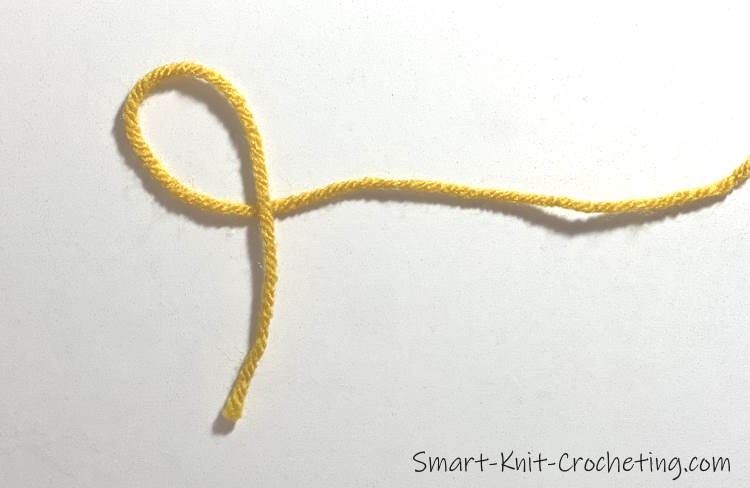 Work the slip knot on a solid surface like a desk or table.
Make a loop with the yarn's tail end on top.
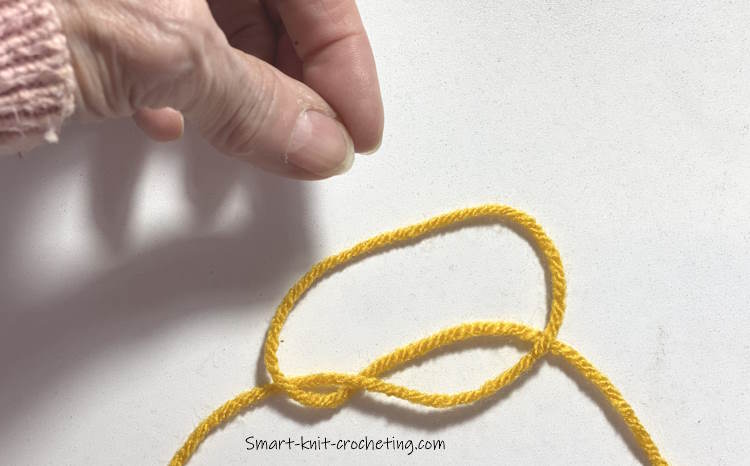 Pass your thumb and index finger through the loop.
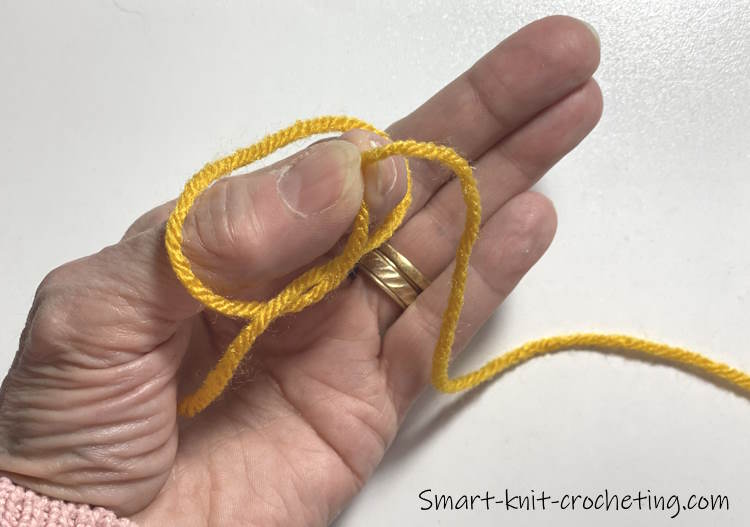 With your thumb and index finger, Pinch the yarn end that is attached to the skein.
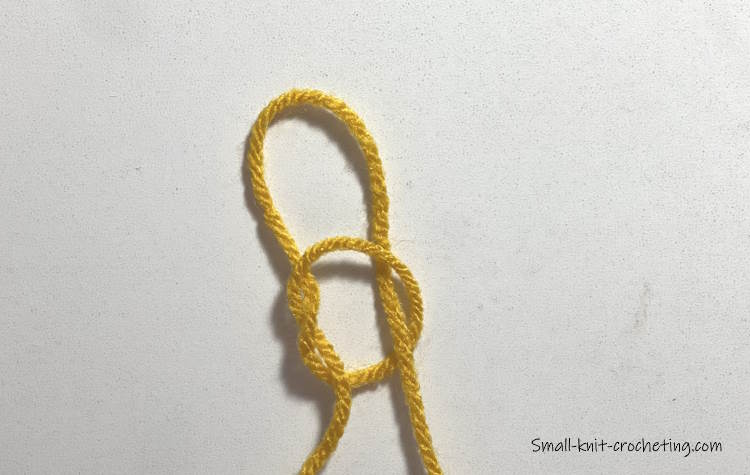 This is what the slip knot should look like before being tightened.
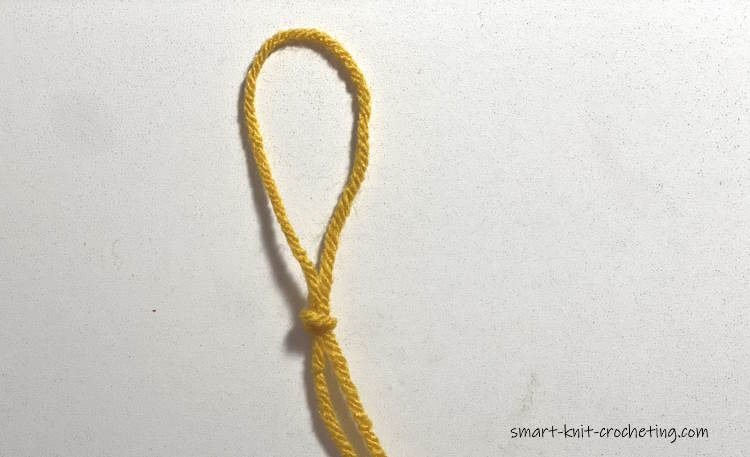 Pull through the loop and tighten the knot again.
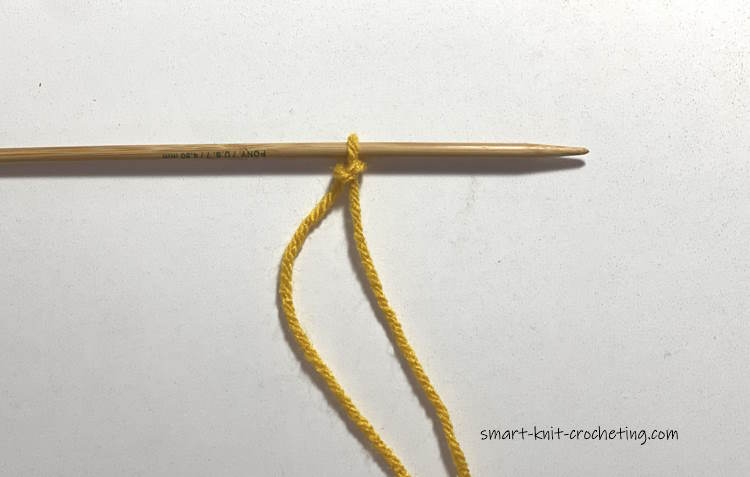 Place the knot on the knitting needle and pull slightly to tighten the needle. It should be snug but not tight.
- Work the slip knot on a solid surface like a desk or table.
- Make a loop with the yarn's tail end on top.
- Pass your thumb and index finger through the loop.
- With your thumb and index finger, Pinch the yarn end that is attached to the skein.
- Pull through the loop and tighten the knot again.
- Place the knot on the knitting needle and pull slightly to tighten the needle. It should be snug but not tight.
Method Two: Making the Knot In Your Hands and Fingers
- Hold about six inches of yarn in your hand.
- Wrap the yarn around the pointer finger.
- Pinch the loop on your pointer finger.
- Push the yarn through the loop and tighten.
- Place the knot on the knitting needle.

Last Words
Mastering the slip knot is a fundamental skill that lays the groundwork for a successful knitting project. While it may seem like a minor detail, the quality of your knitting largely depends upon how well you start, and that starts with a solidly formed slip knot.
The goal is to create a loop that can adjust effortlessly without unraveling, granting both durability and flexibility to your work. Hence, it's worth your time to master this straightforward, essential technique, as it forms the very basis of your knitting journey.
Remember, every exquisite knitting piece commences with a
single, well-formed slip knot. Keep practicing, and soon it will become second
nature. Happy knitting!
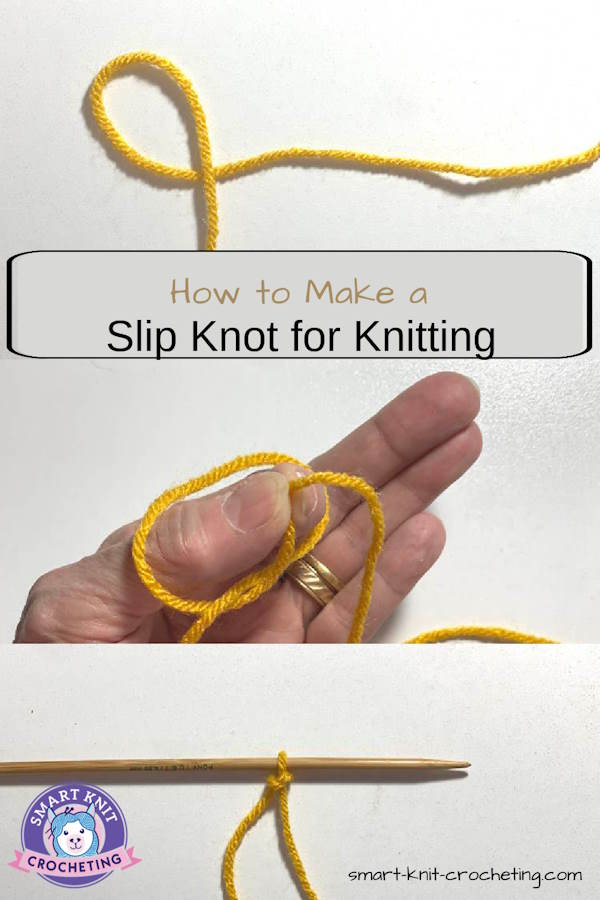
Slip Knot for Knitting: Pin for Future Reference
About Janice
Hi, I’m Janice, the voice behind Smart-Knit-Crocheting. I love to knit and crochet and even more, I love teaching others what I know.
Though I learned to knit and crochet as a child, I didn’t get serious about these amazing hobbies until I retired. I’m a certified knit and crochet instructor through the Craft Yarn Council and am working on becoming a Master Hand Knitter through The Knitting Guild Association.
I’m currently living with my husband of over 50 years and our 6 Shih Tzu dogs.
I love hearing from you, so please drop me a line and let me know what you’re working on, whether you love knitting or crocheting more, and if you have any questions. Please visit my about me page for more information.
Happy Crocheting
