- Home
- How to Knit: Basics
- Longtail Cast On for Beginners
Longtail Cast On for Beginners: Step-by-step Tutorial
Long Tail Cast On in Knitting, by Janice
The Long Tail Cast-on is a method for placing stitches on the needle so they can be knitted. It creates a beautiful, stretchy, neat edge for beginners and experienced knitters.
It is the go-to method for an elastic edge, such as cuffs and hats. This cast-on method is one of many, but often the first a beginning-level knitter learns.
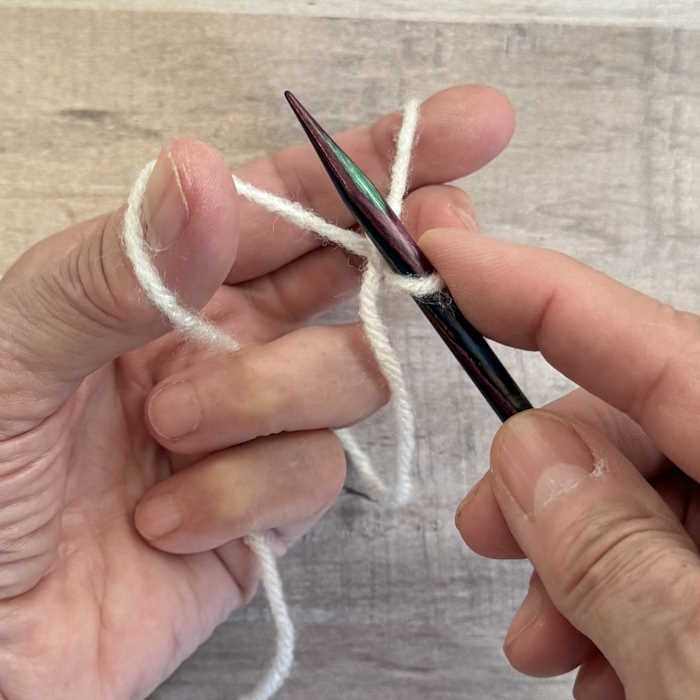
Longtail Cast on For Beginners
In this article, I will show you how to do make the longtail cast on using using the slingshot position and a way to do it that doesn’t require holding yarn in the slingshot position, also called the thumb method.
Supplies You will Need
- Knitting Needles: Appropriate size for your chosen yarn. More information about Knitting Needles
- Yarn: Enough for your project, considering the cast-on edge length. Learn more about the best yarn for beginner knitters.
- Scissors: To snip the yarn at the end.
Estimating Yarn for Long Tail Cast On
As the name implies, you will be working with yarn coming from the yarn ball (working yarn) and the yarn tail. For this reason, it is important to understand how long the tail will take.
There are several ways to estimate this length of yarn. Here are two of my favorites.
- Yarn Wrapping Method: Find out how many stitches you want to cast on. Start with 6 inches of yarn, then wrap the rest around one of the needles. Wrap loosely one time per stitch until you have the same number of wraps as stitches you need to cast on. Unwrap and pinch the yarn at the point at the end of your wraps. That is the place where you will create your slip stitch. If you have many stitches to cast on, make ten wraps and multiply this by the number of stitches you need.
- One Inch per Stitch: This works if you are knitting with worsted weight (CYC #4). Estimate one inch of yarn per stitch. For example, if you want to make 20 stitches, you will measure roughly 20 inches of yarn.
Longtail Cast on using the Slingshot Method
Measure out a yarn tail based on one of the methods just described.
Make a Slip Knot
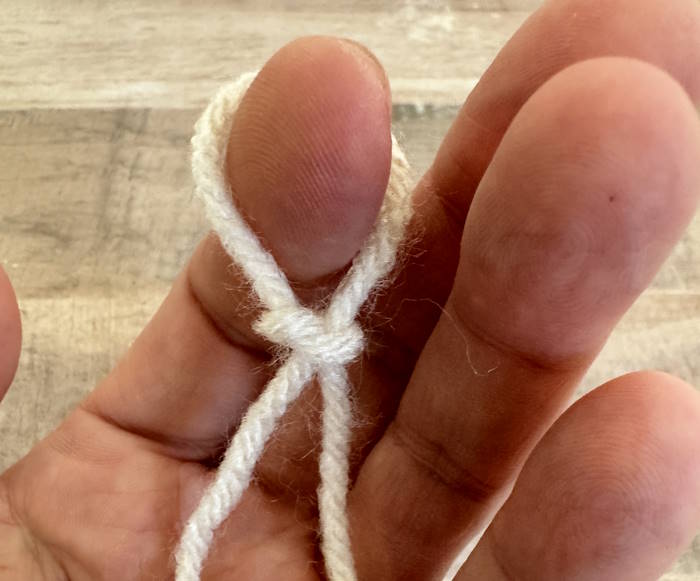
You don't need a slip knot to begin casting on, but for the beginner, it is likely the easiest way to begin.
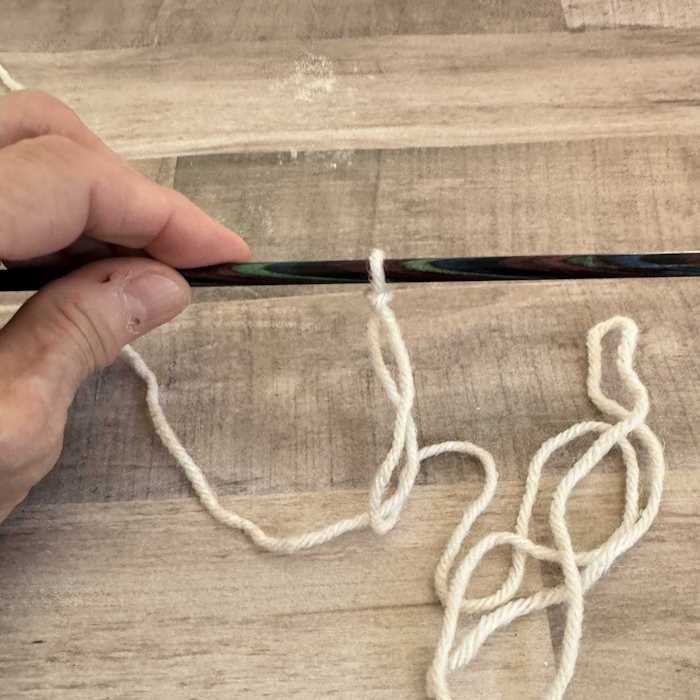
There are several ways to make a slipknot:
- Create a loop with the tail end under the working yarn.
- Pass your thumb and index finger through the loop, grab the long tail, and pull up a new loop through the first loop.
- Hold the new loop and tighten it by pulling on the tail.
- Place the slip knot on your needle.
- Hold the yarn in your right hand.
Slip knots for knitting is a step by step photo tutorial.
Use the Slingshot Position to Cast-on

Create a slingshot in your left hand: Let the yarn tail and the working yarn hang down.
Insert your index and thumb between the two strands of yarn hanging from the needle.
Stretch out your thumb and index fingers while holding the yarn in the palm of your hand.
Longtail Cast on for Knitting
Insert the needle tip under and into the loop on your left thumb.
Next, go over the yarn on your left index finger and bring that yarn through the thumb loop.
Drop the yarn off your left thumb and gently tighten the loop on the needle.
Repeat these steps until you have the appropriate number of stitches.
Troubleshooting Common Issues
Uneven Tension:
Some stitches on the needle appear larger, looser, or unevenly spaced. This is very common when you first get started. Practice makes perfect!
- Focus on consistent yarn tension by holding firmly on the working end of the yarn.
- Try to work so that the newly formed cast on row stitches are evenly spaced on the needle.
- You may want to tension your working yarn around your fingers on your left hand before assuming the slingshot position.
Twisted Stitches:
Ensure the yarn is scooped correctly in each repetition. This does require some practice until you are able to achieve a muscle memory.
Remember when you are looking at your stitches on the needle, the right leg or the one closest to you should be slightly forward the needle tip relative to the left leg.
Running Out of Yarn:
Estimate generously but if you run out, you will need to remove all the stitches from the needle and start over.
Unable to Hold the Slingshot Position
If you are having difficult maintaining the slingshot position, try one of these alternatives:
- If it is difficult to hold the yarn in your left hand, switch hands. Hold the needle in your left hand and the yarn in your right hand.
- If this doesn't help, try the thumb method (below).
Longtail Cast On Using the Thumb Method
This is the way I was taught and I find it very easy to use. They call it the thumb method because you can use your thumb to scoop up yarn you loop around the needle. However, you can also use another finger if that feels more comfortable for you. I use my index finger when casting on with this method.
Prop your needle against your leg, so it is vertical or horizong with the tip at the top or away from your body. The needle does not move, just your hand.
1. Place a slip knot on your needle. This is your first stitch.

2. Slip a loop of the yarn tail onto the needle, counterclockwise using your left thumb (or other finger) without letting go of the yarn. I'm accustomed to using my index finger.
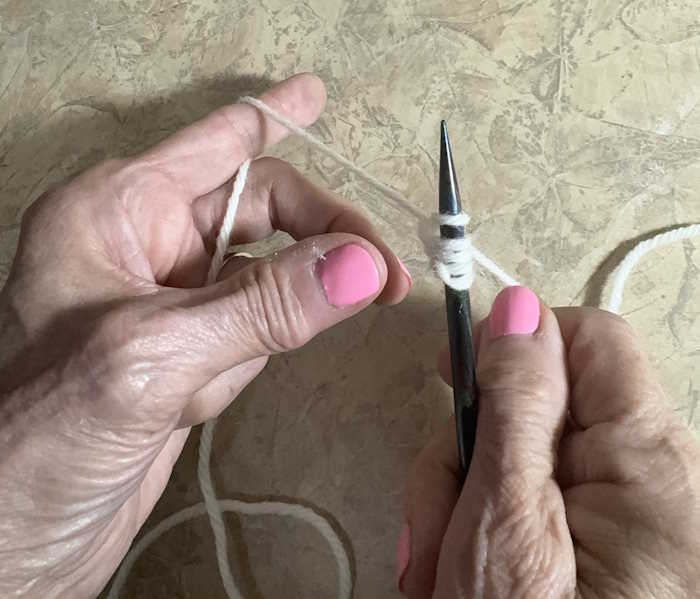
3. Place the loop up and on the tip of the needle.
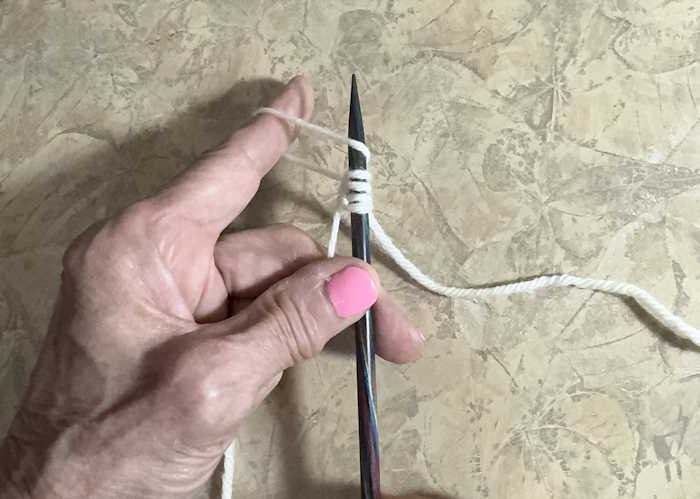
4. With your right hand, wrap the yarn around the needle.
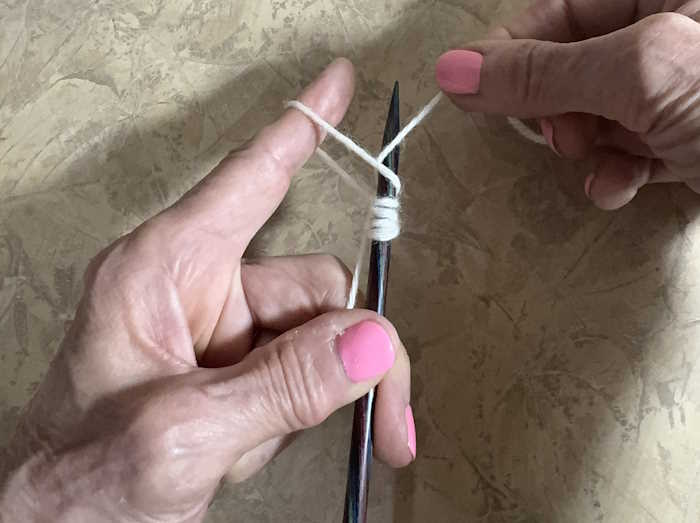
5. Pass the loop over the needle tip.
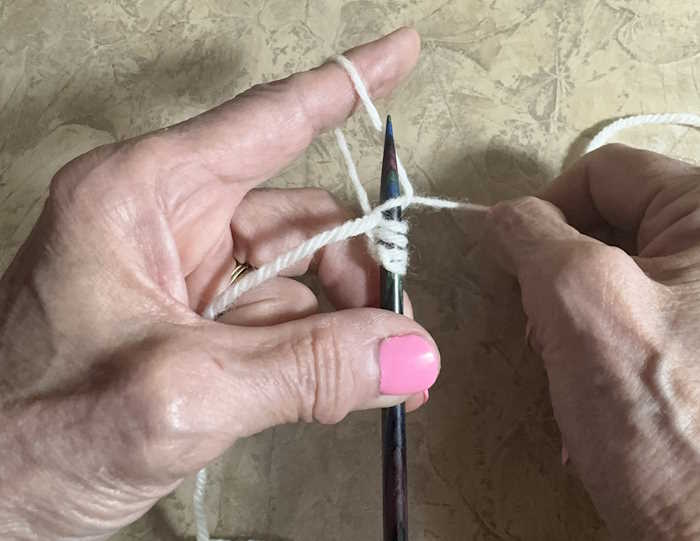
6. Pull with your left index finger and thumb and index fingers on your right hand.
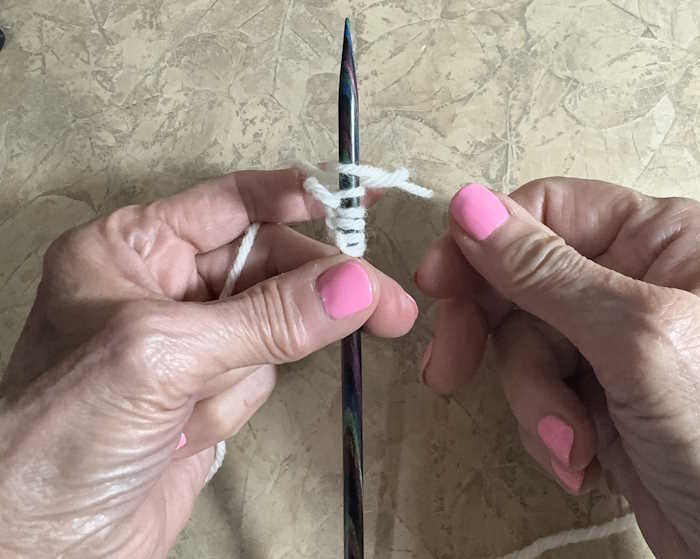
7. Tighten the stitch on the needle by pulling on it with your fingers. One Stitch cast on.
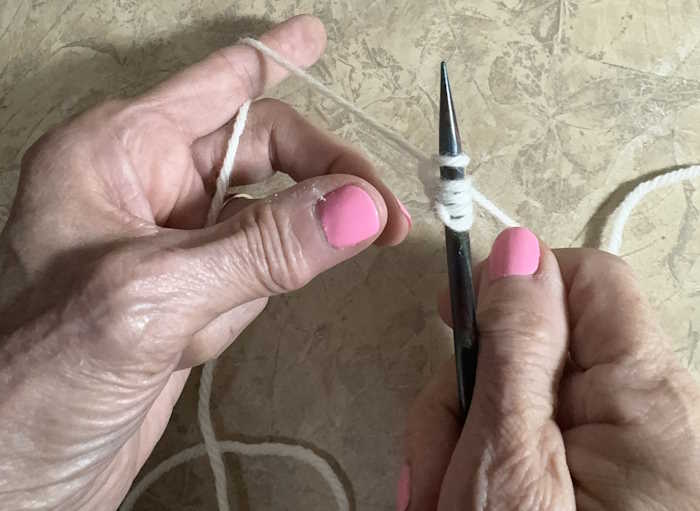
Repeat these steps until you have the required number of stitches.
Should You Knit or Purl the First Row?
If you are making a stockinette fabric (knit one row, purl one row) you might wonder whether you should start with a knit or a purl row.
There is no right or wrong answer to this question. It is all about personal preference, but consistency is essential if you are doing a project such as a sweater where you will be knitting different pieces.
If you knit the first row, the cast-on edge will look like a series of little bumps.
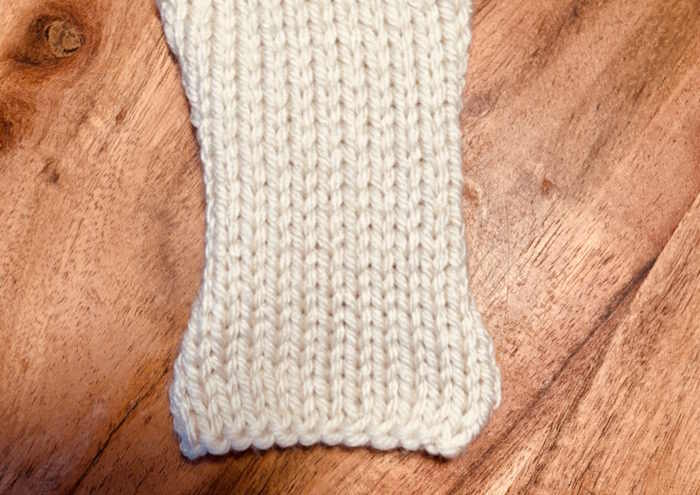
If you purl the first row, the cast-on will be smooth.
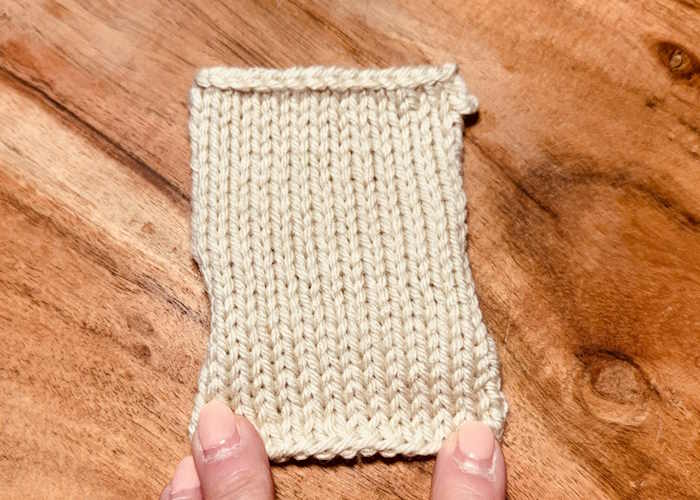
Try both ways and then decide which method you like best.
Conclusion
The Long Tail Cast On is often the first cast on which a beginner learns. It is the workhorse of all cast-ons: A versatile and essential skill for knitters.
Its elegant simplicity and desirable stretch make it a favorite among novice and seasoned knitters.
Remember, practice makes perfect. Don't be afraid to experiment, troubleshoot, and enjoy the journey of creating beautiful, hand-knit pieces. The more you practice, the better you will get.


