- Home
- Understanding Knitting Instructions
- Knitting Baby Sweater
How to Knit a Baby Sweater (Beginner-Friendly Guide)
Re-written by Janice Jones, Last updated January 2026
Knitting a baby sweater can feel like a big leap, especially if you’ve only knit flat pieces, scarves, or dishcloths before. Suddenly, there’s shaping, sizing, sleeves, and talk of gauge, and it’s easy to wonder if you’re “ready” or if you should follow a pattern and hope for the best. (And, trust me, you wouldn't be the first to just follow a pattern - ask me how I know)
This guide is here to slow things down.
Instead of giving you a rigid pattern to follow, this page walks you through how a baby sweater actually works, piece by piece, so you can understand what’s happening as you knit. Once you know the structure, gauge, and basic shaping involved, sweater patterns become far less intimidating and much easier to adjust for yarn, size, or personal preference.
If you’ve been curious about knitting garments but felt unsure where to start, you’re in the right place. Think of this as a planning and understanding guide, the step between simple projects and confidently knitting your first sweater.
What This Guide Is/Isn't
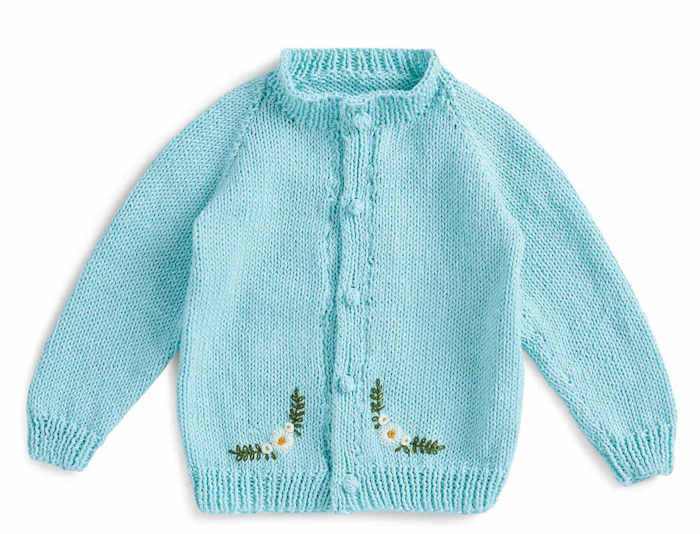
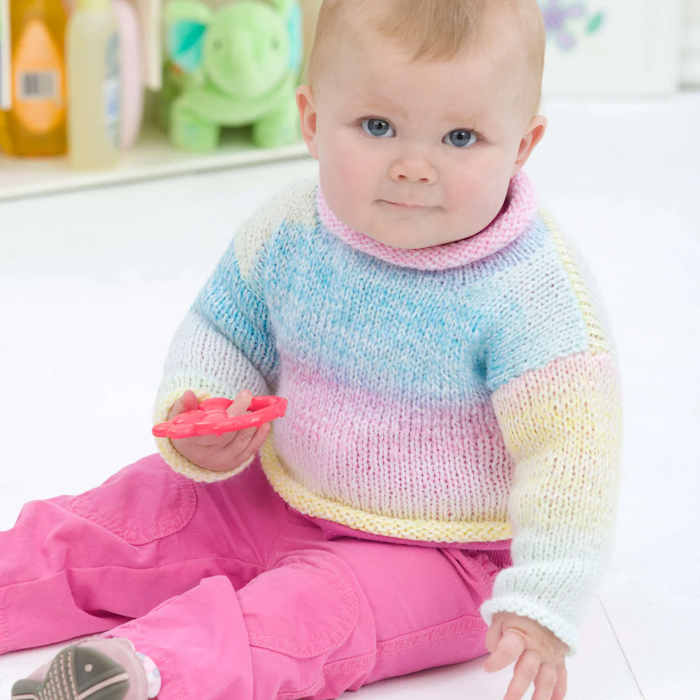
This guide focuses on understanding how baby sweaters are constructed. It’s not a step-by-step pattern, but a planning and learning resource to help you approach sweater knitting with confidence. I have provided a couple of links to free baby sweater patterns to help you get some additional inspiration
Is Knitting a Baby Sweater Beginner-friendly?
Yes, knitting a baby sweater can be very beginner-friendly, as long as you already know a few basic skills and approach it as a learning project rather than a race to finish. I would also mention that it may be challenging for a beginner, as it requires some finishing techniques that are not always considered basic skills.
However, if you can:
- Cast on and bind off
- Knit and purl comfortably
- Follow simple written instructions
- Make a gauge swatch
- Block your work
Then you’re ready to knit a baby sweater.
There are some additional skills that you may want to know:
- 3-Needle Bind off
- Mattress Stitch
- Pick up and knit stitches
- How to Increase
- How to decrease
Why a Baby Sweater?
Baby sweaters are often recommended as a first garment because they’re small, quick to finish, and forgiving. Even if something isn’t perfect, the project usually still fits, looks charming, and teaches you a lot about how garments are shaped.
That said, this guide is not meant to rush you. It’s perfectly normal to feel unsure the first time you see shaping instructions, stitch counts, or gauge measurements. Every garment knitter, even very experienced ones, started exactly where you are now.
This page is designed to help you understand what’s happening as you knit, so you’re not blindly following steps or feeling stuck when something looks different from the pattern. Once you know the structure of a baby sweater, the process becomes far less intimidating and much more enjoyable. Best of all, once you complete your first baby sweater, you will feel confident to move on to bigger and better things.
The Basic Parts of a Knitted Baby Sweater
Before diving into stitches, numbers, or shaping, it helps to understand the basic parts of a knitted baby sweater. No matter what pattern you choose, almost every sweater includes the same core components.
The Sweater Body
The body makes up the main portion of the sweater and is usually knit as:
- A front and back worked separately, or
- A back and two fronts if worked as a cardigan
- One piece worked in the round, then split for armholes
The body determines the sweater’s width, length, and overall fit. For beginners, it is often easier to pick a pattern that uses simple stitch patterns such as garter stitch or stockinette.
Sleeves
Sleeves are usually worked from:
- The cuff up to the shoulder, or
- The shoulder down to the cuff
They include increases to shape the arm and decreases to fit neatly into the armhole. Sleeves are often where knitters first encounter shaping, but the logic is simpler than it looks.
Neckline
The neckline shapes the opening for the baby’s head.
It may be:
- round
- shallow
- finished with ribbing or a simple band
Neck shaping is usually done near the end of the body and can feel tricky at first, but it follows clear, repeatable steps.
Ribbing and Edges
Ribbing is typically used at:
- The bottom hem
- The cuffs of the sleeves
- The neckline
It helps the sweater stretch, sit neatly, and stay in place. Ribbing also adds structure and a polished look to an otherwise simple sweater. Most beginner-level sweaters use a 1 x1 or a 2x2 ribbing pattern.
Why Understanding the Parts Matters
Once you can recognize these pieces, sweater instructions start to make sense. Instead of seeing a long list of steps, you’ll understand why stitches are added, removed, or set aside, and that’s the key to knitting garments with confidence.
How to Read a Baby Sweater Schematic
Baby sweater patterns include written instructions and a few schematic images.
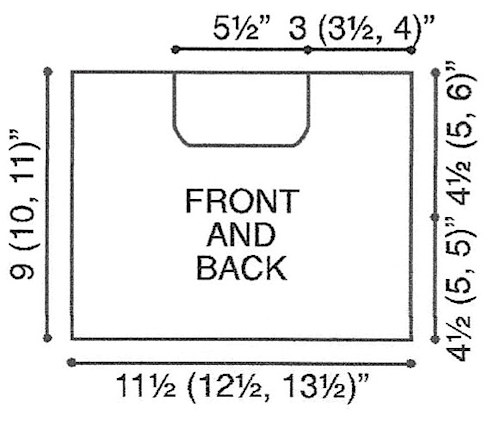
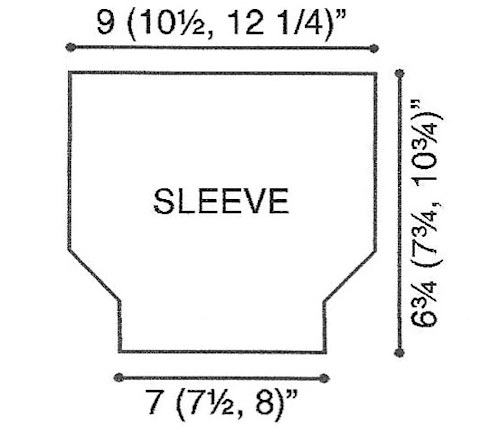
A sweater schematic is a simple line drawing with measurements that shows how the finished sweater pieces fit together. It may look technical at first, but once you know what you’re looking at, a schematic becomes one of the most helpful tools in garment knitting.
What a Schematic Shows
A typical baby sweater schematic includes:
- The width and length of the sweater body
- Sleeve length and width
- Armhole depth
- Neckline width and depth
These measurements represent the finished size of the sweater, not the needle size or the number of stitches.
Why Schematics are Helpful
Schematics help you:
- Understand how the sweater is shaped
- See where sleeves and necklines begin
- Tells you what the finished size of each part should be
- Make simple adjustments for length or width
- Tells you how to block the pieces for your sweater
If written instructions feel confusing, the schematic often makes things click.
How Baby Sweaters are Constructed (flat vs. in the round)
Baby sweaters are usually knit using one of two construction methods: worked flat in pieces with straight needles, or worked in the round with circular needles. Both methods are common, both can produce beautiful sweaters, and neither one is “better." They suit different learning styles and preferences.
Knitting a Baby Sweater Flat
When a sweater is knit flat, the pieces are worked back and forth in rows. Most often, this means:
- A front piece
- A back piece
- Two sleeves
Once all the pieces are finished, they are blocked and then sewn together.
Many beginners find flat construction easier to understand because:
- It feels familiar if you’ve knit scarves or dishcloths
- Shaping instructions are very clear and visible
- Mistakes are easier to spot and fix
Flat construction also makes it easier to see how armholes, shoulders, and necklines are formed.
Knitting a Baby Sweater in the Round
When a sweater is knit in the round, it’s worked continuously in a spiral, starting at the bottom and working upward ( or top-down). At a certain point, the work is divided to create armholes and sleeves.
Knitters often like in-the-round construction because:
- There are fewer seams to sew
- The fabric is smooth and uninterrupted
- You don’t have to turn your work each row
However, this method can feel less intuitive at first if you’re still getting comfortable with shaping and stitch counts. It's also not the easiest method if you have never knit a project in the round. If so, try a quick beanie project first.
Which Method is Better for Beginners?
Both methods are beginner-friendly. The best choice depends on how you like to learn.
You may prefer flat construction if you:
- Like seeing each step clearly
- Want to understand garment shaping in detail
- Are comfortable sewing pieces together
You may prefer knitting in the round if you:
- Dislike seaming
- Enjoy continuous knitting
- Are comfortable working with circular needles
If this is your very first sweater, choosing a method that feels familiar can make the learning process much more enjoyable and reduce the learning curve. Remember, the goal isn’t speed or perfection, it’s understanding how sweaters are built.
The Good News
Once you understand one construction method, learning the other becomes much easier. The basic principles of sweater knitting, body, sleeves, shaping, and gauge, stay the same no matter how the sweater is constructed.
Why Gauge Matters When Knitting Baby Sweaters
When you knit something flat like a scarf or dishcloth, slight differences in stitch size don’t usually matter. A scarf can be a little wider or narrower and still work just fine.
A baby sweater is different.
If your stitches are too large, the sweater may turn out:
- Wider than expected
- Longer than planned
- Loose or floppy in places
If your stitches are too small, the sweater may:
- Come out stiff
- Feel tight or uncomfortable
- Ends up much smaller than intended
Gauge affects fit, drape, and comfort, especially around the neckline, sleeves, and armholes.
What a Gauge Swatch Really Does
A gauge swatch is simply a small test piece that lets you see how your yarn and needles behave together before you commit to the whole sweater.
Knitting a swatch helps you:
- Choose the correct needle size
- See how the fabric feels
- Avoid surprises halfway through the project
- It also gives you the confidence that the sweater will come out close to the size you’re aiming for.
Why are Baby Sweaters Often Made with Different Stitch Patterns
Many baby sweaters include:
- ribbing at the cuffs and hem
- a different stitch pattern for the body
Each stitch pattern can have a slightly different gauge, even when knit with the same yarn and needles. That’s why garment patterns sometimes list more than one gauge, and why it’s helpful to understand what’s happening rather than ignoring it.
You Don’t Need a Perfect Gauge
This is important to say clearly: your gauge does not need to be perfect. If you can't get your row and stitch gauge to match the pattern designer's, strive to get the stitch pattern correct.
You’re not aiming for mathematical precision. You’re aiming for a fabric that:
- Feels comfortable
- Stretches appropriately
- Produces a sweater that fits reasonably well
If your gauge is close and you understand how it affects size, you can make simple adjustments, like changing needle size or adding a little length, without stress.
Understanding Sweater Shaping Without Complicated Math
When knitters say sweater knitting is “all about shaping,” they’re really talking about adding and removing stitches on purpose to help the fabric follow the shape of a body. While shaping instructions can look intimidating on paper, the ideas behind them are actually very simple.
You don’t need to be good at math to understand sweater shaping; you just need to know why stitches are added or removed.
What Shaping Really Means
Shaping happens whenever a sweater needs to:
- Get wider
- Get narrower
- Change direction
In knitting, this is done by:
- Increasing stitches to add width
- Decreasing stitches to remove width
That’s it.
Where Shaping Usually Happens in a Baby Sweater
Most baby sweaters include shaping in a few predictable areas:
- Armholes – stitches are decreased so the body can curve under the arms
- Shoulders – stitches are gradually reduced to create a gentle slope
- Neckline – stitches are set aside or bound off to form the opening
- Sleeves – stitches are increased to follow the shape of the arm, then decreased near the top
Once you know to expect shaping in these areas, pattern instructions start to feel much more logical.
Why Patterns Spread Shaping Over Several Rows
Instead of removing all the stitches at once, shaping is usually worked gradually over multiple rows. This creates smooth curves rather than sharp corners.
For example:
- A few stitches might be decreased at the beginning of several rows
- Or one stitch might be decreased every other row or every right side row
The goal isn’t speed, it’s creating a shape that fits comfortably and looks natural.
You Don’t Need to Calculate Everything Yourself
Many beginners worry that they need to design or calculate shaping from scratch. In most cases, you don’t.
Well-written patterns already tell you:
- How many stitches to add or remove
- Where to place increases and decreases
- How often should they be repeated
Your job is to understand what those instructions do, not reinvent them.
Sleeves, Necklines, and Finishing Touches
Sleeves and necklines often feel like the most intimidating parts of knitting a baby sweater, not because they’re difficult, but because they usually come near the end of the project, when you’re eager to be finished. Understanding what’s happening at this stage makes these steps feel much more manageable.
Common Techniques Used for Sleeves, Necklines, and Finishing
As you work through the sleeves, neckline, and final finishing steps of a baby sweater, you’ll often encounter a handful of standard knitting techniques.
Here are a few you may see mentioned in sweater instructions:
-
Increases
Used to add stitches gradually, most often in sleeves, so they widen as the arm grows. Common increases are subtle and nearly invisible once you’ve practiced them a few times. Well-written patterns will tell you which ones to use and where to place them. -
Decreases
Used to remove stitches, especially when shaping armholes, sleeve tops, shoulders, and necklines. Decreases help create smooth curves and a comfortable fit. -
Pick up and knit
This technique is often used to add ribbing or a band around the neckline. Stitches are picked up along an existing edge and worked directly from the sweater. -
Mattress stitch
A popular seaming method for sweaters knit in pieces. When done carefully, it creates a nearly invisible seam that looks clean on both sides. -
Three-needle bind off
Sometimes used to join shoulders while binding off neatly. It creates a sturdy seam that helps maintain the sweater's shape.
Common Beginner Mistakes When Knitting Baby Sweaters
Every knitter makes mistakes when knitting their first sweater, and that’s not a sign you’re doing anything wrong. Garment knitting simply introduces a few new elements that can feel unfamiliar at first. Knowing what to watch for ahead of time can save frustration and help your project turn out more smoothly.
Skipping the gauge swatch
One of the most common beginner mistakes is jumping straight into the sweater without checking the gauge.
While it’s tempting to skip this step, gauge has a big impact on how a sweater fits. Even a small difference in stitch size can affect the width of the body, the length of sleeves, and how the neckline sits.
Taking a little time to knit a gauge swatch can prevent having to start over later.
Choosing yarn based on looks alone
Soft, fluffy, or novelty yarns may look appealing, but they can make learning garment construction more difficult.
For a first baby sweater, it’s usually easier to work with:
- smooth yarns
- light, solid colors
- yarns that show stitches clearly
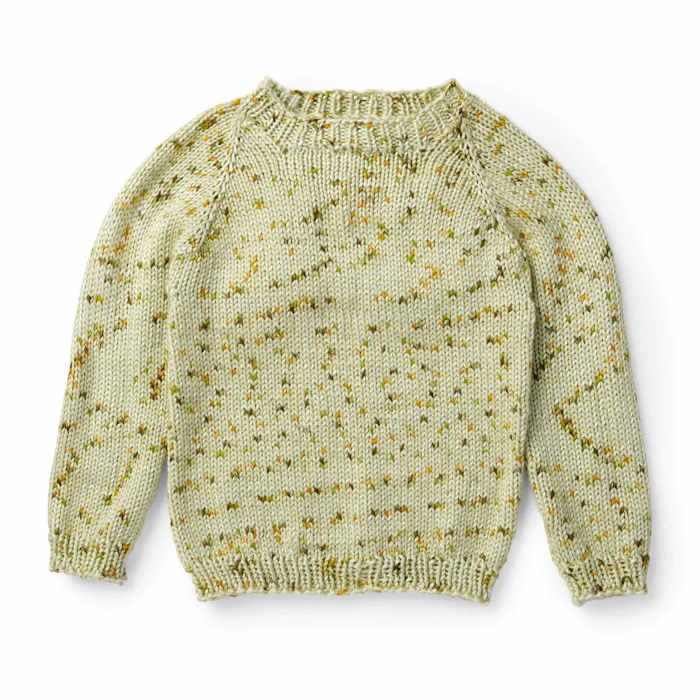
These make it easier to see shaping, count rows, and spot mistakes early. Don't make the mistake I made with my first baby sweater: I used a variegated yarn, which ended up pooling, making the sweater look very odd.
Knitting too tightly
Many beginners knit more tightly when working on garments, especially when shaping or following new instructions.
Tight knitting can lead to:
- stiff fabric
- difficulty picking up stitches
- uneven seams
If your hands feel tense, it’s often a sign to slow down, relax your grip, or try a larger needle size.
Ignoring shaping instructions
It’s easy to overlook increases, decreases, or bind-off instructions when you’re focused on finishing quickly.
Shaping steps are what allow the sweater to fit correctly. Placing stitch markers and reading ahead a few rows can help you stay on track.
Not keeping track of row counts
Seaming is easier if you are sewing the front and back pieces together that are the same size, especially when using the mattress stitch technique. You can make slight alterations, but the seam will look more professional when the two pieces have the same number of rows.
Expecting perfection on the first sweater
Perhaps the biggest mistake is expecting your first baby sweater to be flawless.
Your first garment is a learning project. Small imperfections are normal and often barely noticeable once the sweater is worn or washed. Each sweater teaches you something new, and that experience carries forward into every project after.
Remember this
Mistakes aren’t setbacks — they’re part of learning how garments work. With each baby sweater you knit, your confidence grows, your skills improve, and the process becomes more enjoyable.
If you ever feel stuck, take a breath, reread the instructions, and remember: every experienced knitter was once a beginner, too.
Frequently Asked Questions
Is knitting a baby sweater hard for beginners?
Is knitting a baby sweater hard for beginners?
Knitting a baby sweater is not hard if you already know how to knit and purl, and a few additional techniques, such as casting on and binding off. It’s often one of the best first garment projects because the pieces are small, so the project takes less time to finish. It's also a good project because you can learn basic shaping and finishing techniques without committing to a large project.
Do I need to follow a baby sweater pattern exactly?
Do I need to follow a baby sweater pattern exactly?
No. Baby sweater patterns are guides, not rules. As long as you understand the basic construction and pay attention to gauge and measurements, small adjustments in length or width are completely normal and often necessary.
Is it better to knit a baby sweater flat or in the round?
Is it better to knit a baby sweater flat or in the round?
Both methods work well for beginners. Knitting flat makes shaping easier to see and understand, while knitting in the round reduces seaming. The best choice is the one that feels most comfortable to you.
What yarn is best for knitting baby sweaters?
What yarn is best for knitting baby sweaters?
The best yarns for baby sweaters are soft, smooth, and easy to care for. Look for yarns that are machine-washable, gentle on the skin, and light in color so you can clearly see your stitches while learning. Check the yarn weight pattern and stick with the printed pattern's recommendation to ensure the size matches the pattern.
Knitting a baby sweater doesn’t require advanced skills, but it requires understanding how the pieces fit together. Once you’re familiar with construction, gauge, and basic shaping, sweater knitting becomes much less intimidating and far more enjoyable.
Whether you choose to knit flat or in the round, and whether you follow a pattern closely or make minor adjustments, the most important step is starting. Each sweater you knit builds confidence, and every technique you practice carries forward into future projects. Happy Knitting.
