- Home
- How to Crochet
- Crochet Gauge Swatch
Crochet Gauge Swatch: How To
Crochet Gauge Swatch by Janice Jones
Gauge is so important if you want your finished project to fit or resemble the project photo. In the US, we call it achieving gauge. In the UK it is called tension.
Gauge is a term that describes a set of measurements. The number of stitches per inch and the rows per inch that can be obtained by using a specified type of yarn and worked with a particular sized hook.
Everyone crochets differently so determining some standardization is important if we want the the finished product to be the correct size. Some of us crochet loosely, others tightly and still others are somewhere in between.
 Pin for future reference
The solution is very simple.
Every time you start a new project you need to make a gauge swatch. With that said, if the project you are making doesn't require a specific size, you may decide to overlook this step.
What Happens When You Don't Make a Crochet Gauge Swatch?
Very often crochet or knitting patterns will recommend the size of yarn and hook or needles you should use to make the gauge specified in your pattern. For example, "24 stitches and 18 rows will make 4 in x 4 in square."
You used the recommended hook and yarn, and followed their exact instructions. But 24 stitches and 18 rows of your swatch didn't make a 4x4 square. Now what?
First of all, don't panic. An exact match happens rarely happens. And second, don't try to follow their advice "change the hook or yarn brand until your stitch gauge is correct".
Certainly it was good advice, but not a universal one. It doesn't always help to solve the problem.
Here is what you should do now.
How to Make a Crochet Gauge Swatch
The pattern will give you an approximate gauge for the finished product. For example:
14 dc = 4 inches
8 rows in pattern = 4 inches
Look at the pattern's materials list to locate the type of yarn and hook size for the pattern.
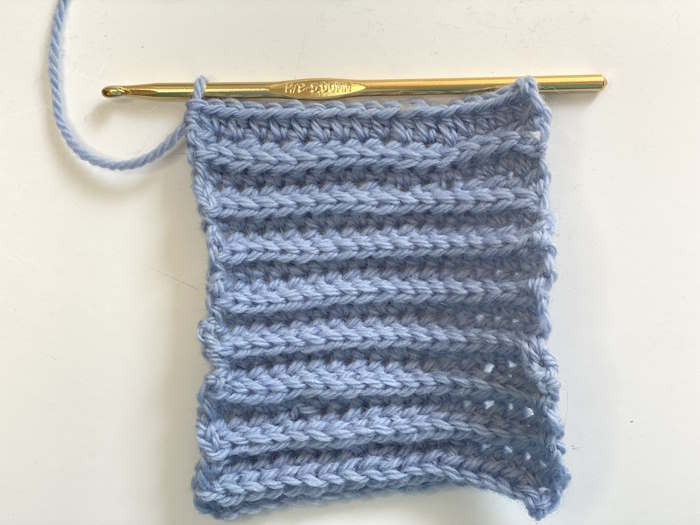
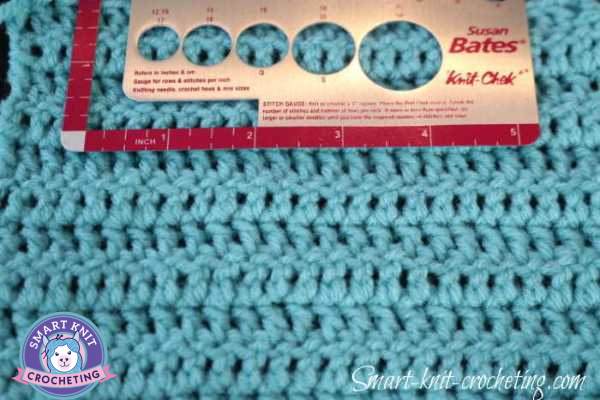
Here I am going to count the stitches (or posts) within a four inch square. I count 13 1/2 posts.
 14 dc = 4 inches
It looks like mine is about 13 1/2 dc
14 dc = 4 inches
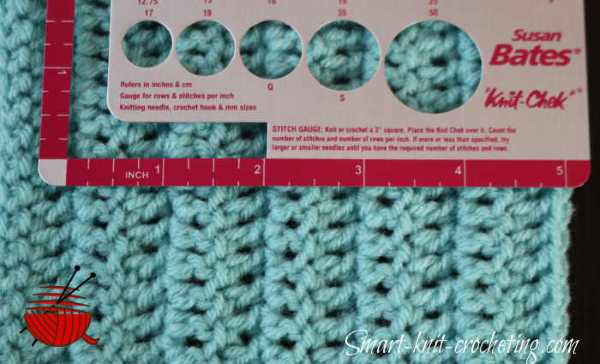
It looks like mine is about 13 1/2 dcThis crochet gauge swatch is done in double crochet stitches (dc) so in this case I'm counting rows. I counted 8 rows.
 Crochet Gauge Swatch
8 rows = 4 inches
Crochet Gauge Swatch
8 rows = 4 inchesFor this particular hypothetical pattern, the project is calling for worsted weight yarn (number 4) and a hook size of H/8 (5mm) crochet hook of size needed to obtain gauge.
You may look at that and make a four by four inch swatch, but that might work. Here's why.
To calculate gauge correctly, you need to make your measurements in the center of the swatch. This means that your swatch should be larger than the 4 x 4 square indicated in the pattern.
Ready?
Follow this Beginner Crochet instruction.
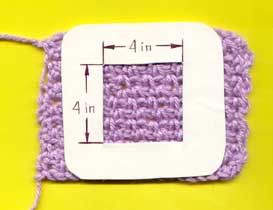
Use Your Swatch to Figure Out the Correct Gauge
Step 1. Put the swatch on the ironing board and cover with damp fabric. Hold an iron ABOVE the ironing board for a few seconds. NEVER iron your crochet or knitting projects directly - just steam it.
Step 2. Put your swatch on the flat surface. If this is the only project you are going to make, take a ruler and put it on the swatch. Count the number of rows in four inches. Count the number of stitches in four inches.
If you are more serious about the number of your future projects and would like to calculate correct gauge, spend a couple of extra minutes and make a simple template (see the picture). It can be made of cardboard, plastic, metal, etc. Put it in the center of your swatch and count the number of stitches and rows in that 4 inch x 4 inch window.
A simple ruler will work as well.
- Number of stitches per inch
- Number of rows per inch
Here's some examples
Start by making a crochet gauge swatch using the size hook and type of yarn recommended by the pattern. Make at least a five inch square so you can make your measurements within the square. Don't worry about wasting yarn as you can always unravel your swatch if you need that extra yarn. But there are other things you may want to do with your swatch and we'll get to that in a minute.
Let's look at our example from above:
14 dc = 4 inches
8rows in pattern = 4 inches
Using your ruler, measure out four inches of stitches and then count each stitch. Turn the ruler, and measure the number of rows within the four inch space.
Does your measurements match that of the pattern? Great. You're ready to begin your project.
When your gauge doesn't match the pattern
Don't worry. Everyone crochets a little different so we need to understand that gauge is not written in stone. We can make some alterations.
Too Many stitches per inch?
After you have made your sample swatch using the size of hook and the yarn weight mentioned in the pattern, you find you have more stitches per inch than specified, go up one hook size.
Too Fewer stitches per inch?
Switch to a smaller sized hook and try again.
As you do more projects you will discover that you tend to crochet loosely or tightly, and may want to adjust the hook size accordingly before you begin your swatch. Since each pattern is different, don't rely on making gauge with one pattern and hoping that all will follow suite.
My swatch was a bit off because I needed 14 stitches for four inches and I managed to get 13 1/2 stitches. The row count was fine. Since it was so close, I decided that I would leave it alone.
Other Fixes that Might Help you Achieve Gauge
Hook Size: Changing the hook size is one of the easiest way to achieve gauge. Remember if you have too many stitches, go up one hook size. Too few stitches, go down one hook size.
Yarn Weight:
This is a bit more tricky. The most common yarn weight is the number 4 worsted weight yarn. But even within this one category of yarn, you may find some interesting differences. Here's where it pays to check labels. Sometimes switch between yarn manufacturers may help.
Your Tension:
This is the most difficult as people tend to get into certain habits and they are not easy to change. Be sure when you are crocheting that you are bringing your yarn onto the hook and not leaving it down near the hook's tip or throat.
You may also experiment with pulling the yarn a bit tighter in your hands or hold it in a different way through your fingers to allow it to flow easier.
Uses for your crochet gauge swatch
If you don't need the yarn in your swatch, consider a couple of other ideas for recycling it.
Laundry sample:
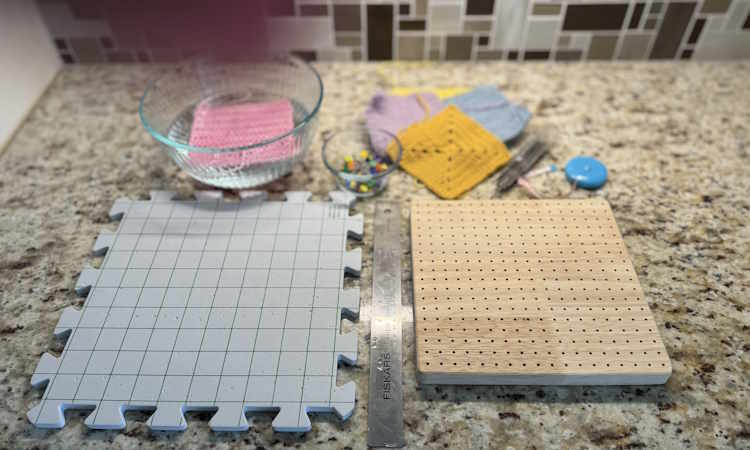
Practice blocking it and the make sure it launders well according to the instructions you found on the yarn label.
Use it in Different Projects:
Collect swatches from similar yarn types and then sew them into a pillow, placemat, or small blanket. For this you may want to label your swatches with the type of yarn used and weight, hook size and laundry instructions if necessary. If you make all of your swatches into a five inch square you will have no trouble combining them into a one of a kind creation.
Crochet Gauge Swatch
Pin for Future Reference
 How to Create a crochet gauge swatch. Pin Image
Conclusion
Gauge is an important concept in crocheting, as it ensures that your finished project will be the correct size. By making a gauge swatch, you can determine how many stitches and rows per inch you should work to achieve the desired gauge. This will help you to avoid ending up with a project that is too big or too small.
There are a few different ways to make a gauge swatch. The most common method is to chain the number of stitches that the gauge calls for, plus 5 or 6 extra stitches.
Then, work the number of rows specified in the gauge, making sure to keep your tension consistent. Once you have finished the swatch, measure it to see how many stitches and rows per inch you have.
If your gauge does not match the pattern's gauge, you can adjust your hook size or yarn weight until you get a match.
Making a gauge swatch may seem like an extra step, but it is worth it to ensure that your finished project turns out the way you want it to. So next time you are starting a new crochet project, be sure to make a gauge swatch!
Here are some additional tips for making a gauge swatch:
- Use the same yarn and hook size that you plan to use for the finished project.
- Work the swatch in the same stitch pattern that you will use for the finished project.
- Keep your tension consistent throughout the swatch.
- Measure the swatch carefully to get an accurate gauge.
With a little practice, you will be able to make gauge swatches quickly and easily. And once you have mastered this skill, you can be sure that all of your crochet projects will be the perfect size!
Crochet Gauge Swatch: Author Bio
Hello, I'm Janice and I'm the person behind this website. I learned to knit and crochet at a very young age but didn’t get serious until obtaining this site in 2021. Since then, I haven’t stopped creating and learning and now I’m a certified knitting and crocheting instructor through the Yarn Craft Council.
I’m retired and live with my husband and nine Shih Tzu dogs. My three adult children help in various roles. You might see Beth modeling some of my creations. Aaron is my technical advisor and Nick tackles accounting. Learn more about me here.
