How to Crochet Doll Clothes
|Updated 09/10/2022
The Crochet Doll Clothes we are going to make for the doll presented at the left picture below. Instruction about making this doll can be found at the Crochet Doll page Part 1. It doesn't look too attractive so far. Now we have to make it look decent.
Let's compare original and final "products", to decide what should be done.
It is my first experience of making a crochet doll. That's why I
tried to keep it simple.
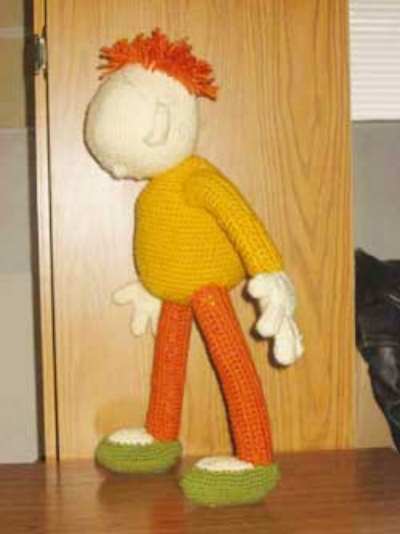 Crochet doll. Original "product"
Nevertheless, it will still require some work to make it look like something a young child would like to cuddle with.
Here is the plan.
First of all, my beauty needs a hairdo.
Having her own face won't hurt her either.
And besides that, any decent girl has to have a dress.
Let us begin to make a crochet doll clothes and her face!
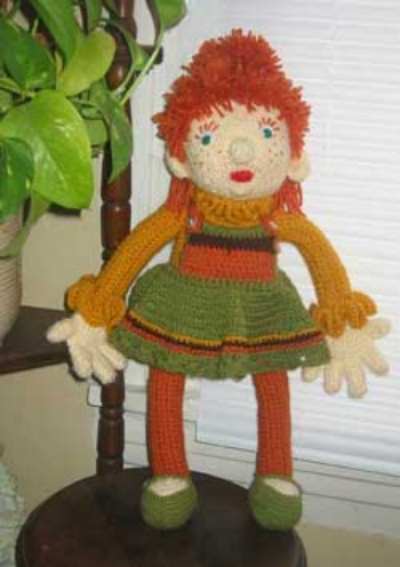 Crochet doll Clothes. Final "product".
1. Make The Hairdo
There are a few choices you can make hair for a doll. The one I've chosen this time perhaps is the simplest one.
The length of the yarn for each "piece" of hair has to be twice as long as its final length.
The way to fasten them to the fabric is described at a Girl Sweater page.
Since for this project hair has to be done on the stuffed head of a doll, I prefer to use a latch hook instead of a regular crochet hook. It is just easier to work.
To make doll's hairdo more stylish, I attached pompom on the top of the head.
The tutorial for making pompom can be found at a Crochet Scarf page. Once all pieces of hairdo are on place, trim them to make it look neat.
2. Make The Dolls Face
Nose: Crochet a small circle (3-4 rows). Don't add stitches in the last row to make it look like a cap. Stuff it and sew somewhere at the horizontal line which connects midpoints of the ears.
Mouth, brows, and lashes are all embroidered. The paste-on eyes are from the craft store, thrift store or Amazon, glued on the doll's face.
How to Make Crochet Doll Clothes
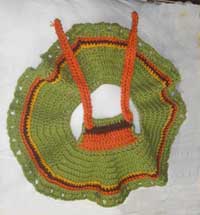
Skirt: Chain number of stitches necessary to wrap around a doll waist line (first you have to decide where it is -:) or a little longer than that. Make a slip stitch to join in a circle.
Crochet a circle. Here is the rule how to keep crochet circle flat.
I decided that my beauty has to have more luxuriant skirt. That's why I didn't try to keep it flat and made more increases per each raw then for a flat circle.
Crochet a rectangular piece for the front part of the dress and two strips for shoulder straps to make it look finished.
Dress the doll and use a matching color of yarn to sew the dress on the doll's body.
It will allow you to alter a
dress easily in case you didn't crochet it exactly her size. Besides
that, sewing the dress onto the body will bring additional rigidity to
the doll's body and make it sturdier.
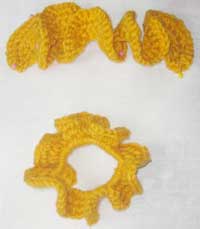
Collar and cuffs: Cuffs (3-4 rows of single crochets) are made the same way as the skirt.
Unlike a skirt more stitches per each row have to be added to make them wavier. The collar is just as wide as the cuffs are, but was crocheted like a strip instead of a circle.
Here is a final "product" . Use the basic instructions of making a crochet doll to create a whole family of the dolls each of which will look different and have its own character. Happy crocheting!
You may also be interested in Barbie DIY.
